<?xml version="1.0" encoding="utf-8"?>
<feed xmlns="http://www.w3.org/2005/Atom" xmlns:media="http://search.yahoo.com/mrss/">
    <title>Grey Owl Construction</title>
    <link href="https://greyowlconstruction.ca/feed.xml" rel="self" />
    <link href="https://greyowlconstruction.ca" />
    <updated>2026-07-07T09:22:47-07:00</updated>
    <author>
        <name>Miguel Talbot</name>
    </author>
    <id>https://greyowlconstruction.ca</id>

    <entry>
        <title>Two-bay garage addition near Notre-Dame-de-Lourdes</title>
        <author>
            <name>Miguel Talbot</name>
        </author>
        <link href="https://greyowlconstruction.ca/two-bay-garage-addition-near-notre-dame-de-lourdes.html"/>
        <id>https://greyowlconstruction.ca/two-bay-garage-addition-near-notre-dame-de-lourdes.html</id>
        <media:content url="https://greyowlconstruction.ca/media/posts/11/4-House-Renovation-50.jpg" medium="image" />
            <category term="Projects"/>
            <category term="Home Renovations"/>

        <updated>2026-07-01T15:34:13-07:00</updated>
            <summary type="html">
                <![CDATA[
                        <img src="https://greyowlconstruction.ca/media/posts/11/4-House-Renovation-50.jpg" alt="" />
                    Renovations and Additions A complete garage addition managed from excavation and foundation work through framing, roofing and exterior finishing. Project Overview The homeowners wanted to add a large attached garage without making it look like an afterthought. Grey Owl Construction managed the project from the&hellip;
                ]]>
            </summary>
        <content type="html">
            <![CDATA[
                    <p><img src="https://greyowlconstruction.ca/media/posts/11/4-House-Renovation-50.jpg" class="type:primaryImage" alt="" /></p>
                <div><!-- ======================================================
     PROJECT SECTION 1: HERO
     Two-Bay Garage Addition
     ====================================================== -->

<section class="go-project-hero">

  <div class="go-project-hero__image">
    <img loading="lazy"       src="./media/posts/11/gallery/4-House-Renovation-55.jpg"
      alt="Completed two-bay garage addition near Notre-Dame-de-Lourdes, Manitoba"
      width="1800"
      height="1100"
    >
  </div>

  <div class="go-project-hero__content">

    <p class="go-eyebrow">
      Renovations and Additions
    </p>

    <h1>
      Two-Bay Garage Addition Near Notre-Dame-de-Lourdes, Manitoba
    </h1>

    <p>
      A complete garage addition managed from excavation and foundation
      work through framing, roofing and exterior finishing.
    </p>

  </div>

</section></div>
<div><!-- ======================================================
     PROJECT SECTION 2: OVERVIEW AND PROJECT DETAILS
     ====================================================== -->

<section class="go-full-bleed go-section">
  <div class="go-container--wide">

    <div class="go-project-overview">

      <div class="go-project-overview__content">

        <p class="go-eyebrow">
          Project Overview
        </p>

        <h2>
          A Two-Bay Garage Added to the Existing Home
        </h2>

        <p>
          The homeowners wanted to add a large attached garage without
          making it look like an afterthought. Grey Owl Construction
          managed the project from the ground up, beginning with the
          excavation and foundation work and carrying it through framing,
          roofing and exterior finishing.
        </p>

        <p>
          The new garage was tied into the existing home and finished
          with matching rooflines, metal roofing, siding and stonework.
          The result was a two-bay garage that added useful space while
          still fitting the look of the original house.
        </p>

      </div>

      <aside class="go-project-details">

        <p class="go-eyebrow">
          Project Details
        </p>

        <dl>

          <div>
            <dt>Location</dt>
            <dd>Near Notre-Dame-de-Lourdes, Manitoba</dd>
          </div>

          <div>
            <dt>Project Type</dt>
            <dd>Renovation and Addition</dd>
          </div>

          <div>
            <dt>Scope</dt>
            <dd>Two-Bay Attached Garage Addition</dd>
          </div>

          <div>
            <dt>Completed</dt>
            <dd>2025</dd>
          </div>

        </dl>

      </aside>

    </div>

  </div>
</section></div>
<div><!-- ======================================================
     PROJECT SECTION 3: WHAT WAS BUILT
     ====================================================== -->

<section class="go-full-bleed go-section go-section--alternate">
  <div class="go-container">

    <div class="go-reading-width">

      <p class="go-eyebrow">
        What Was Built
      </p>

      <h2>
        Full Garage Addition From the Ground Up
      </h2>

      <p>
        Grey Owl Construction managed the full build and coordinated the
        stages needed to connect the new garage properly to the existing home.
      </p>

      <ul class="go-built-points">

        <li>Excavation and project layout</li>

        <li>Foundation and frost-wall construction</li>

        <li>Compacted base and under-slab preparation</li>

        <li>In-floor heating installation</li>

        <li>Reinforced concrete garage slab</li>

        <li>Wall and roof framing</li>

        <li>Connection to the existing house and roof</li>

        <li>Metal roofing and exterior weatherproofing</li>

        <li>Windows, exterior doors and garage-door openings</li>

        <li>Siding, trim and stone veneer</li>

      </ul>

    </div>

  </div>
</section></div>
<div><!-- ======================================================
     PROJECT SECTION 4: FOUNDATION AND HEATED SLAB
     ====================================================== -->

<section class="go-full-bleed go-section">
  <div class="go-container--wide">

    <div class="go-split">

      <div class="go-split__media">
        <img loading="lazy"           src="./media/posts/11/gallery/4-House-Renovation-7.jpg"
          alt="Foundation preparation for a garage addition near Notre-Dame-de-Lourdes"
          loading="lazy"
          width="1400"
          height="1000"
        >
      </div>

      <div class="go-split__content">

        <p class="go-eyebrow">
          Foundation and Slab
        </p>

        <h2>
          Preparing the Addition Before the Framing Began
        </h2>

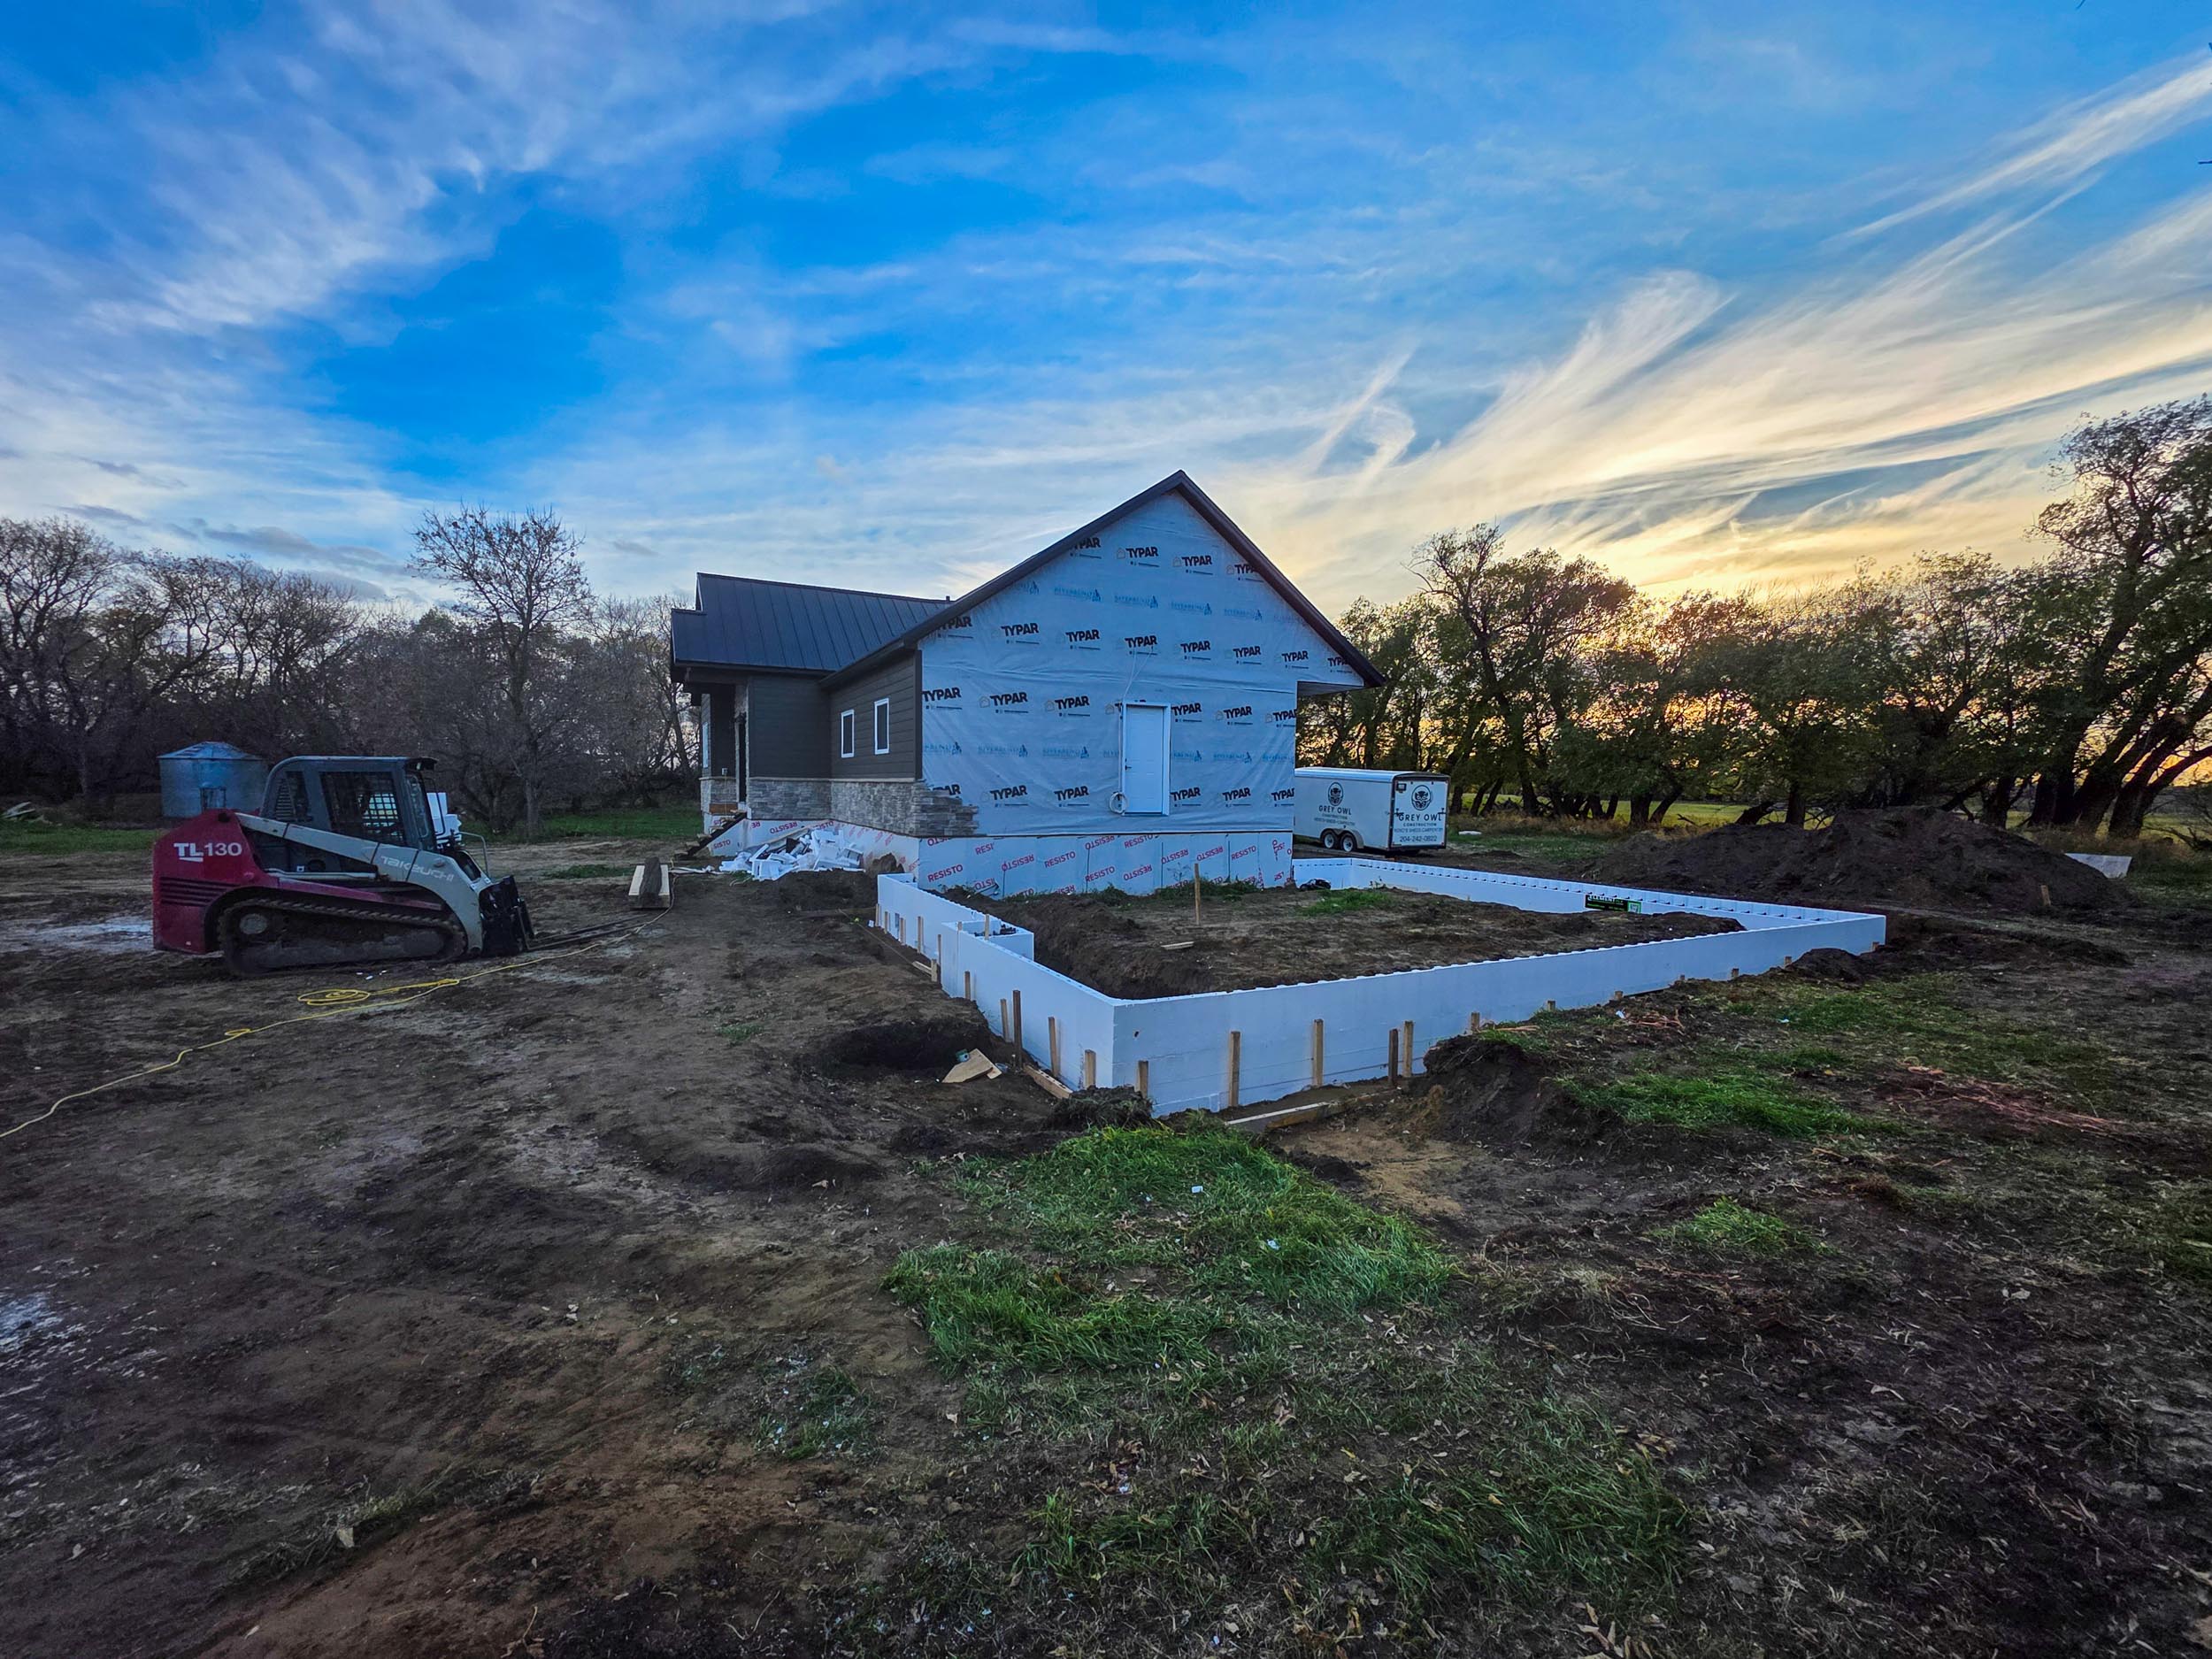
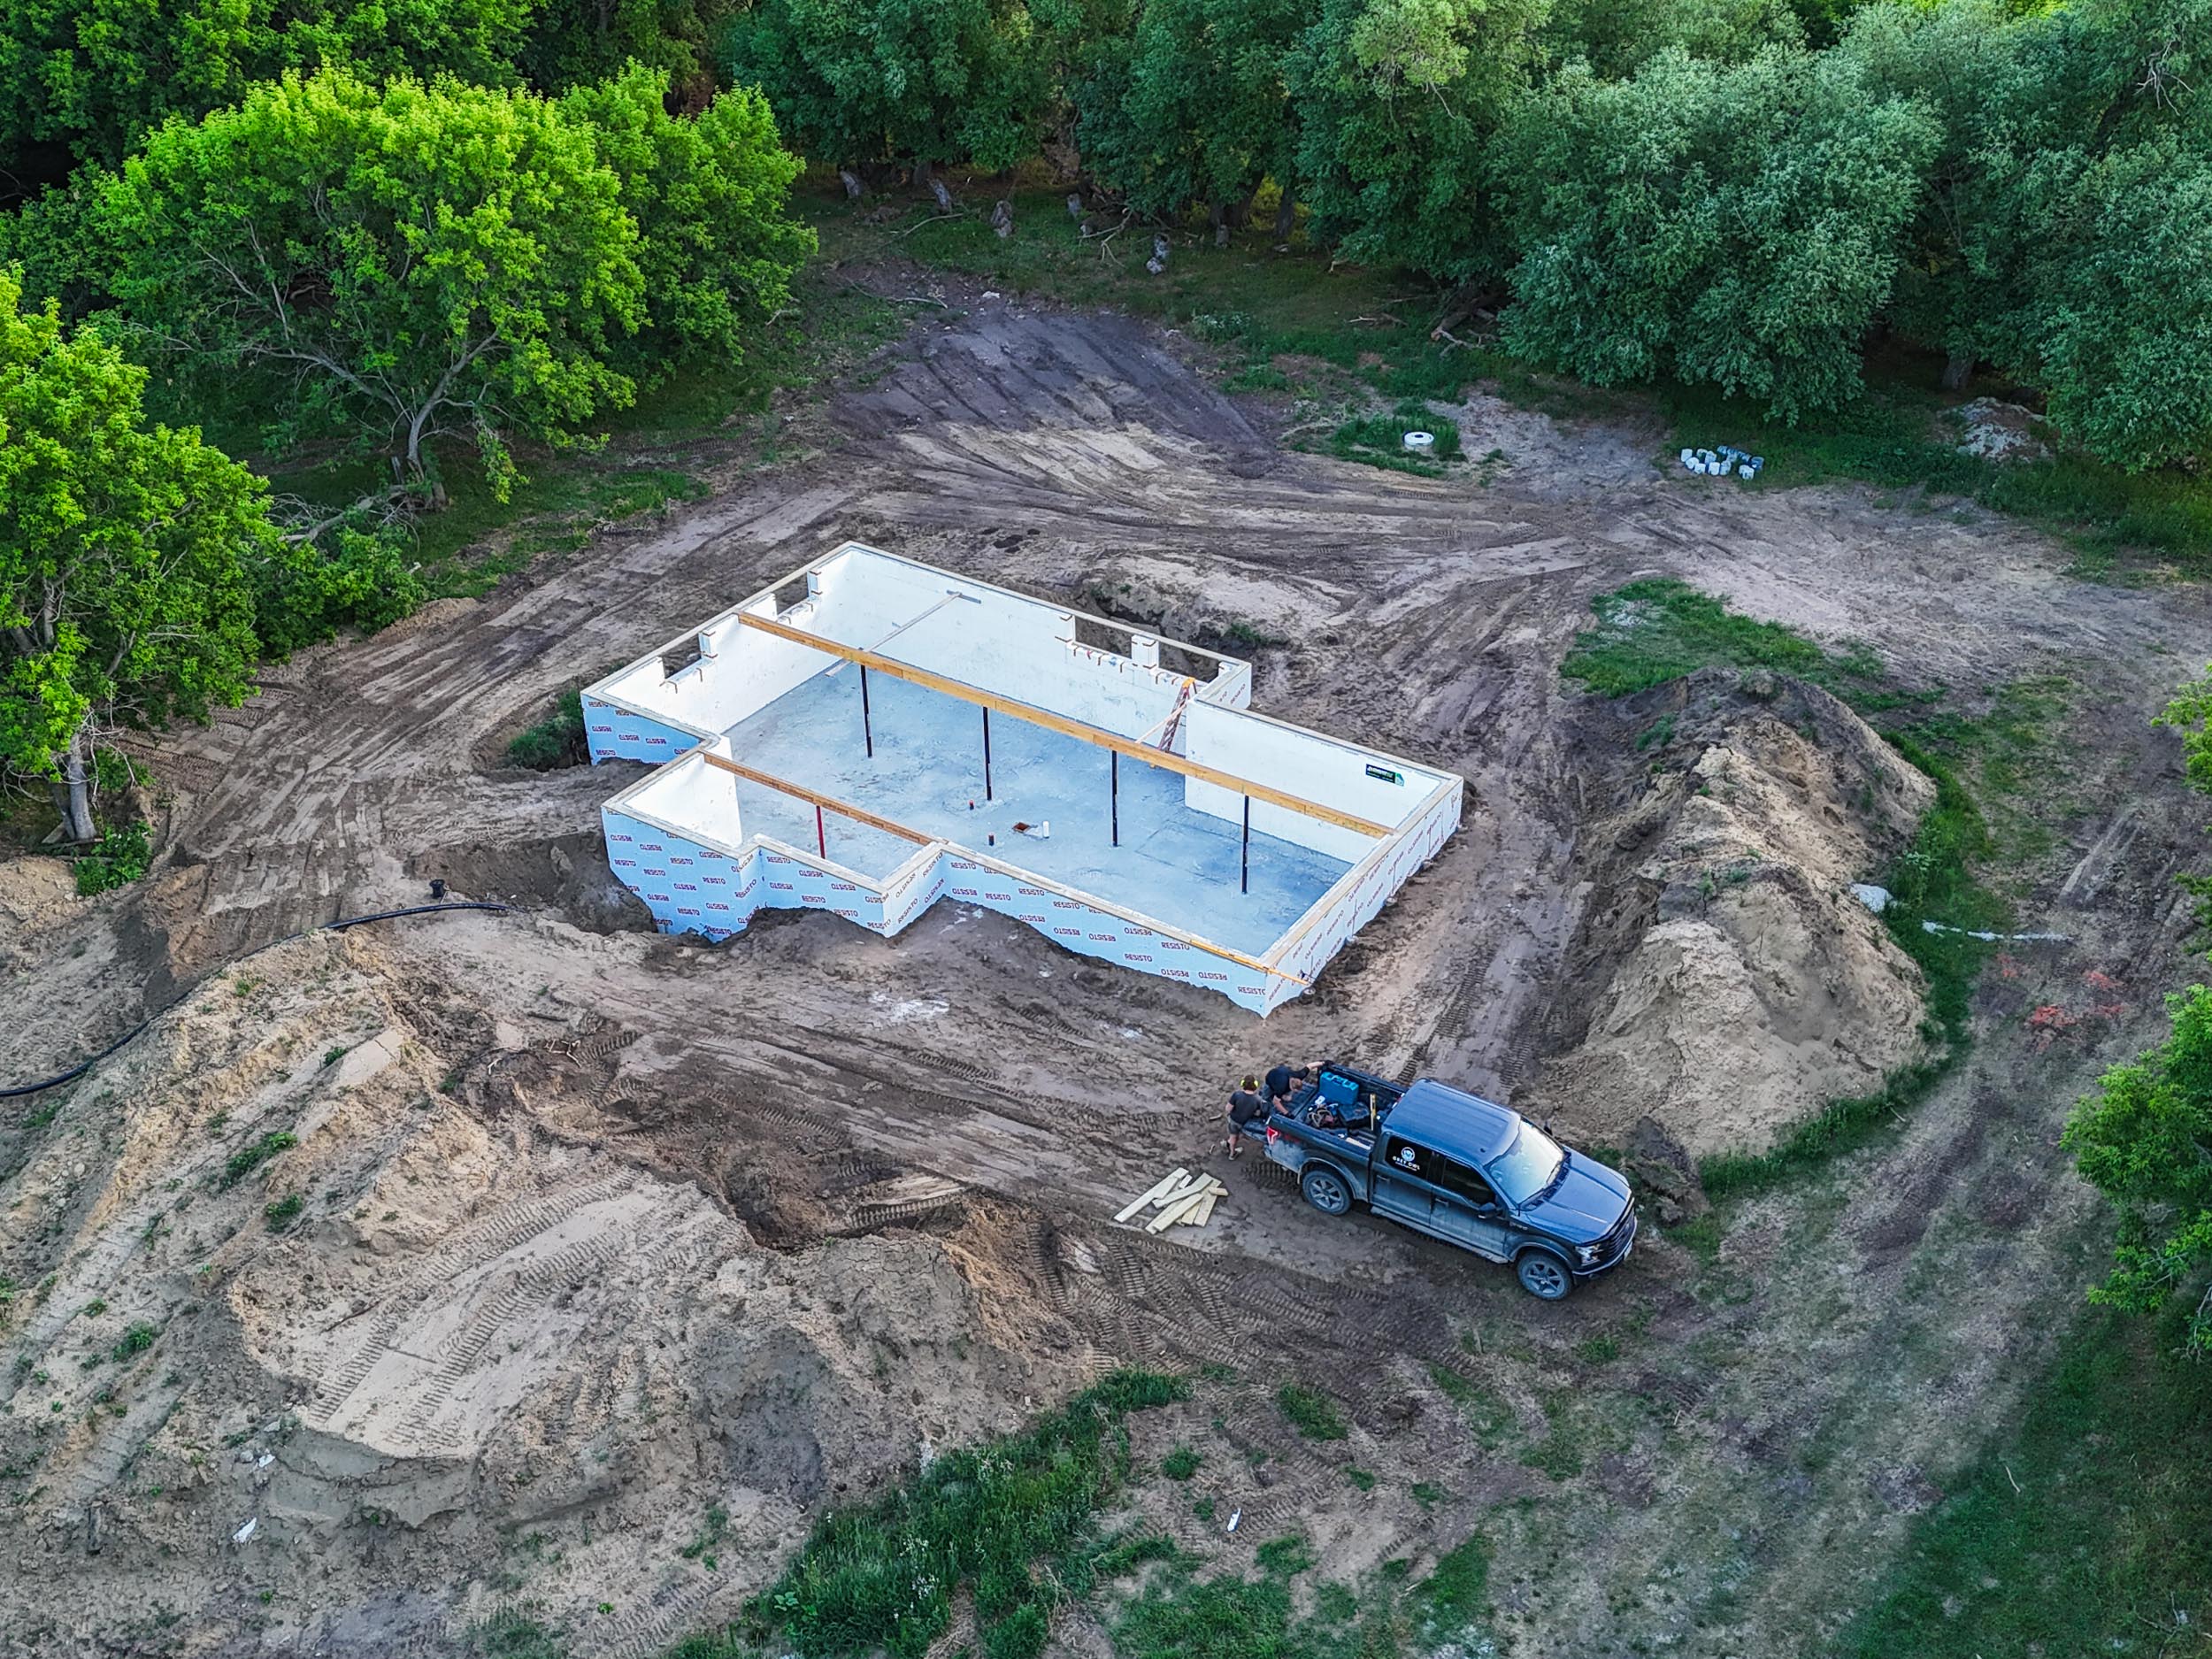
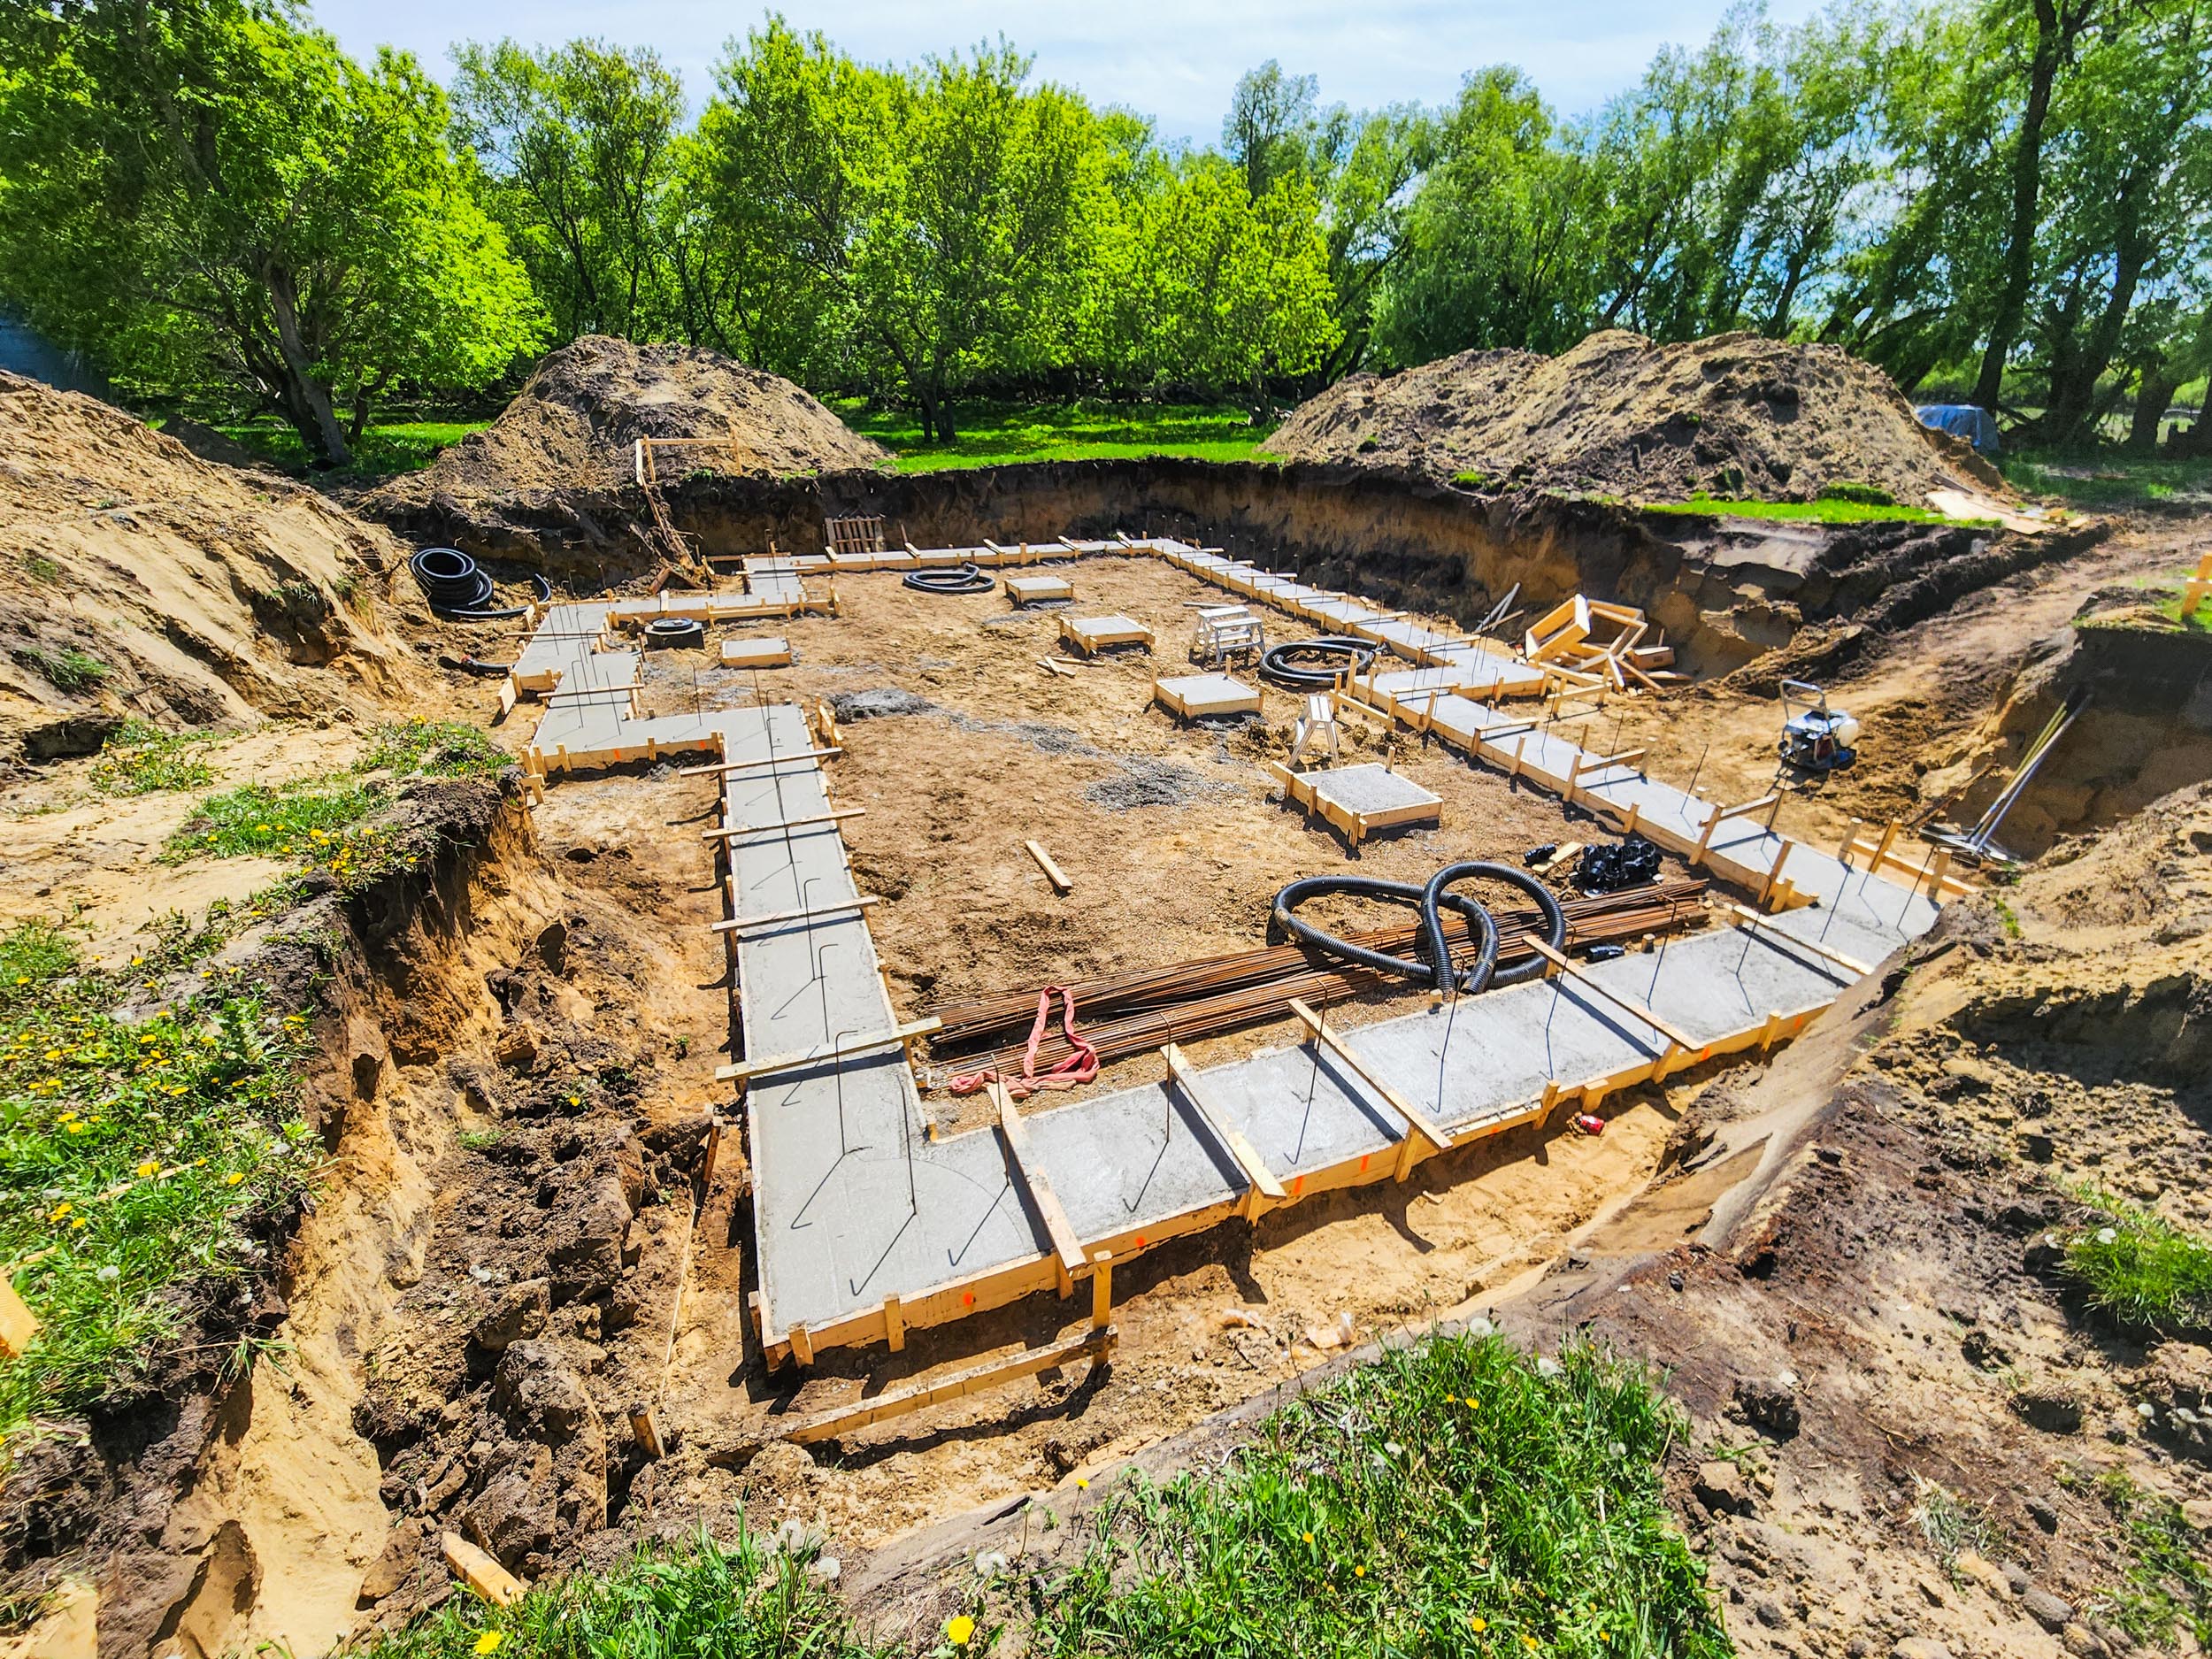
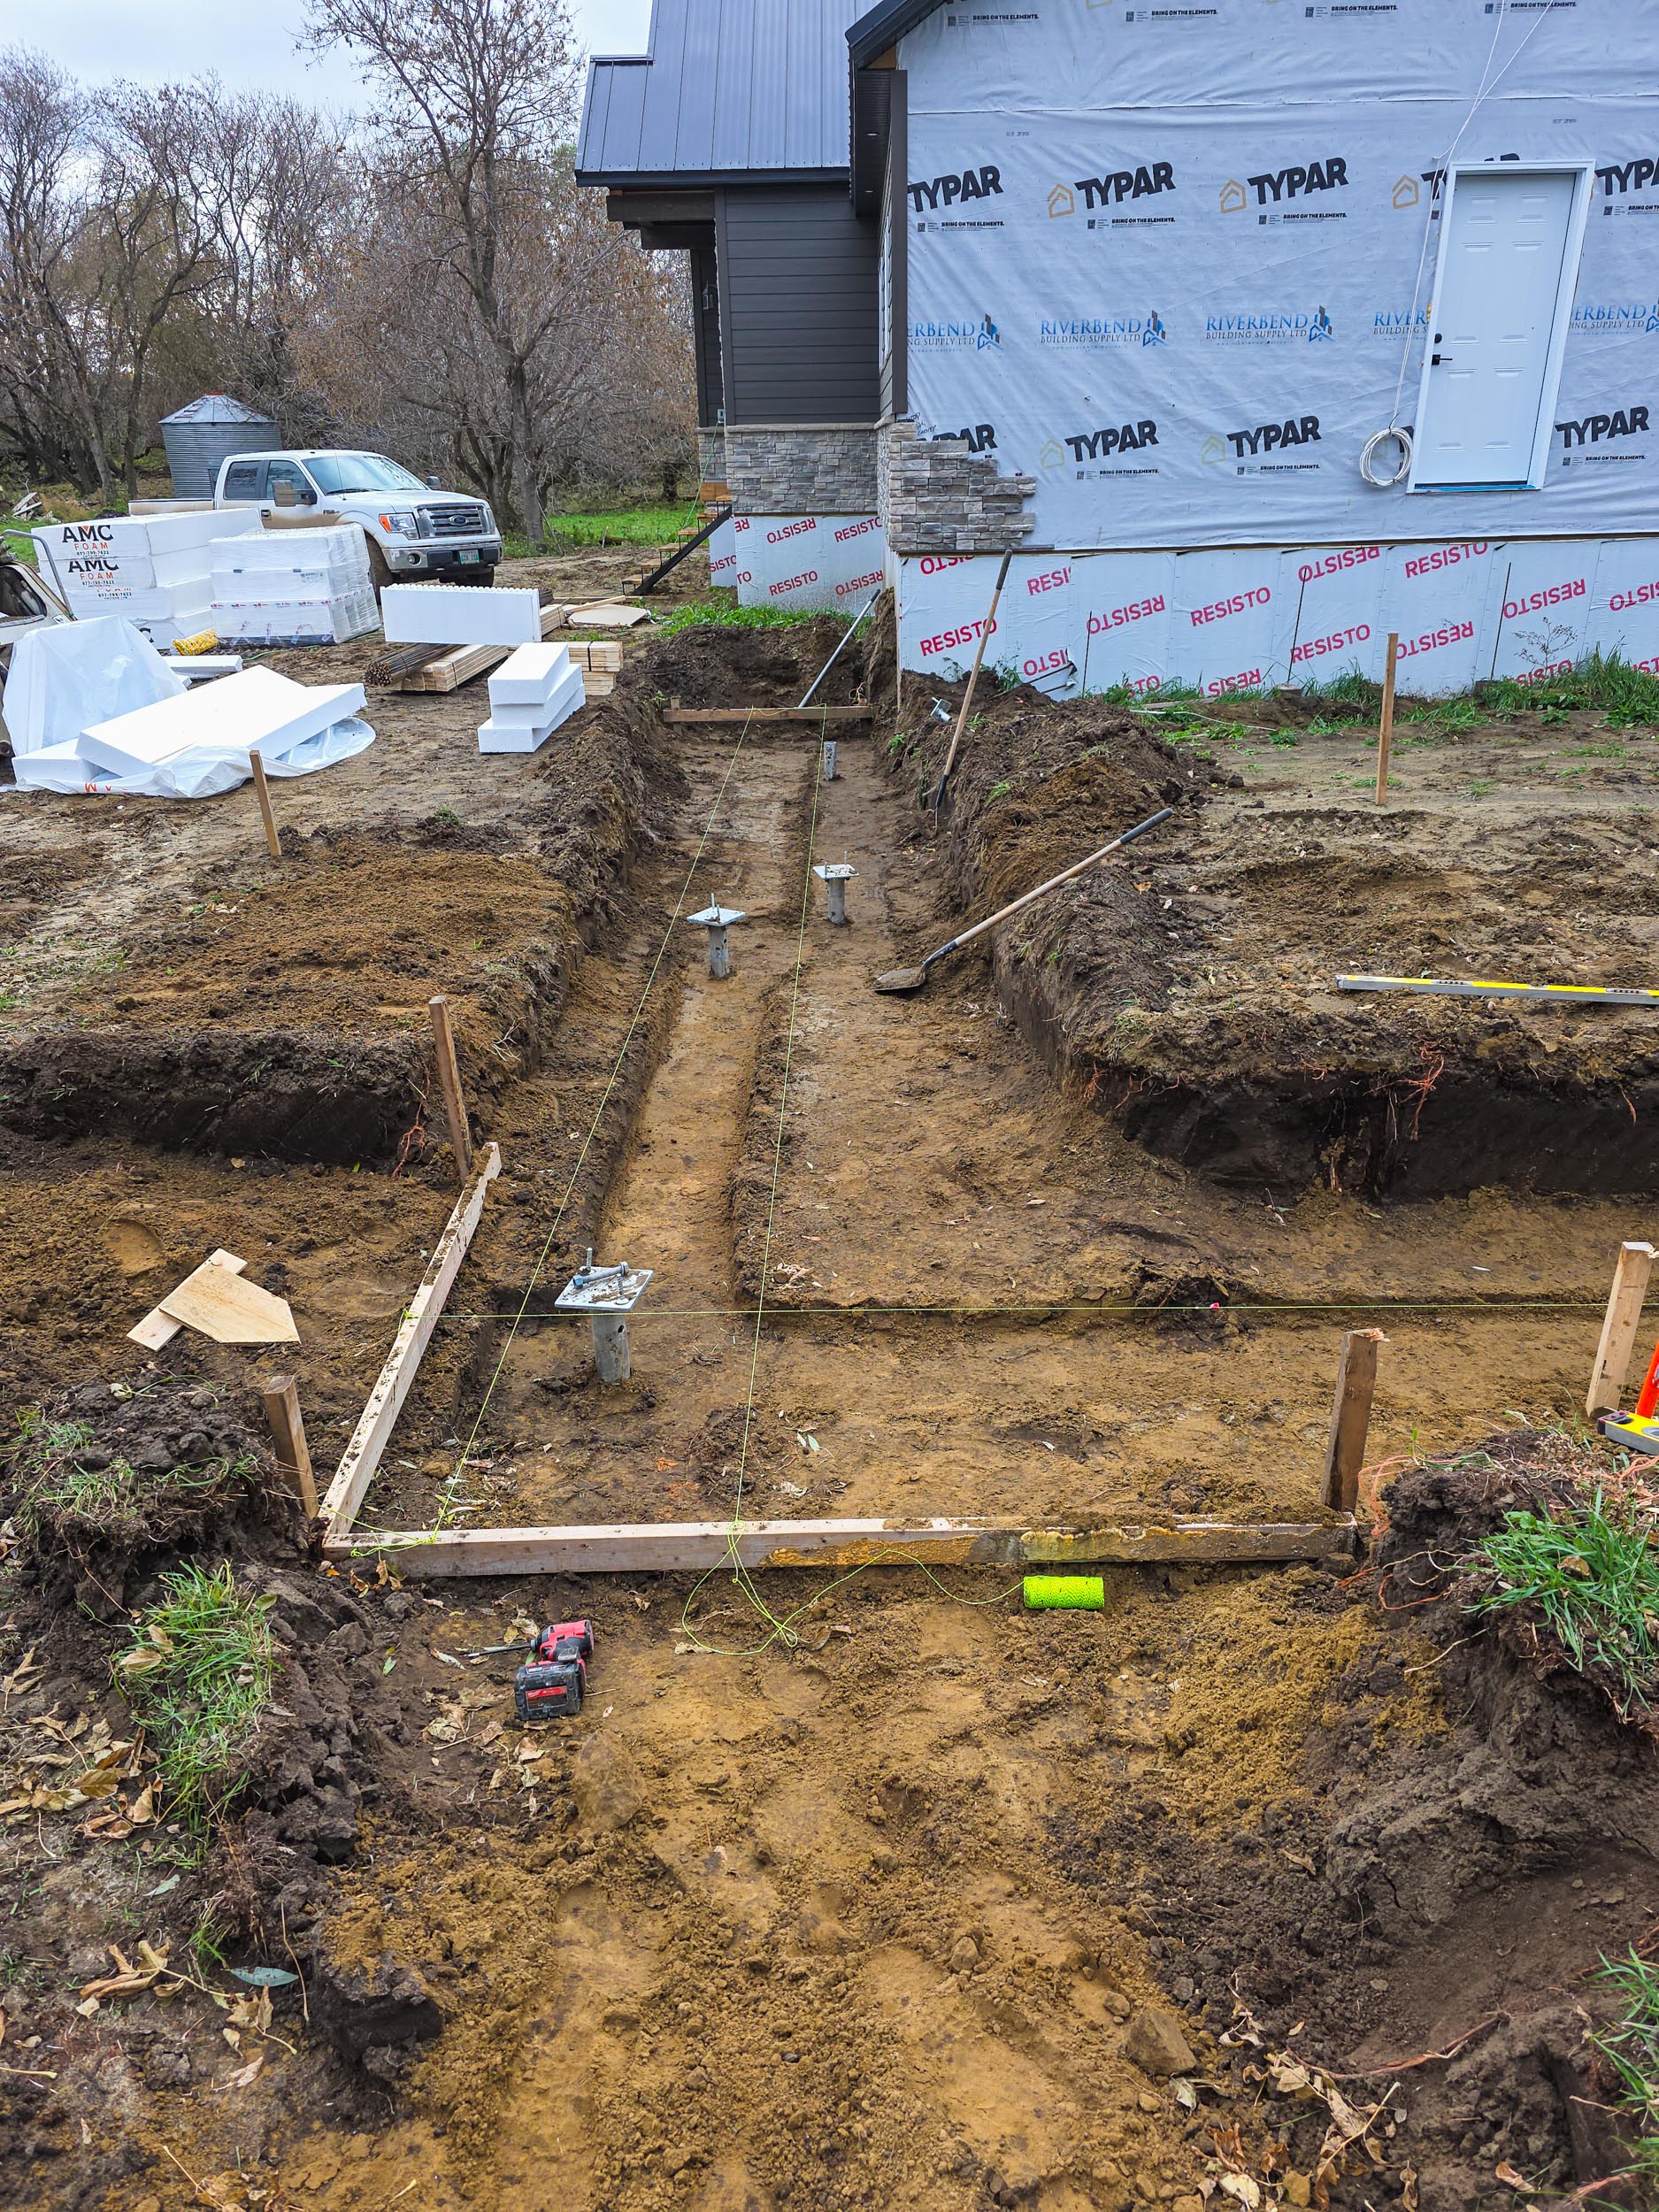
        <p>
          The work started with excavation, layout and the foundation
          needed to support the new garage. Because the addition connected
          directly to the house, the height, wall locations and transition
          into the existing structure all had to be worked out early.
        </p>

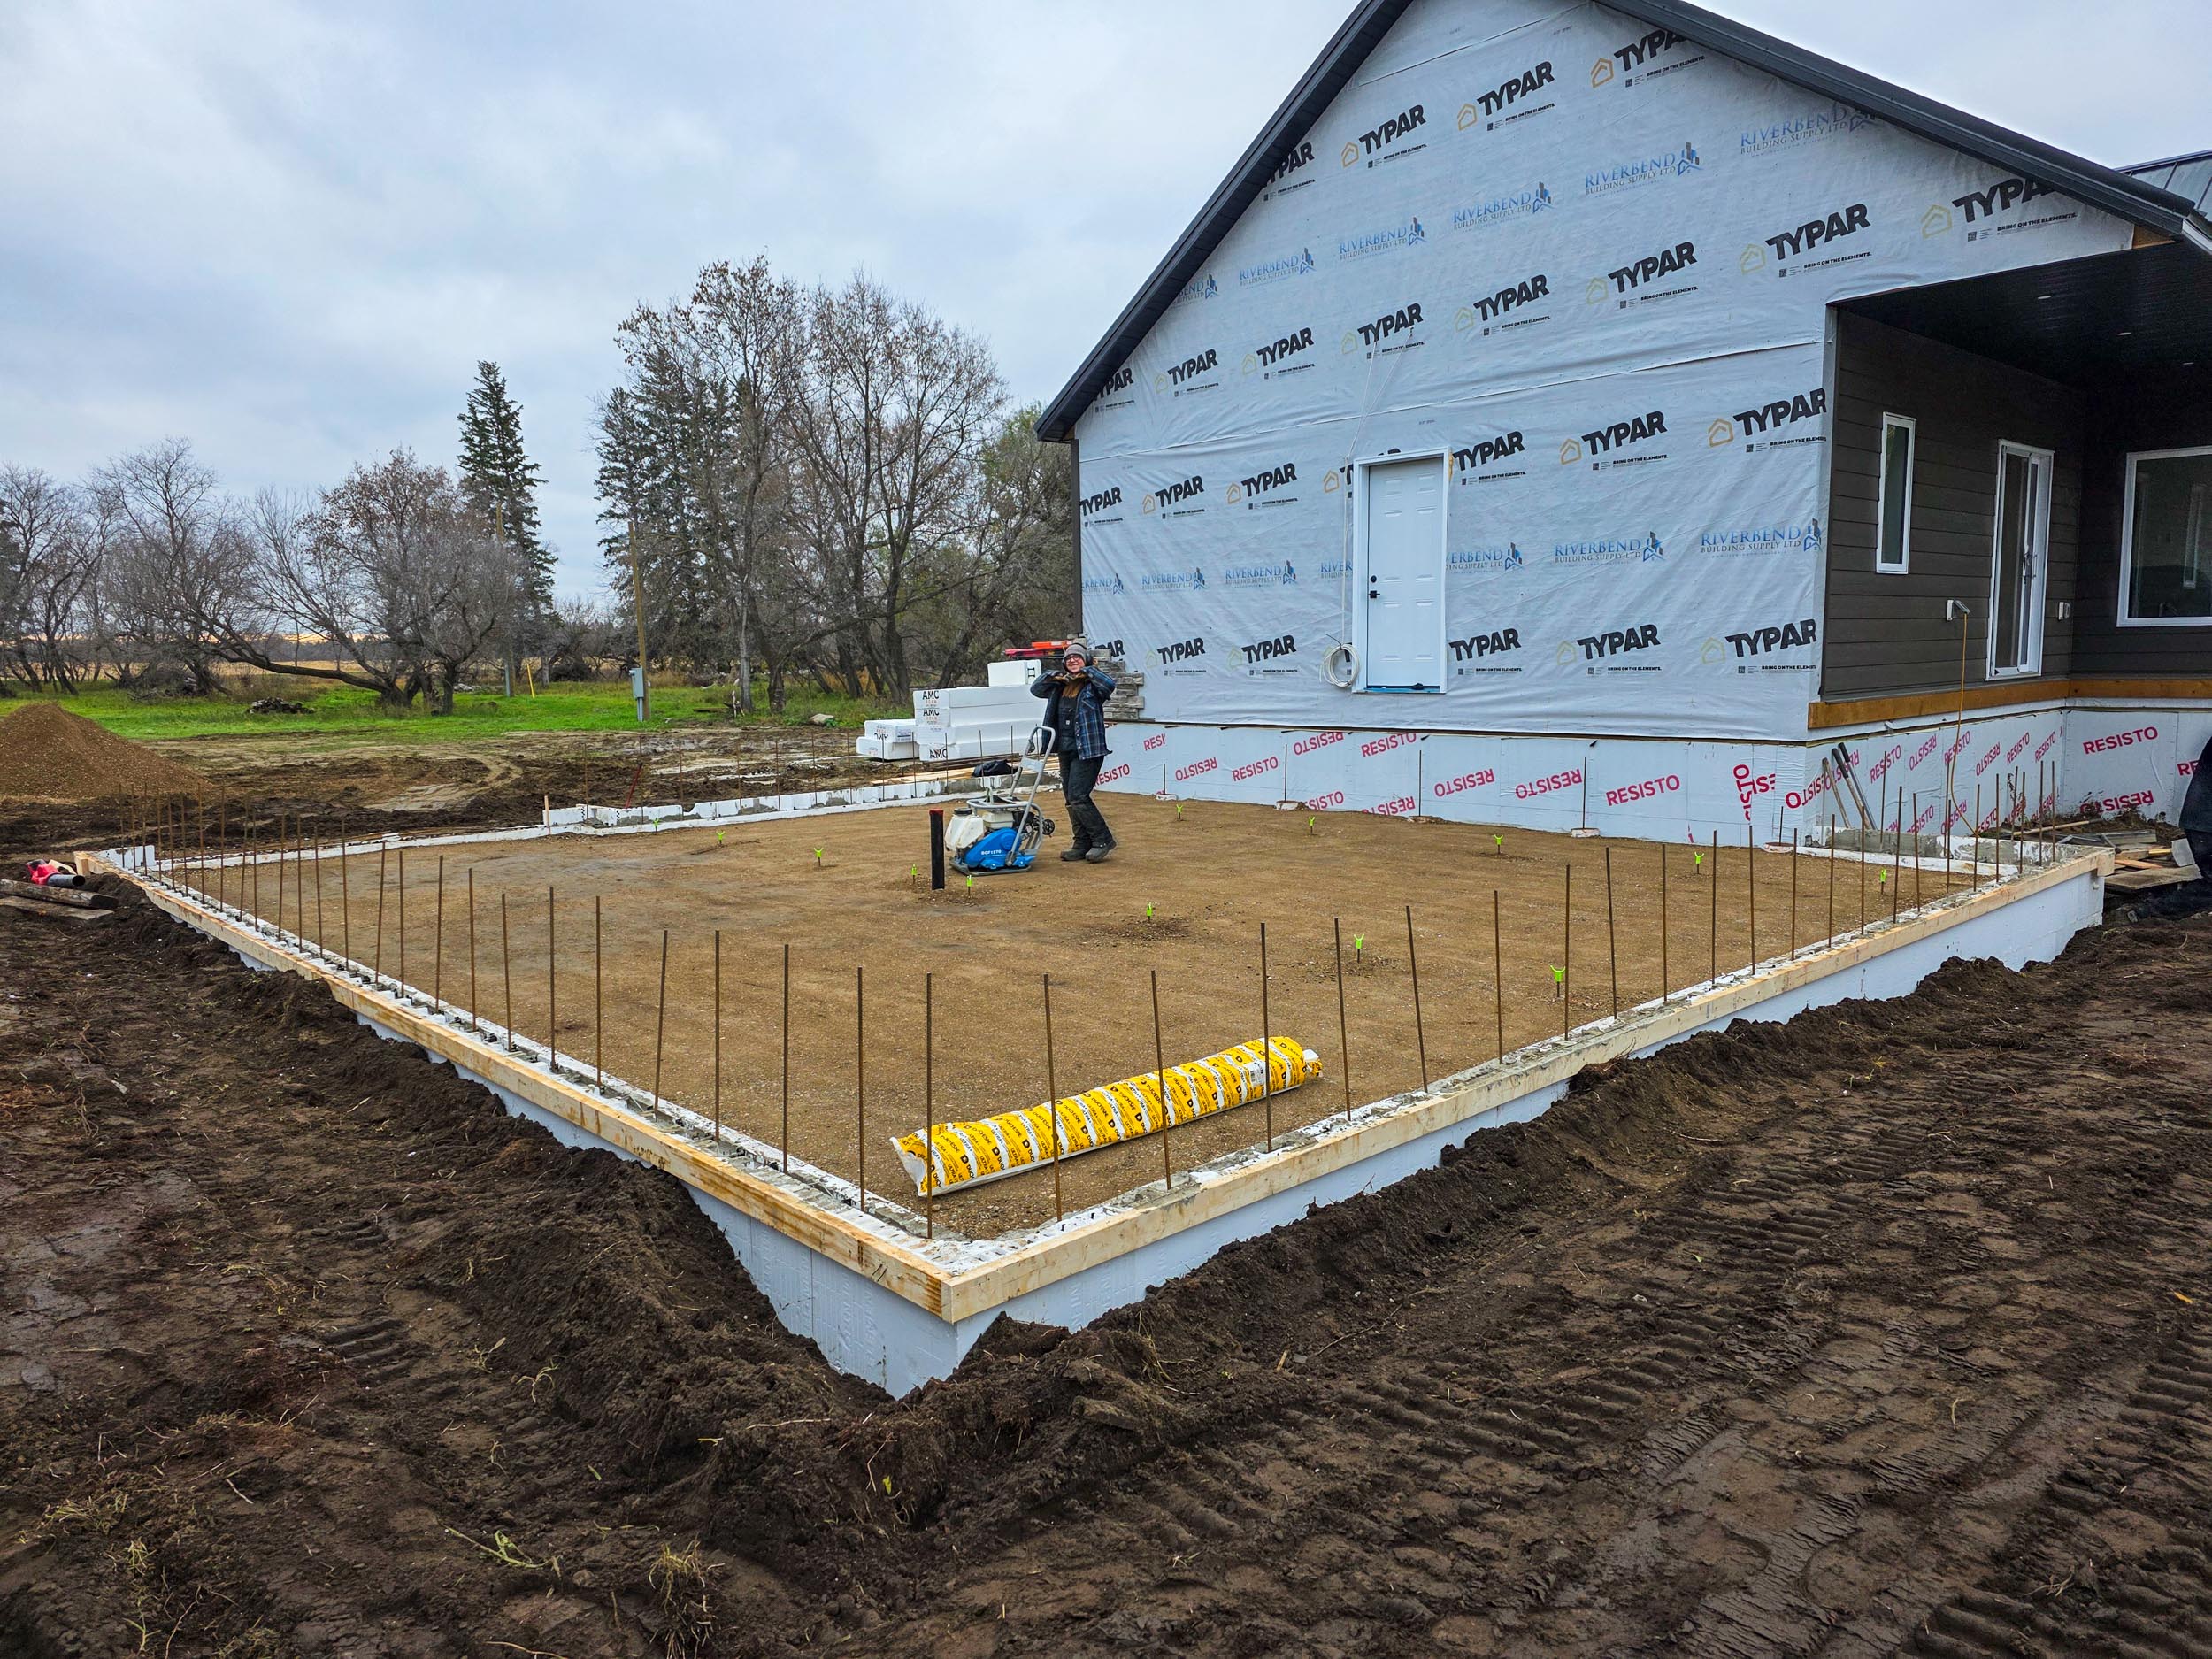
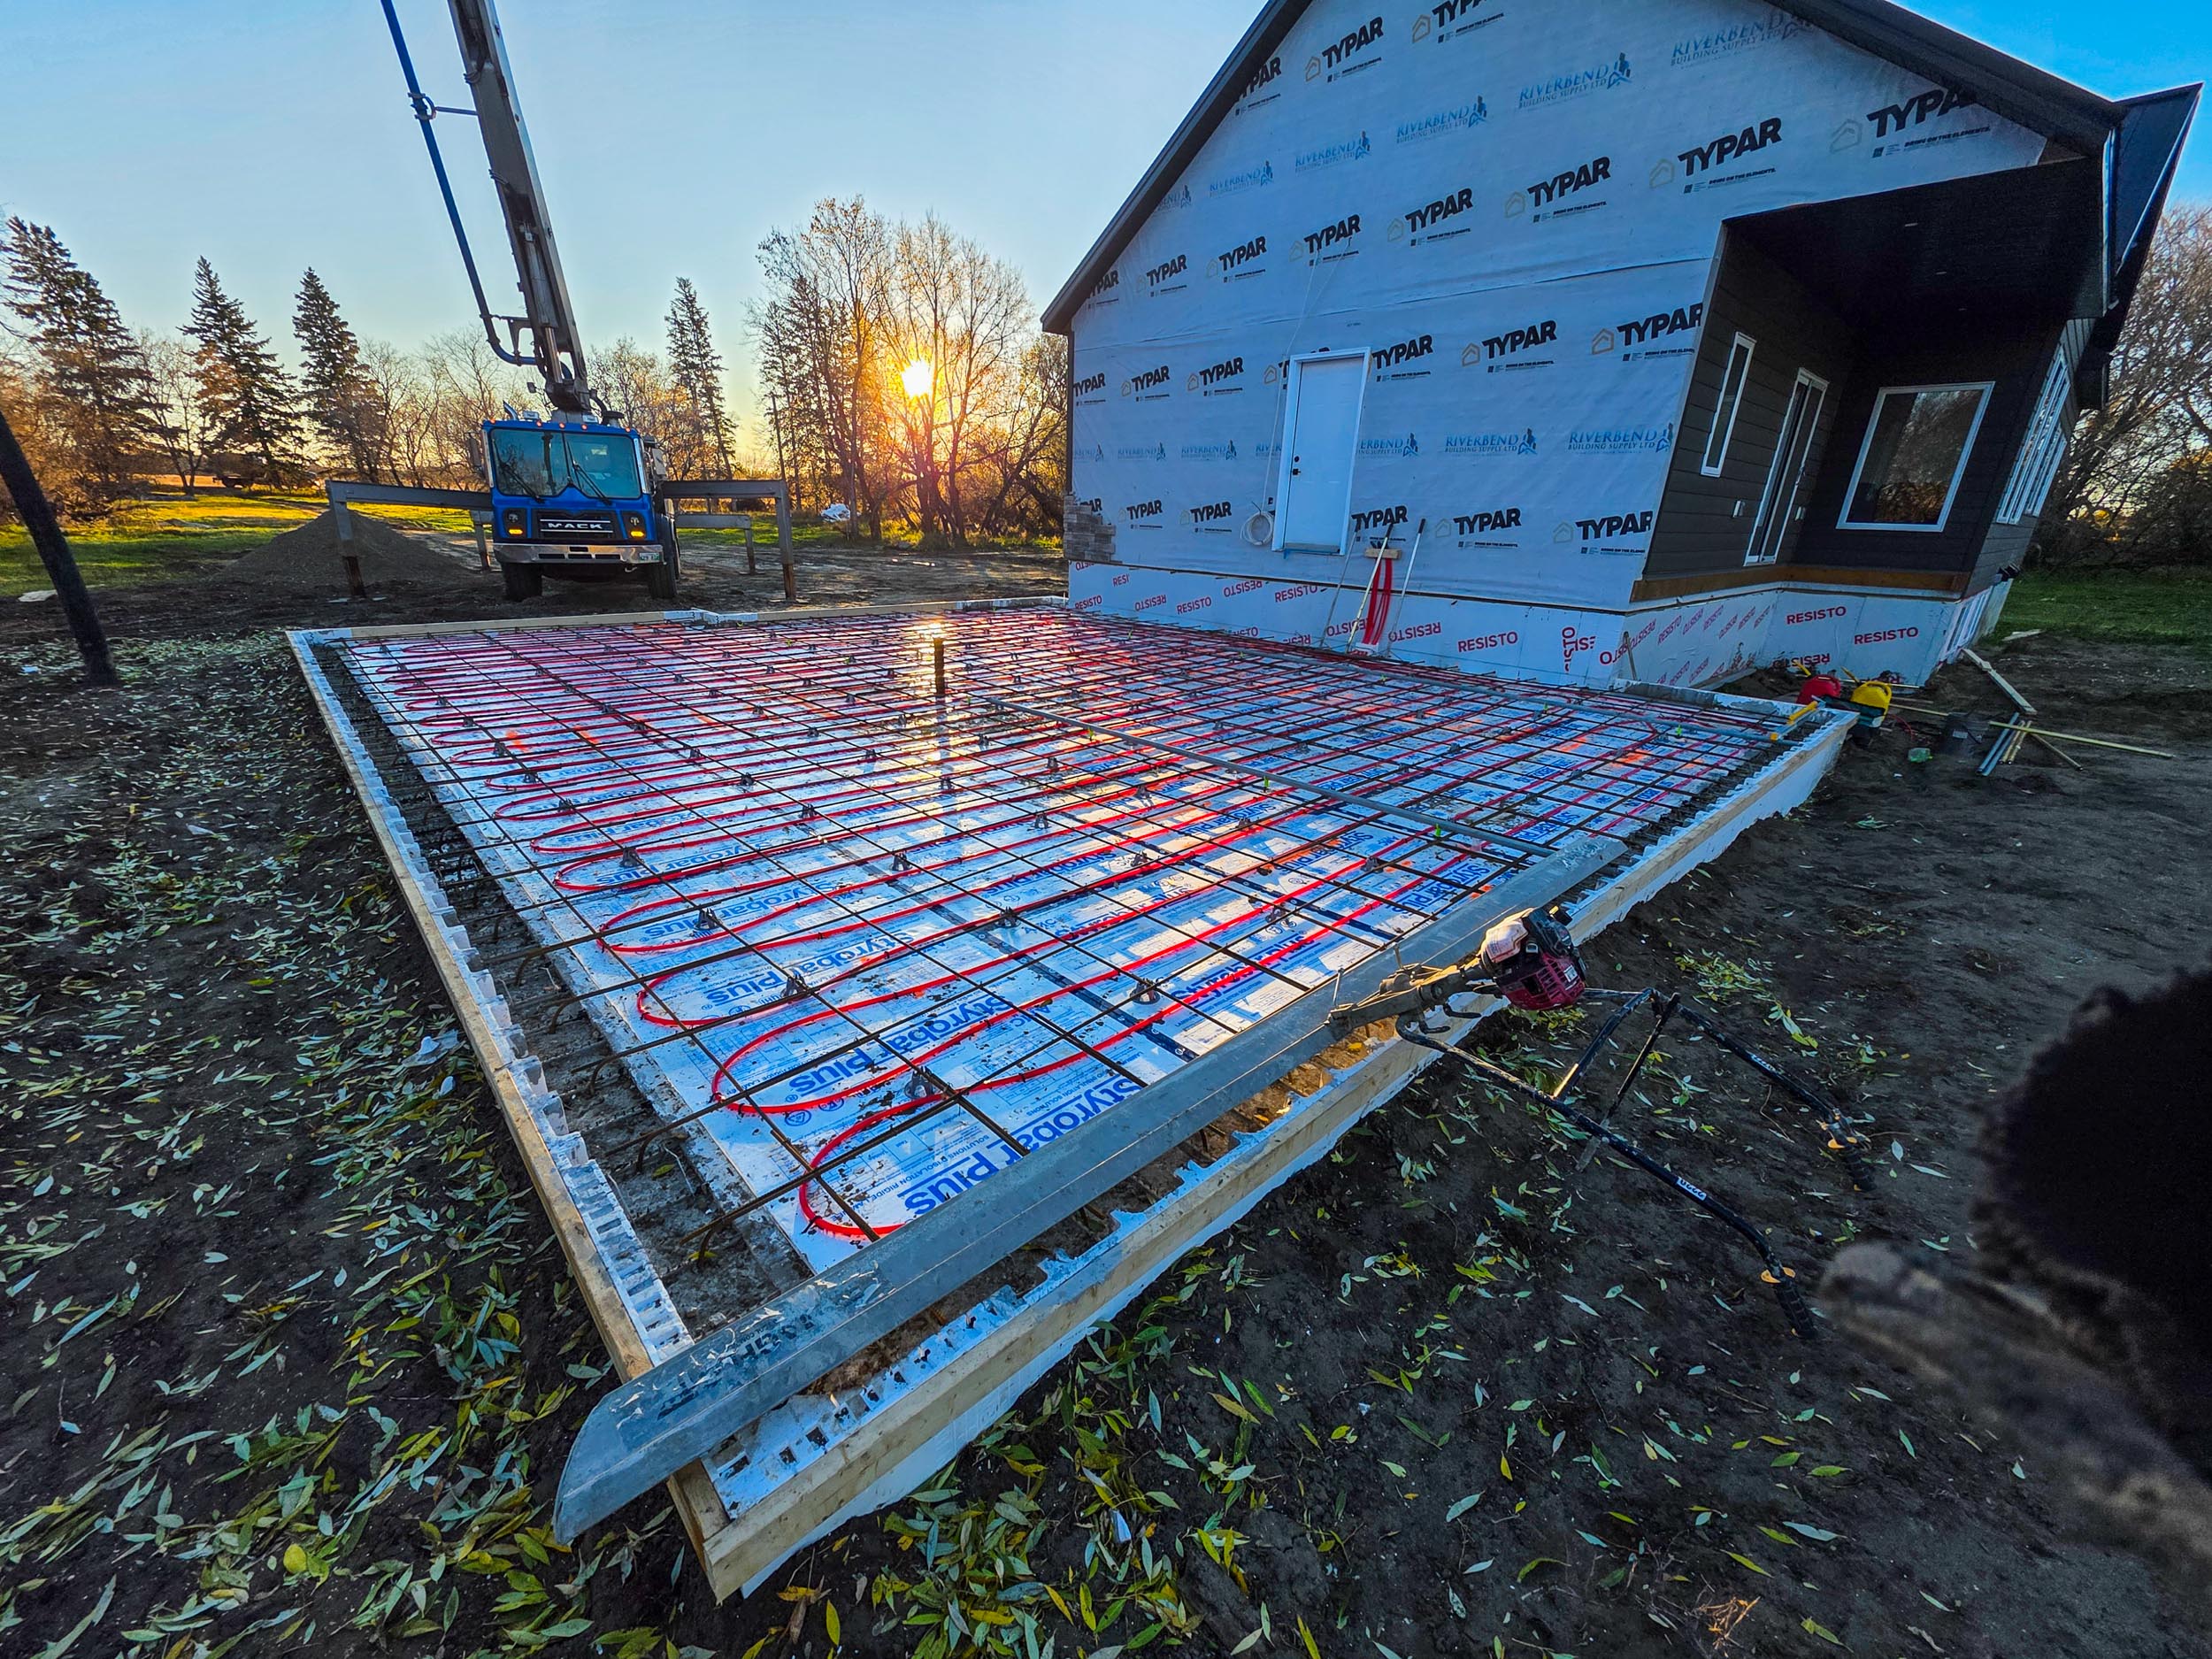
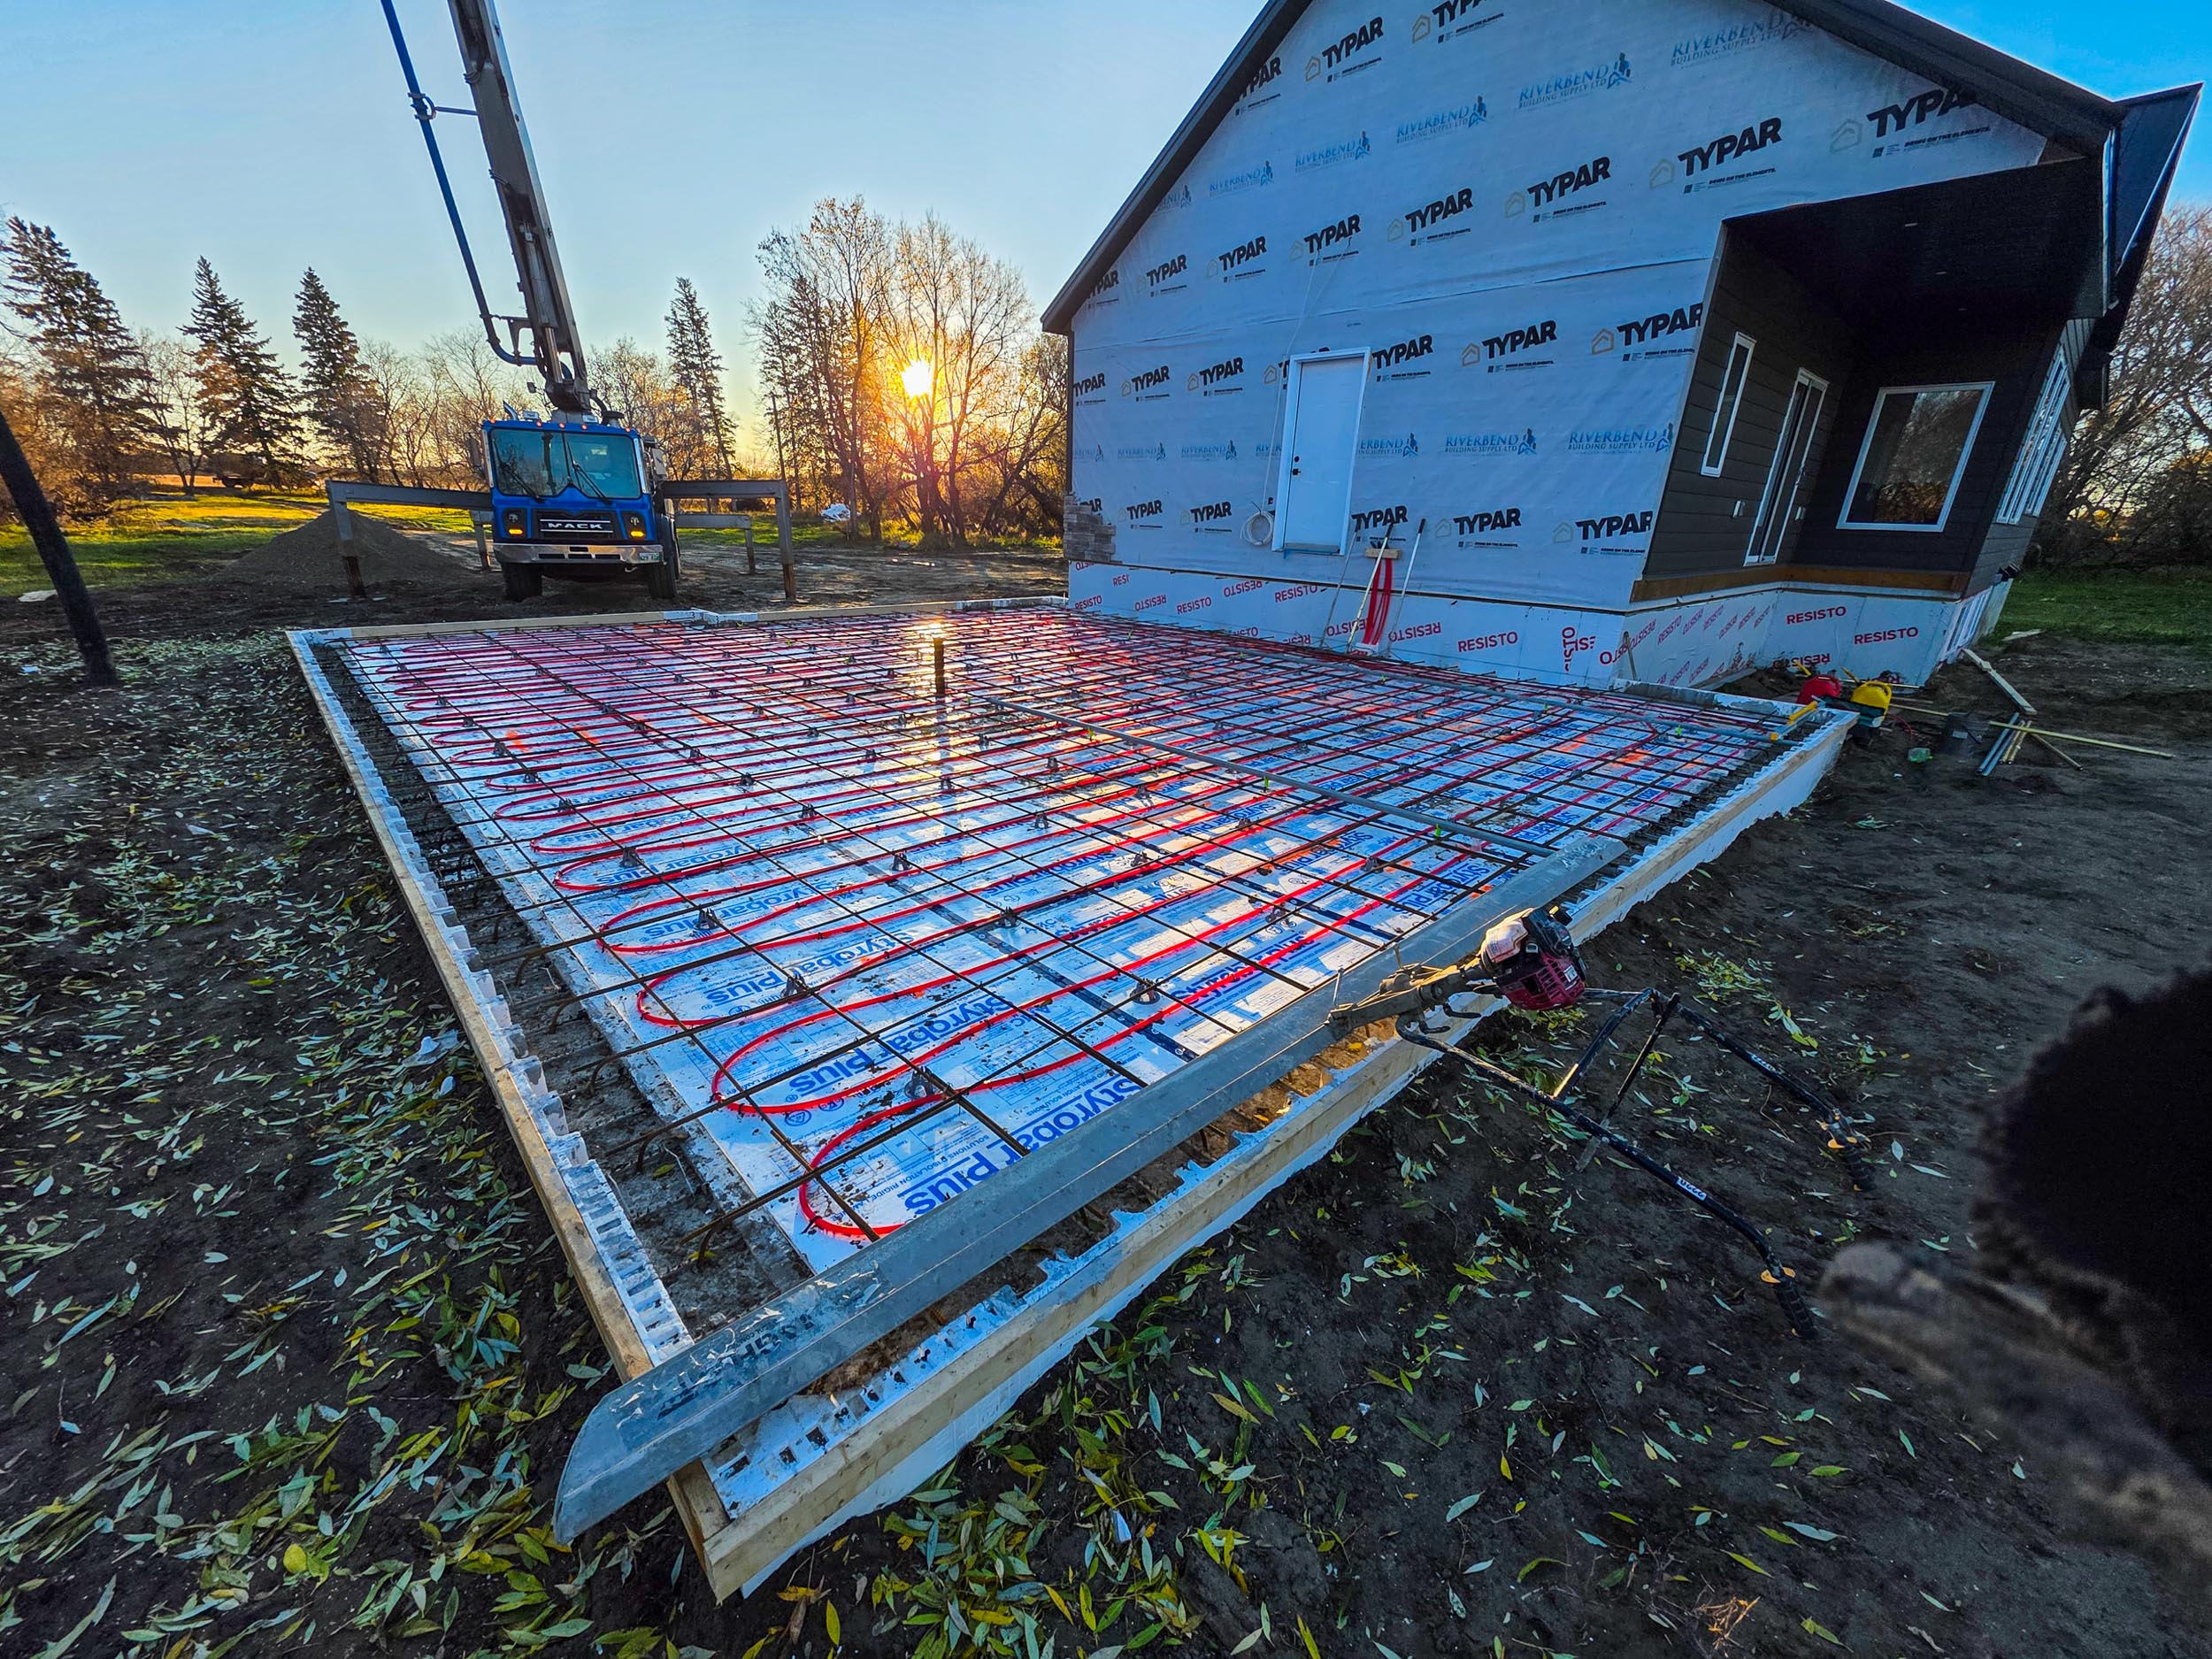
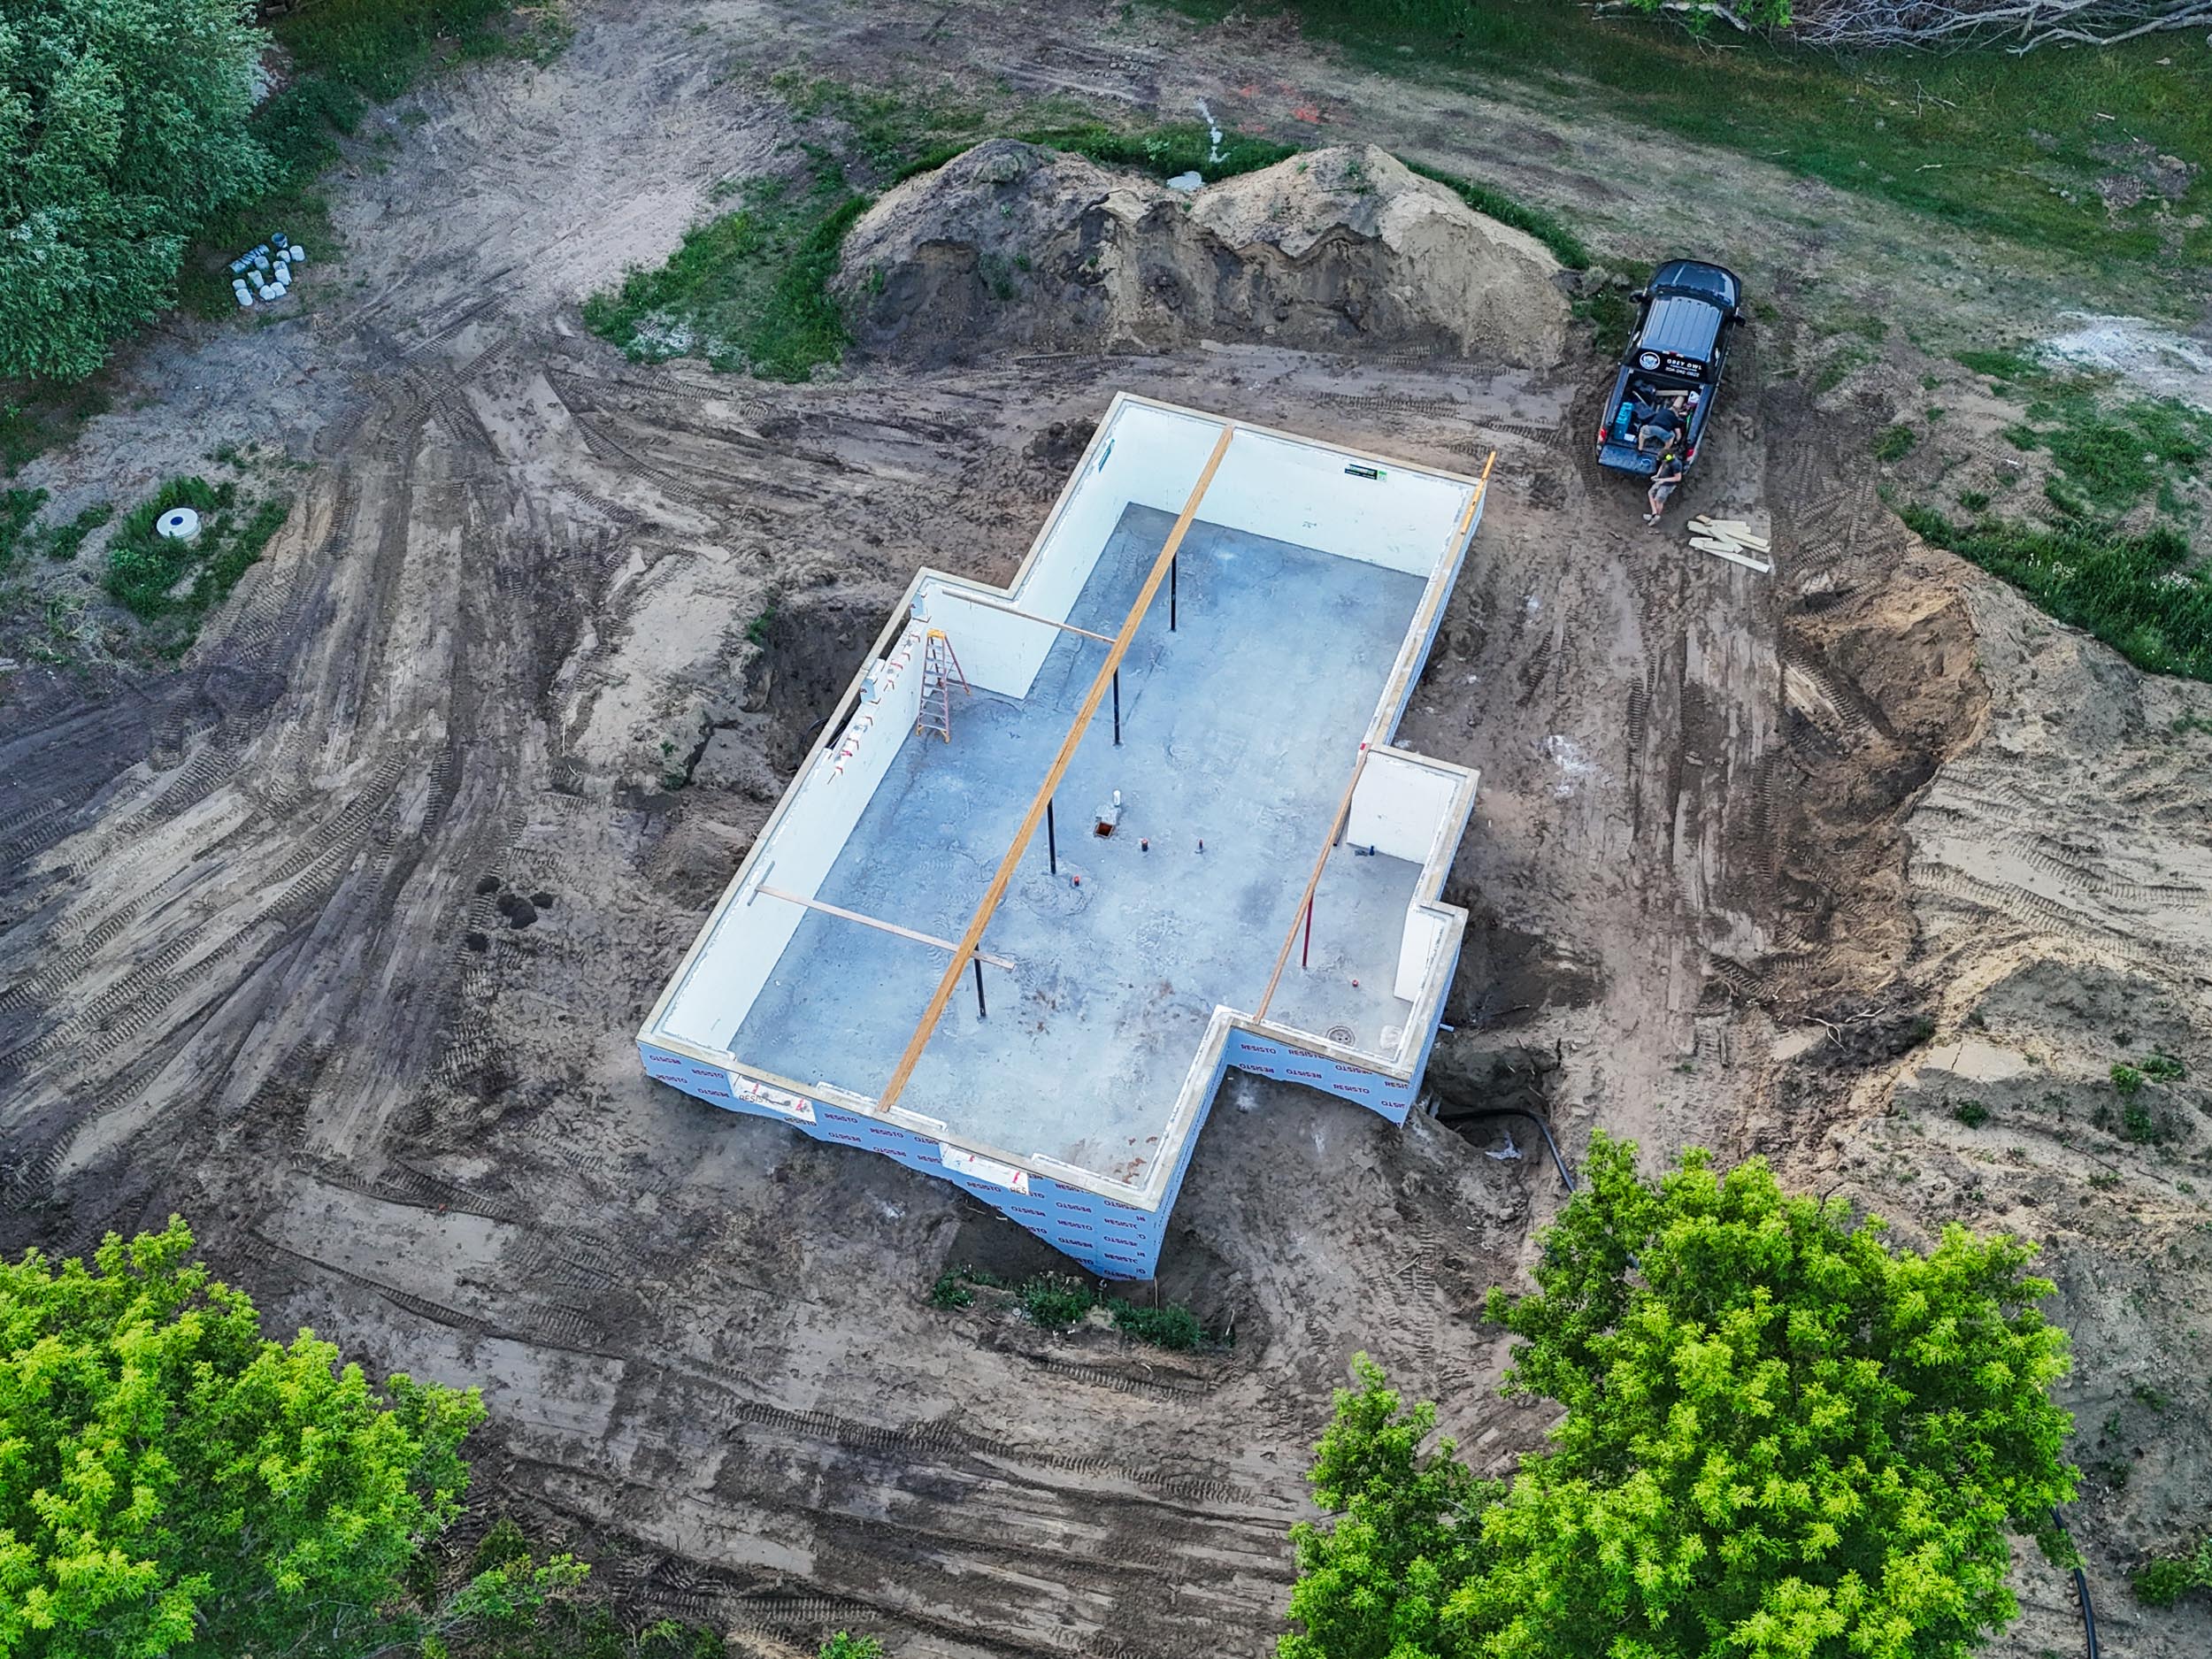
        <p>
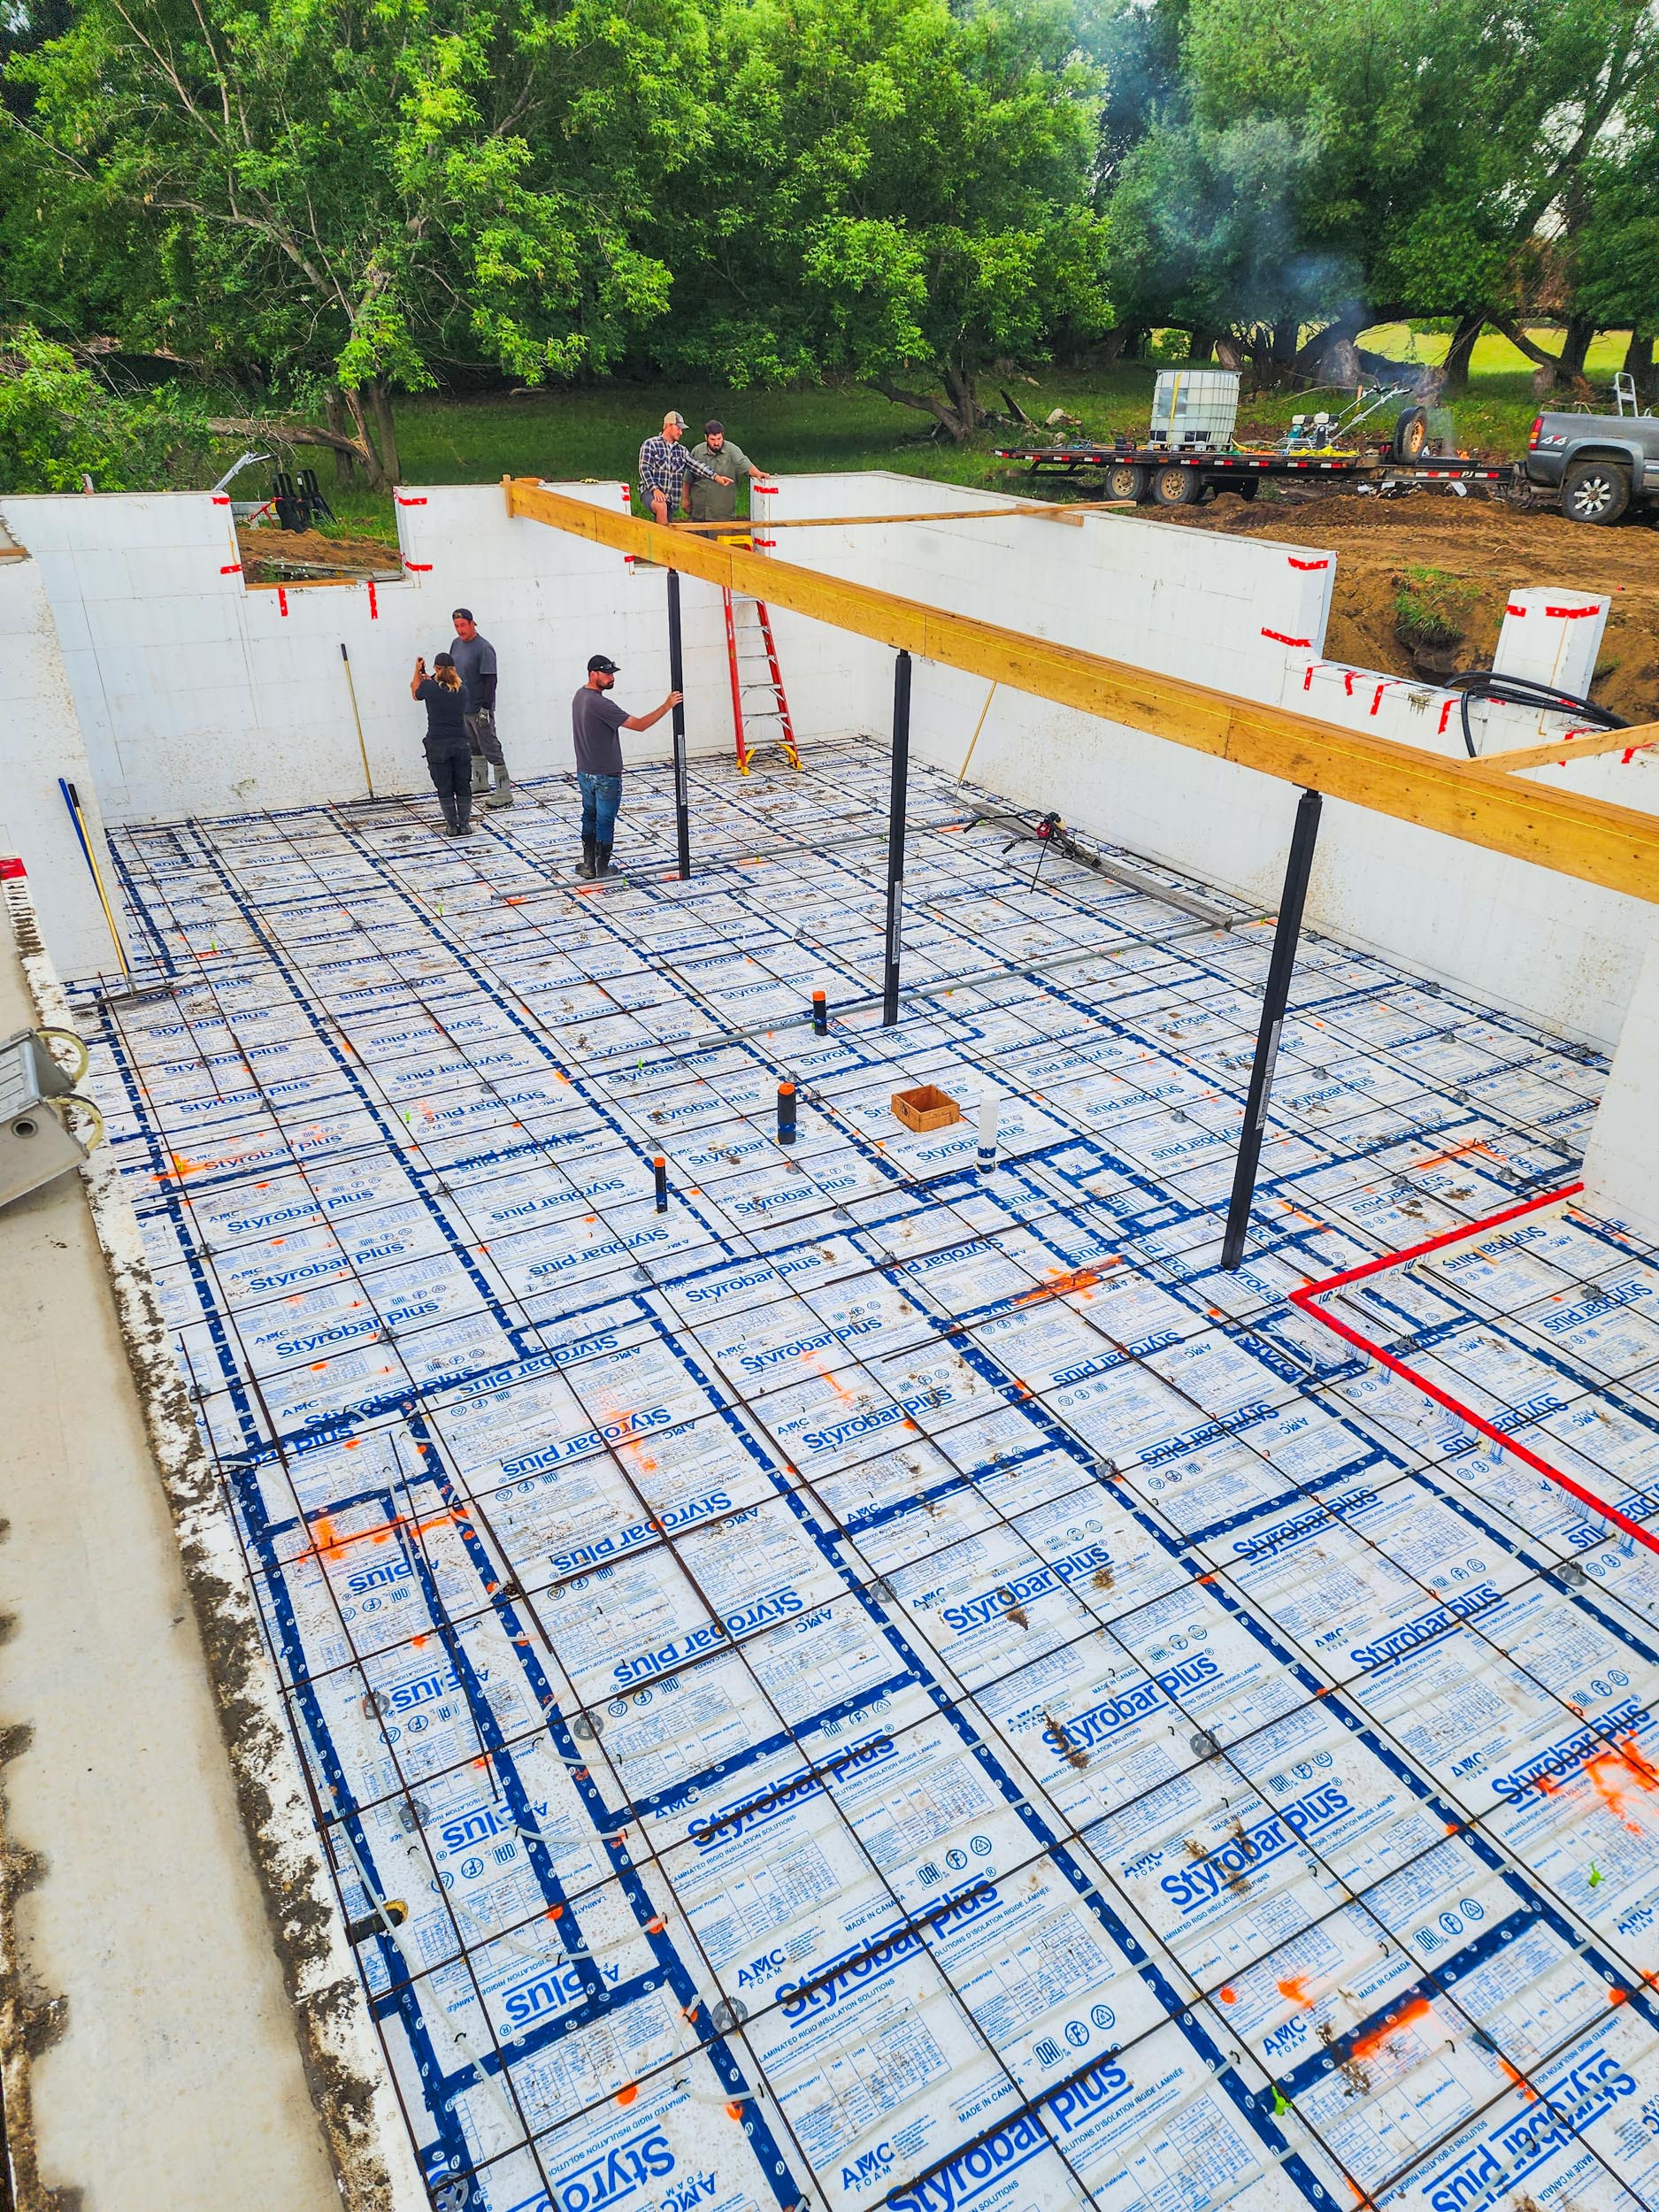
          After the foundation was complete, the base was prepared for
          the concrete floor. Insulation, reinforcing steel and in-floor
          heating lines were installed before the slab was poured.
        </p>

      </div>

    </div>

  </div>
</section></div>

    <figure class="post__image post__image--center">
      <img loading="lazy" src="https://greyowlconstruction.ca/media/posts/11/4-House-Renovation-11-2.jpg" height="1875" width="2500" alt="Foundation preparation for a garage addition"  sizes="(max-width: 1920px) 100vw, 1920px" srcset="https://greyowlconstruction.ca/media/posts/11/responsive/4-House-Renovation-11-2-xs.jpg 640w ,https://greyowlconstruction.ca/media/posts/11/responsive/4-House-Renovation-11-2-sm.jpg 768w ,https://greyowlconstruction.ca/media/posts/11/responsive/4-House-Renovation-11-2-md.jpg 1024w ,https://greyowlconstruction.ca/media/posts/11/responsive/4-House-Renovation-11-2-lg.jpg 1366w ,https://greyowlconstruction.ca/media/posts/11/responsive/4-House-Renovation-11-2-xl.jpg 1600w ,https://greyowlconstruction.ca/media/posts/11/responsive/4-House-Renovation-11-2-2xl.jpg 1920w">
      
    </figure>
<div><!-- ======================================================
     PROJECT SECTION 5: FRAMING AND ROOF CONNECTION
     ====================================================== -->

<section class="go-full-bleed go-section go-section--alternate">
  <div class="go-container--wide">

    <div class="go-split go-split--reverse">

      <div class="go-split__media">
        <img loading="lazy"           src="./media/posts/11/gallery/4-House-Renovation-36.jpg"
          alt="Garage addition roof being tied into an existing home"
          loading="lazy"
          width="1400"
          height="1000"
        >
      </div>

      <div class="go-split__content">

        <p class="go-eyebrow">
          Framing and Roofing
        </p>

        <h2>
          Tying the New Structure Into the Existing House
        </h2>

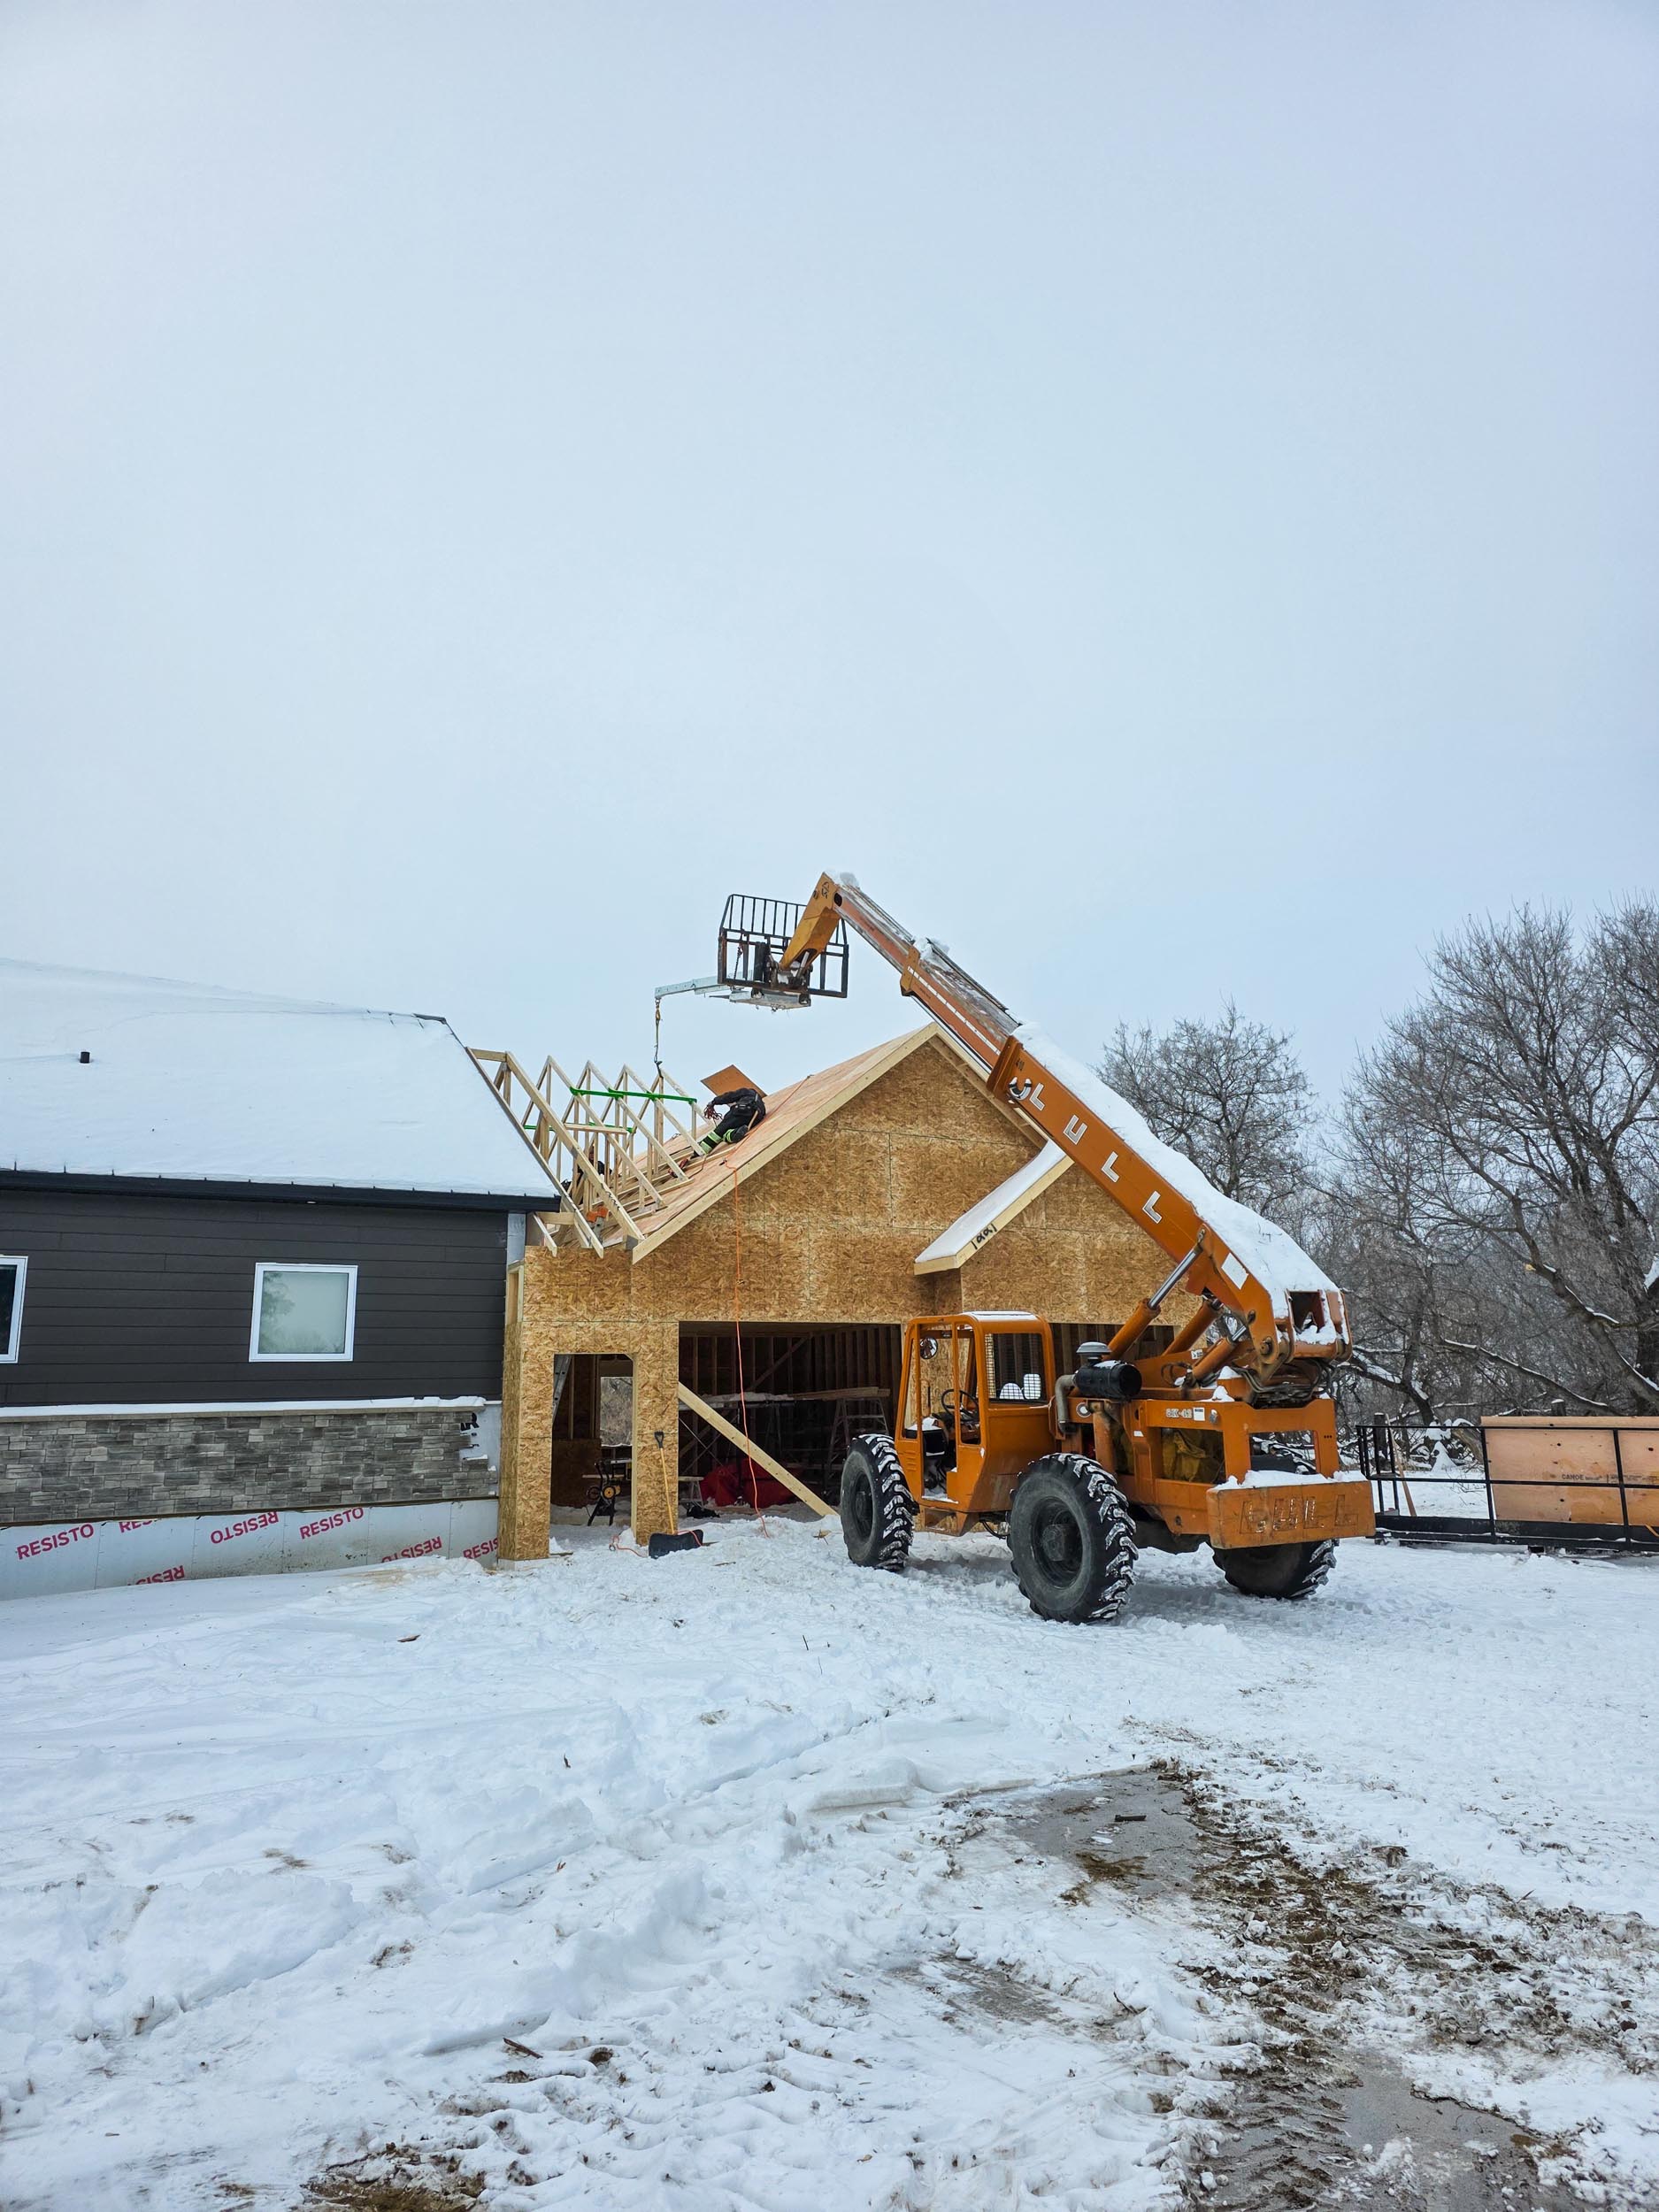
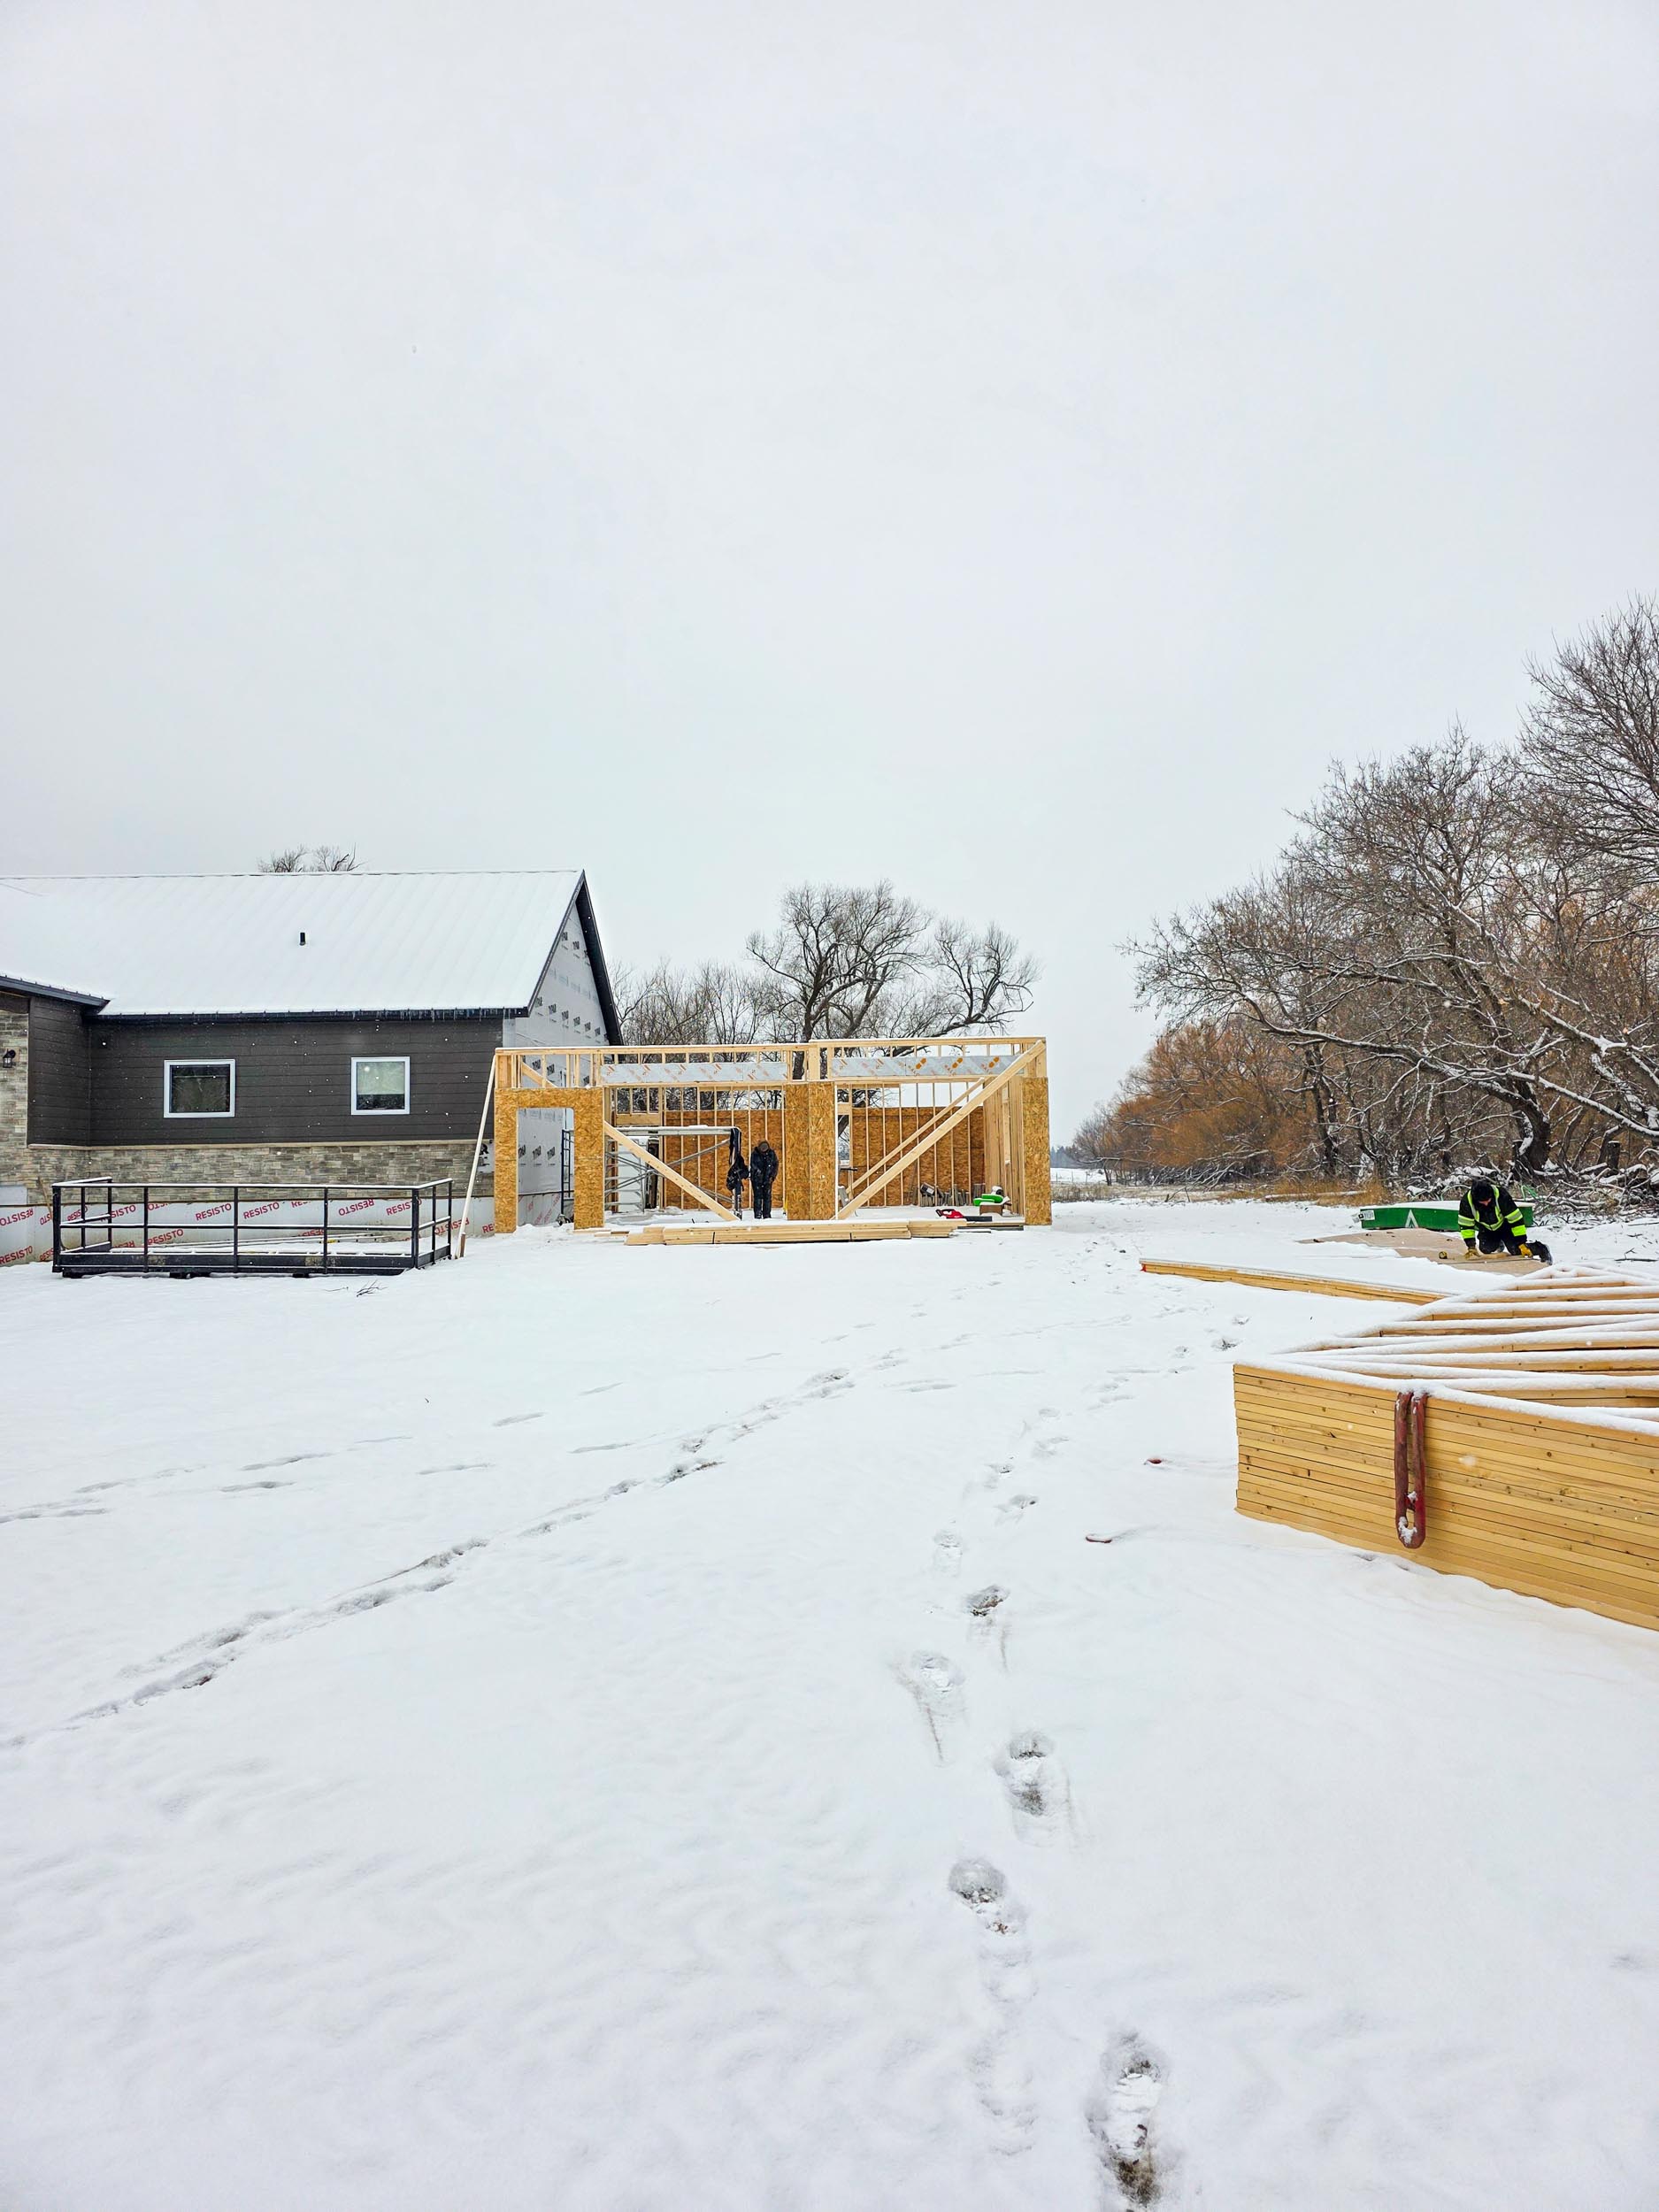
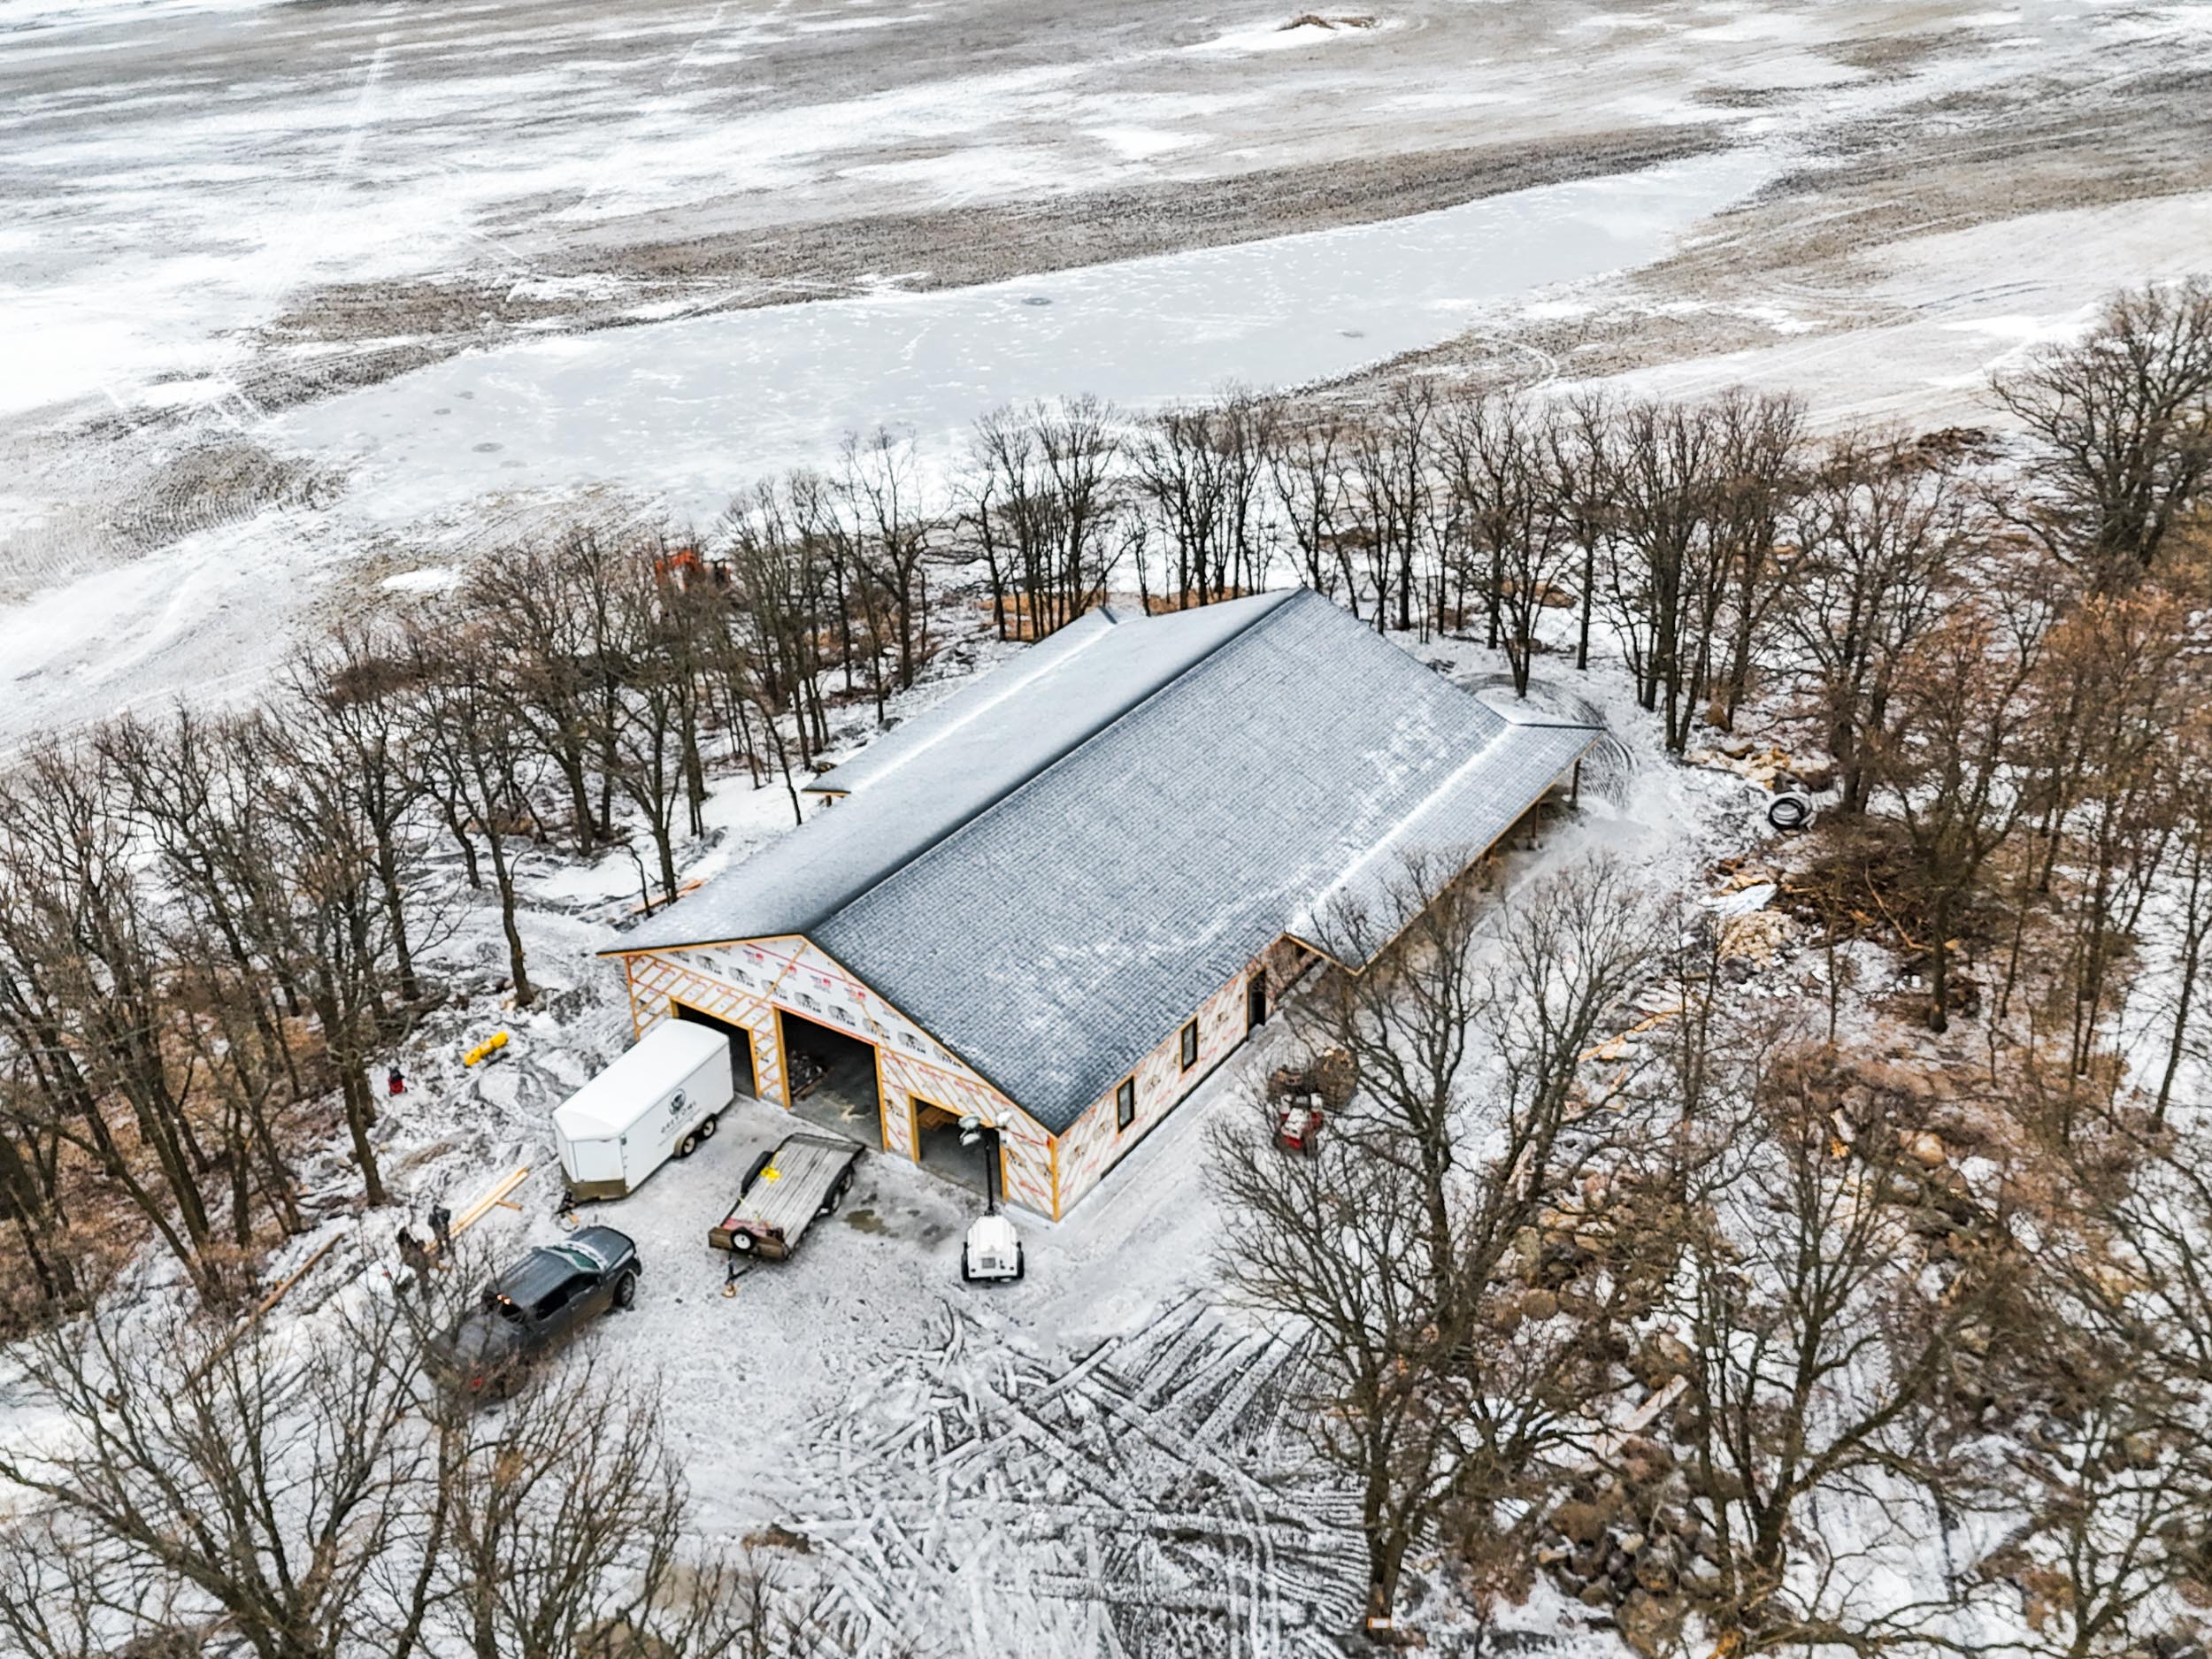
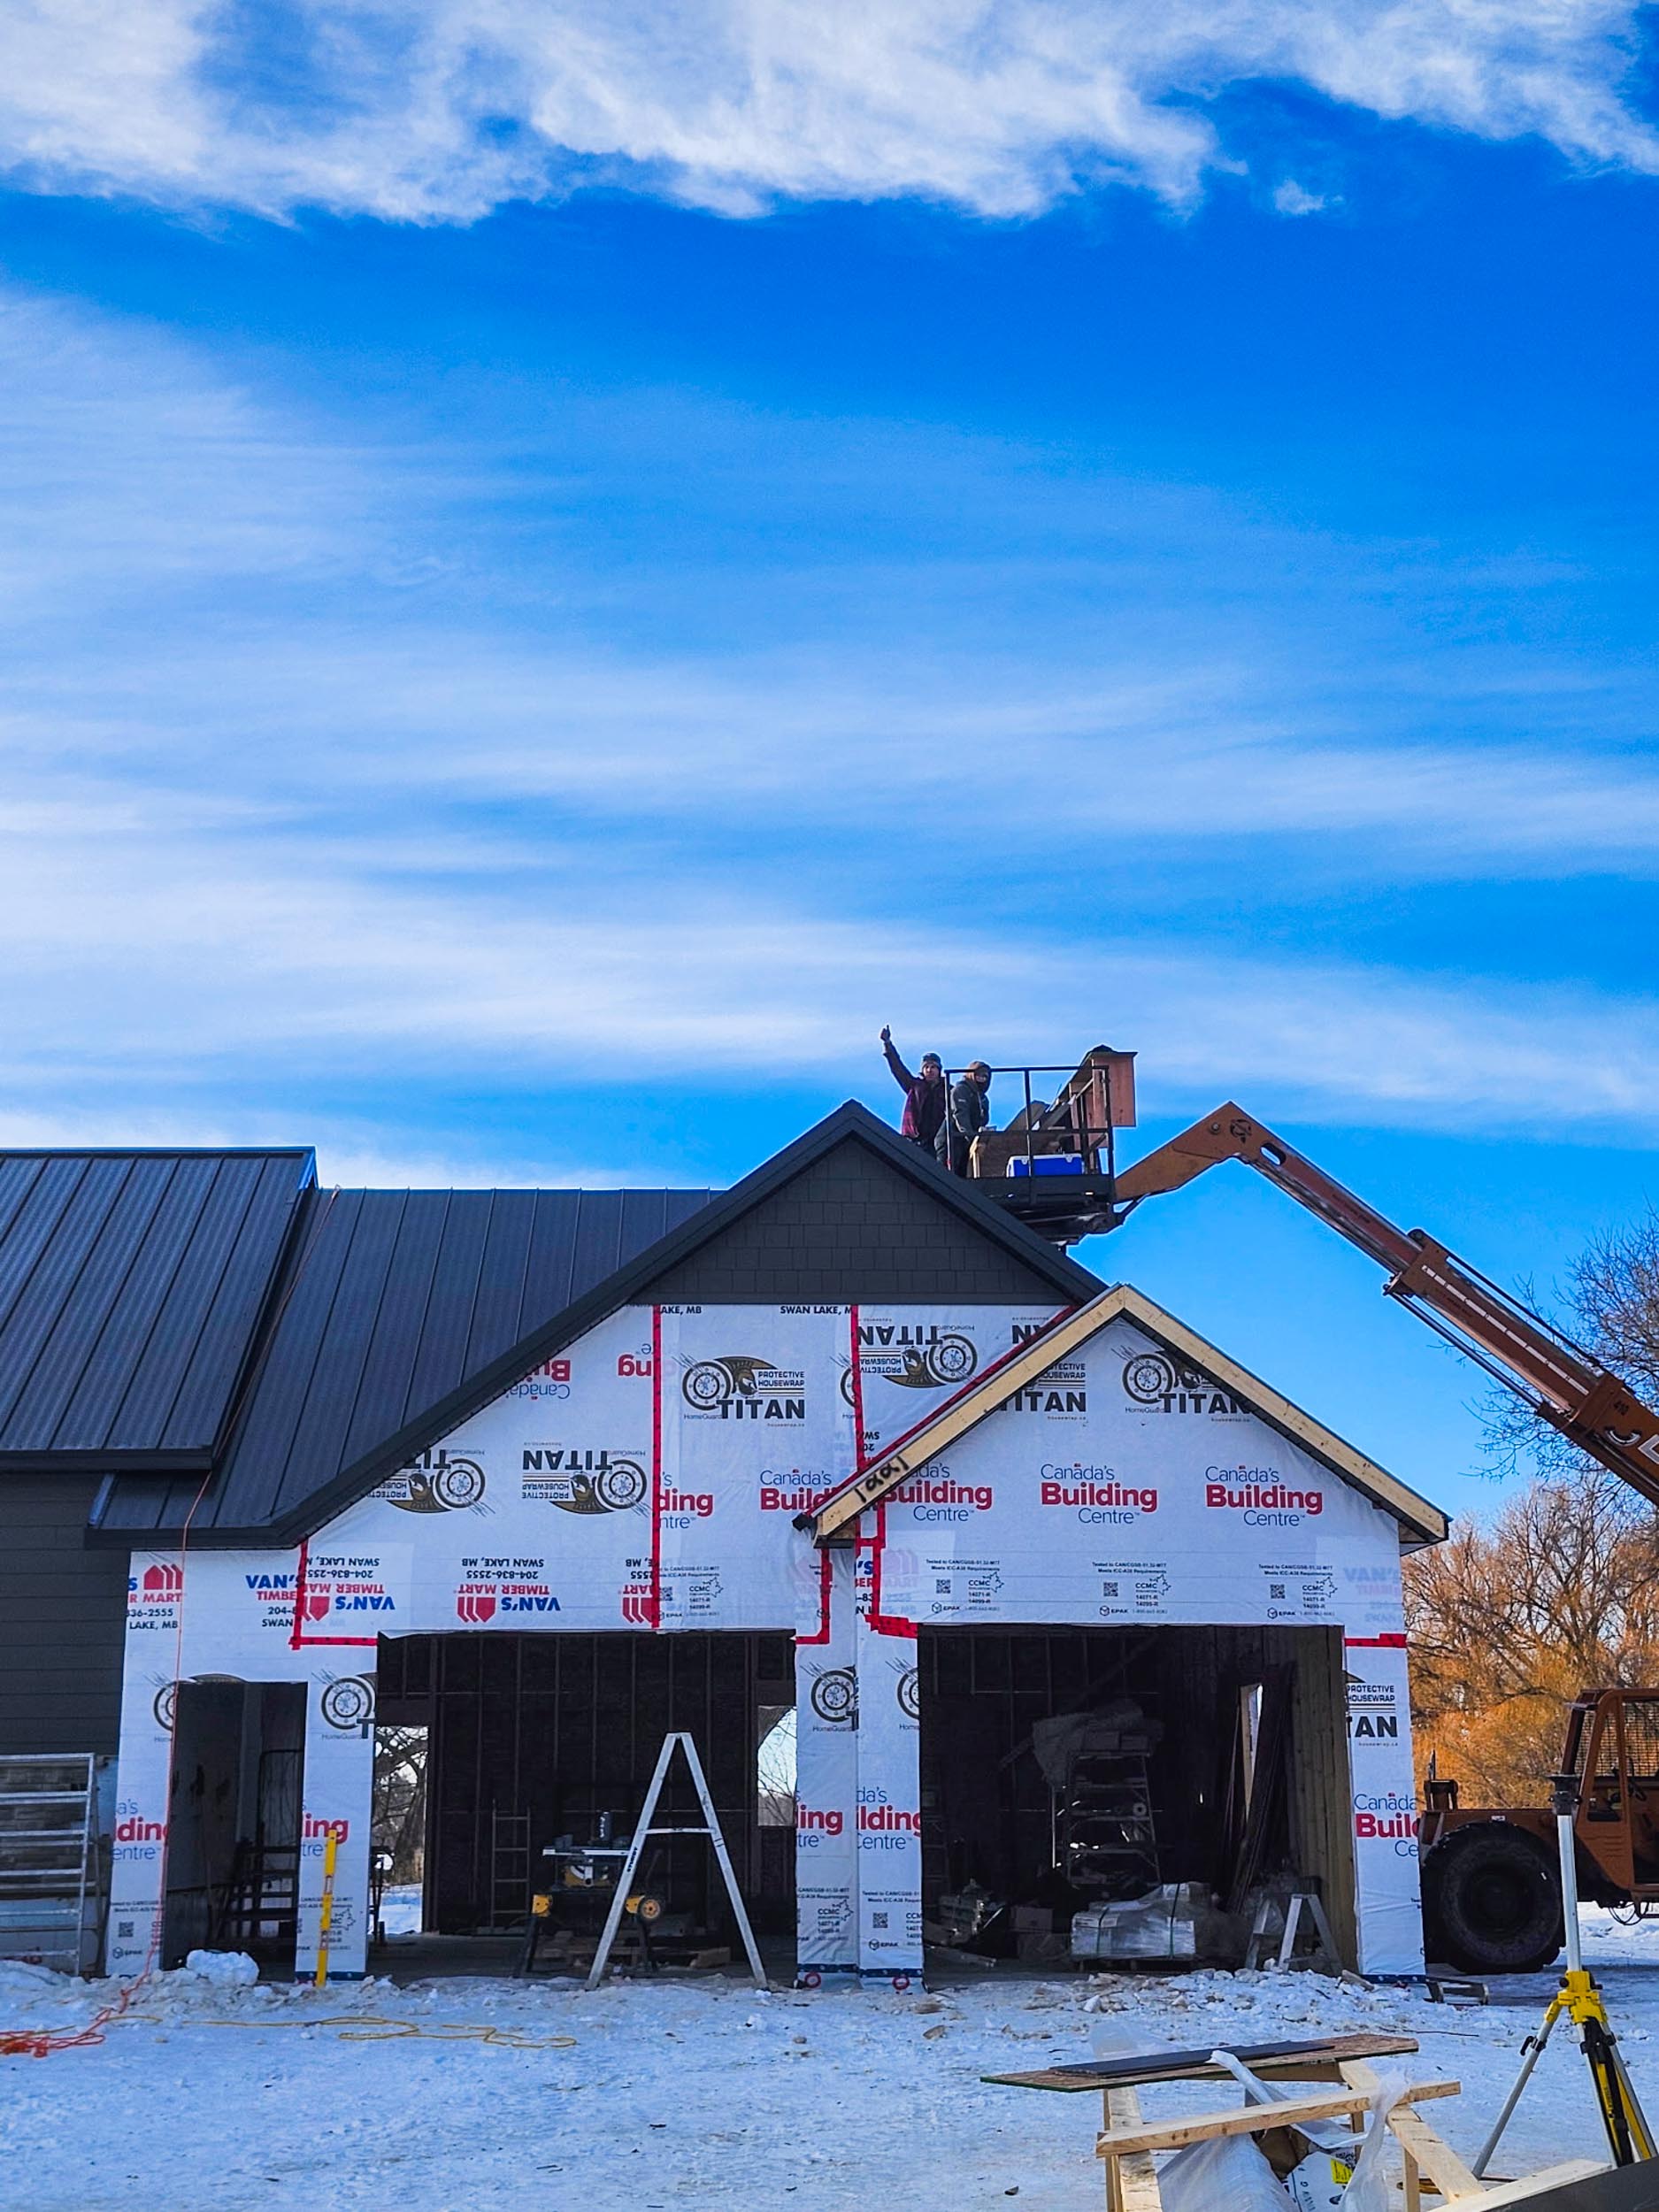
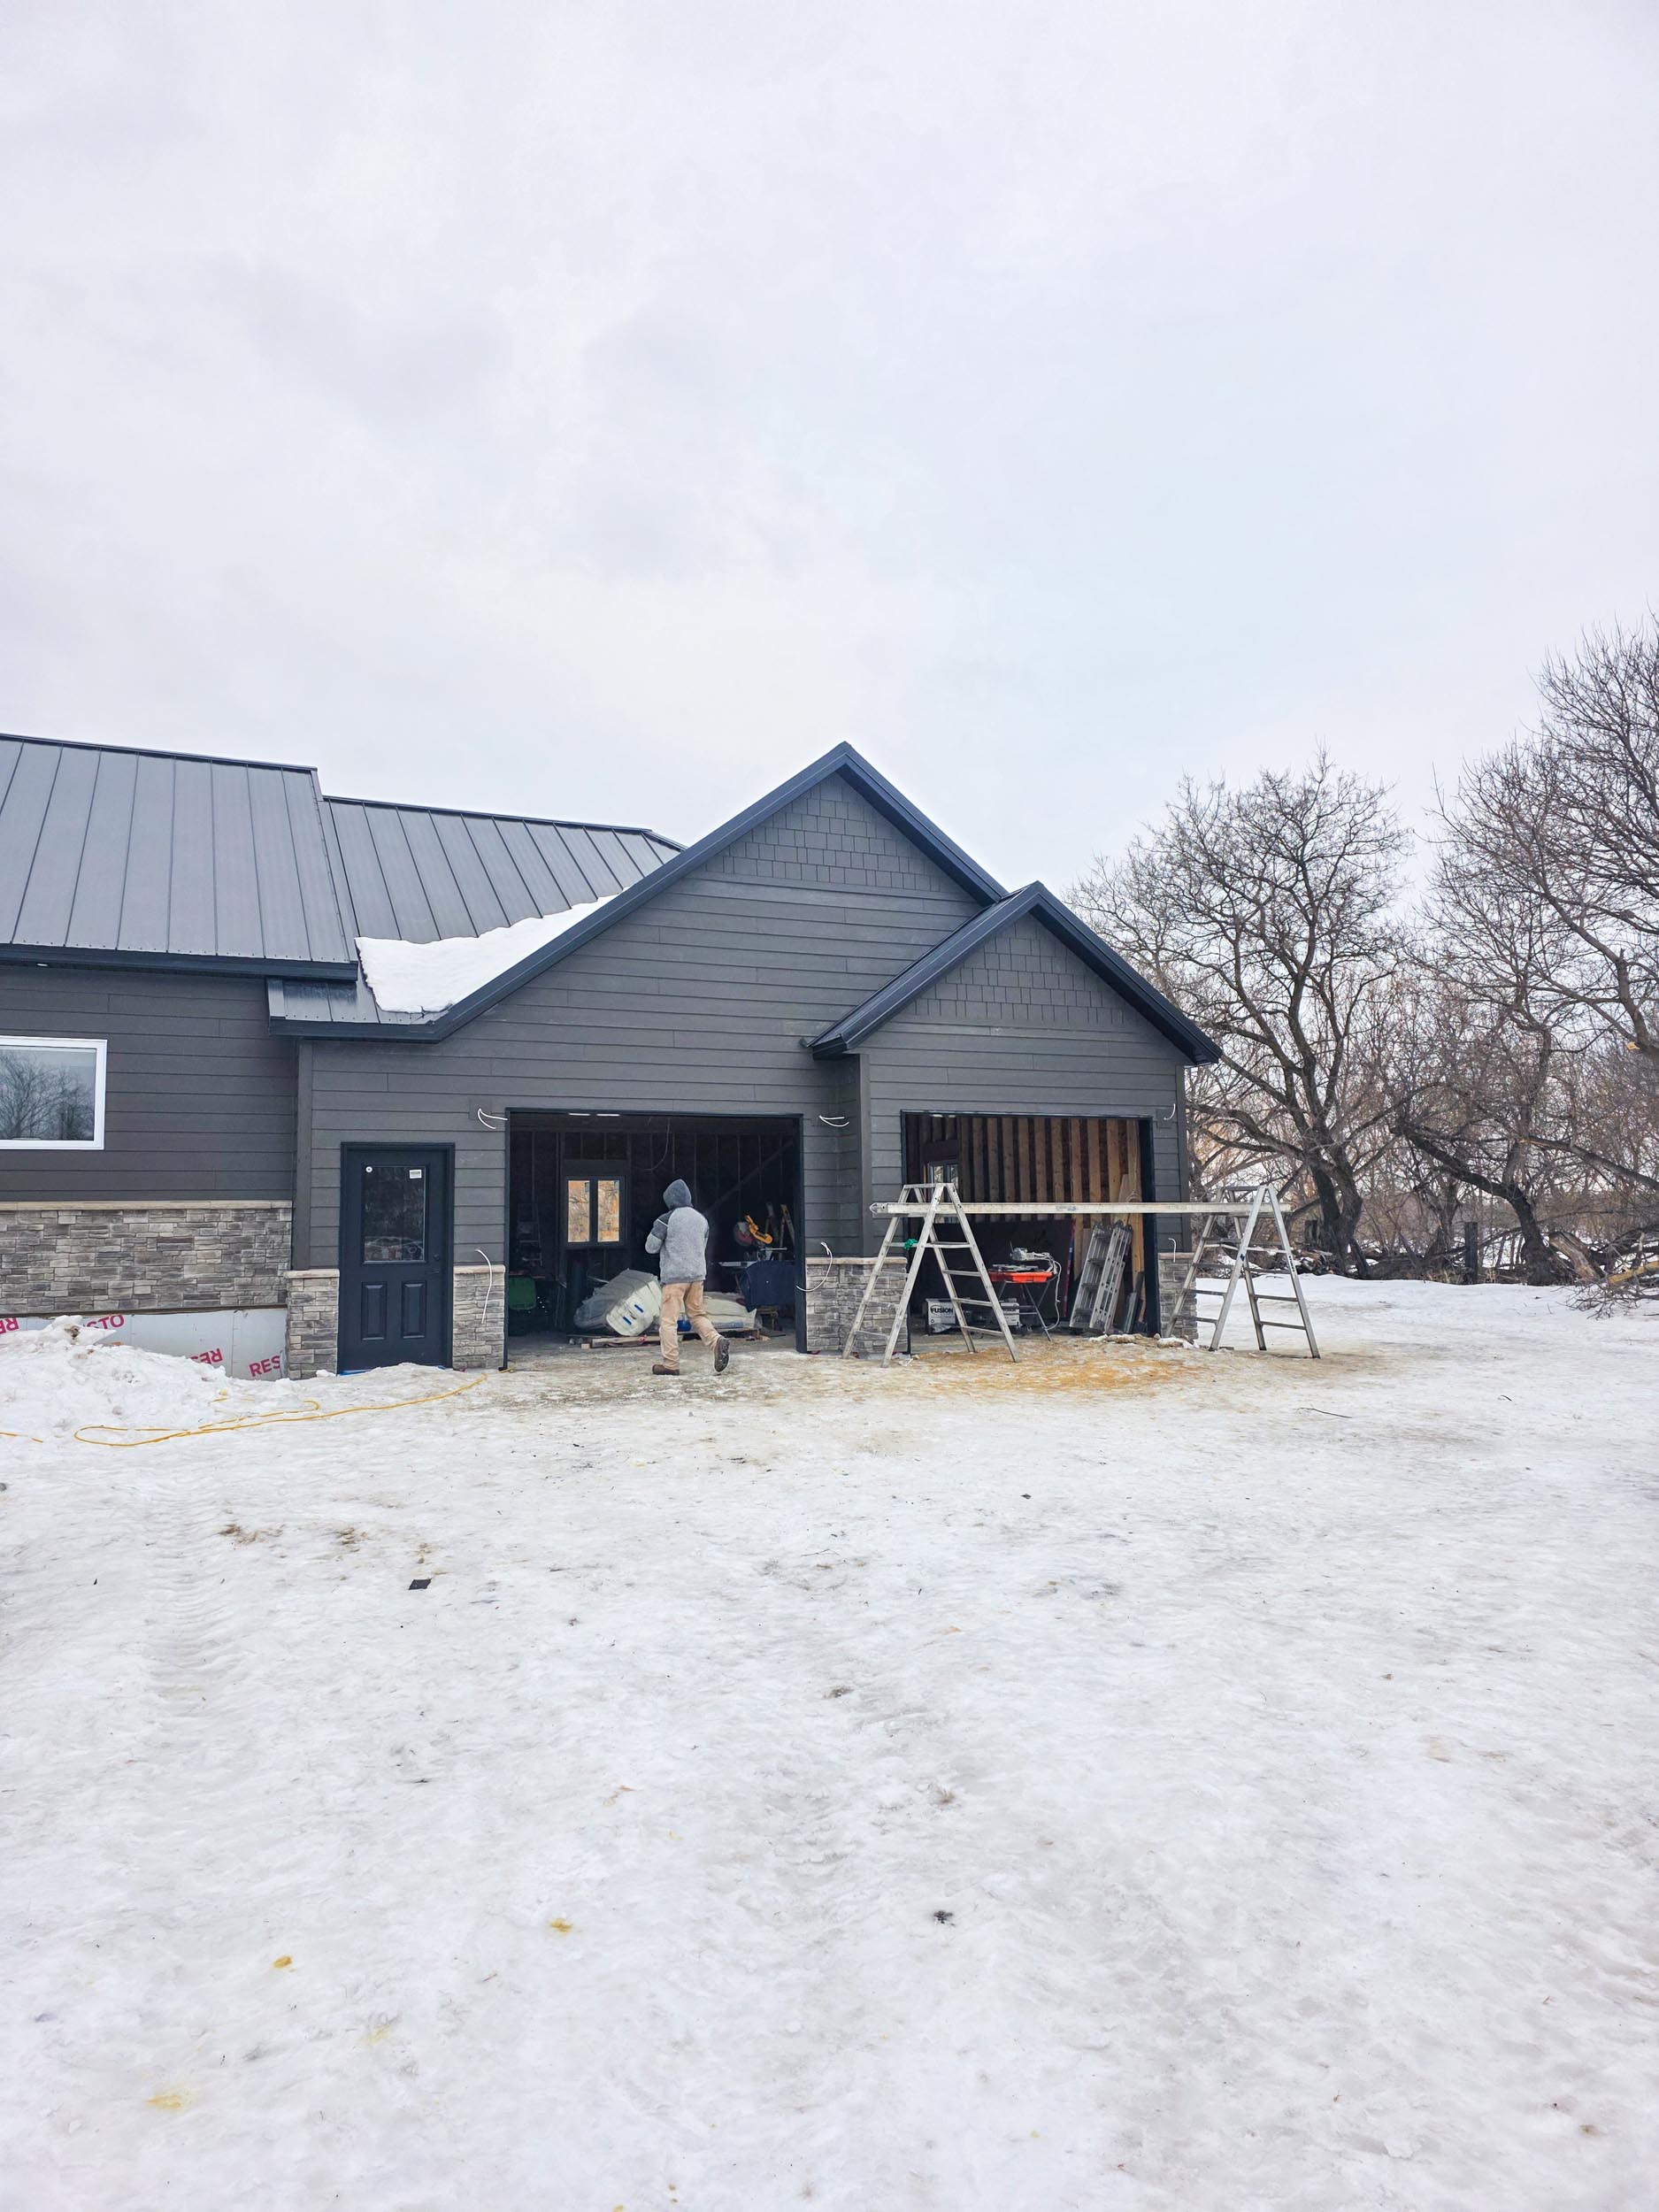
        <p>
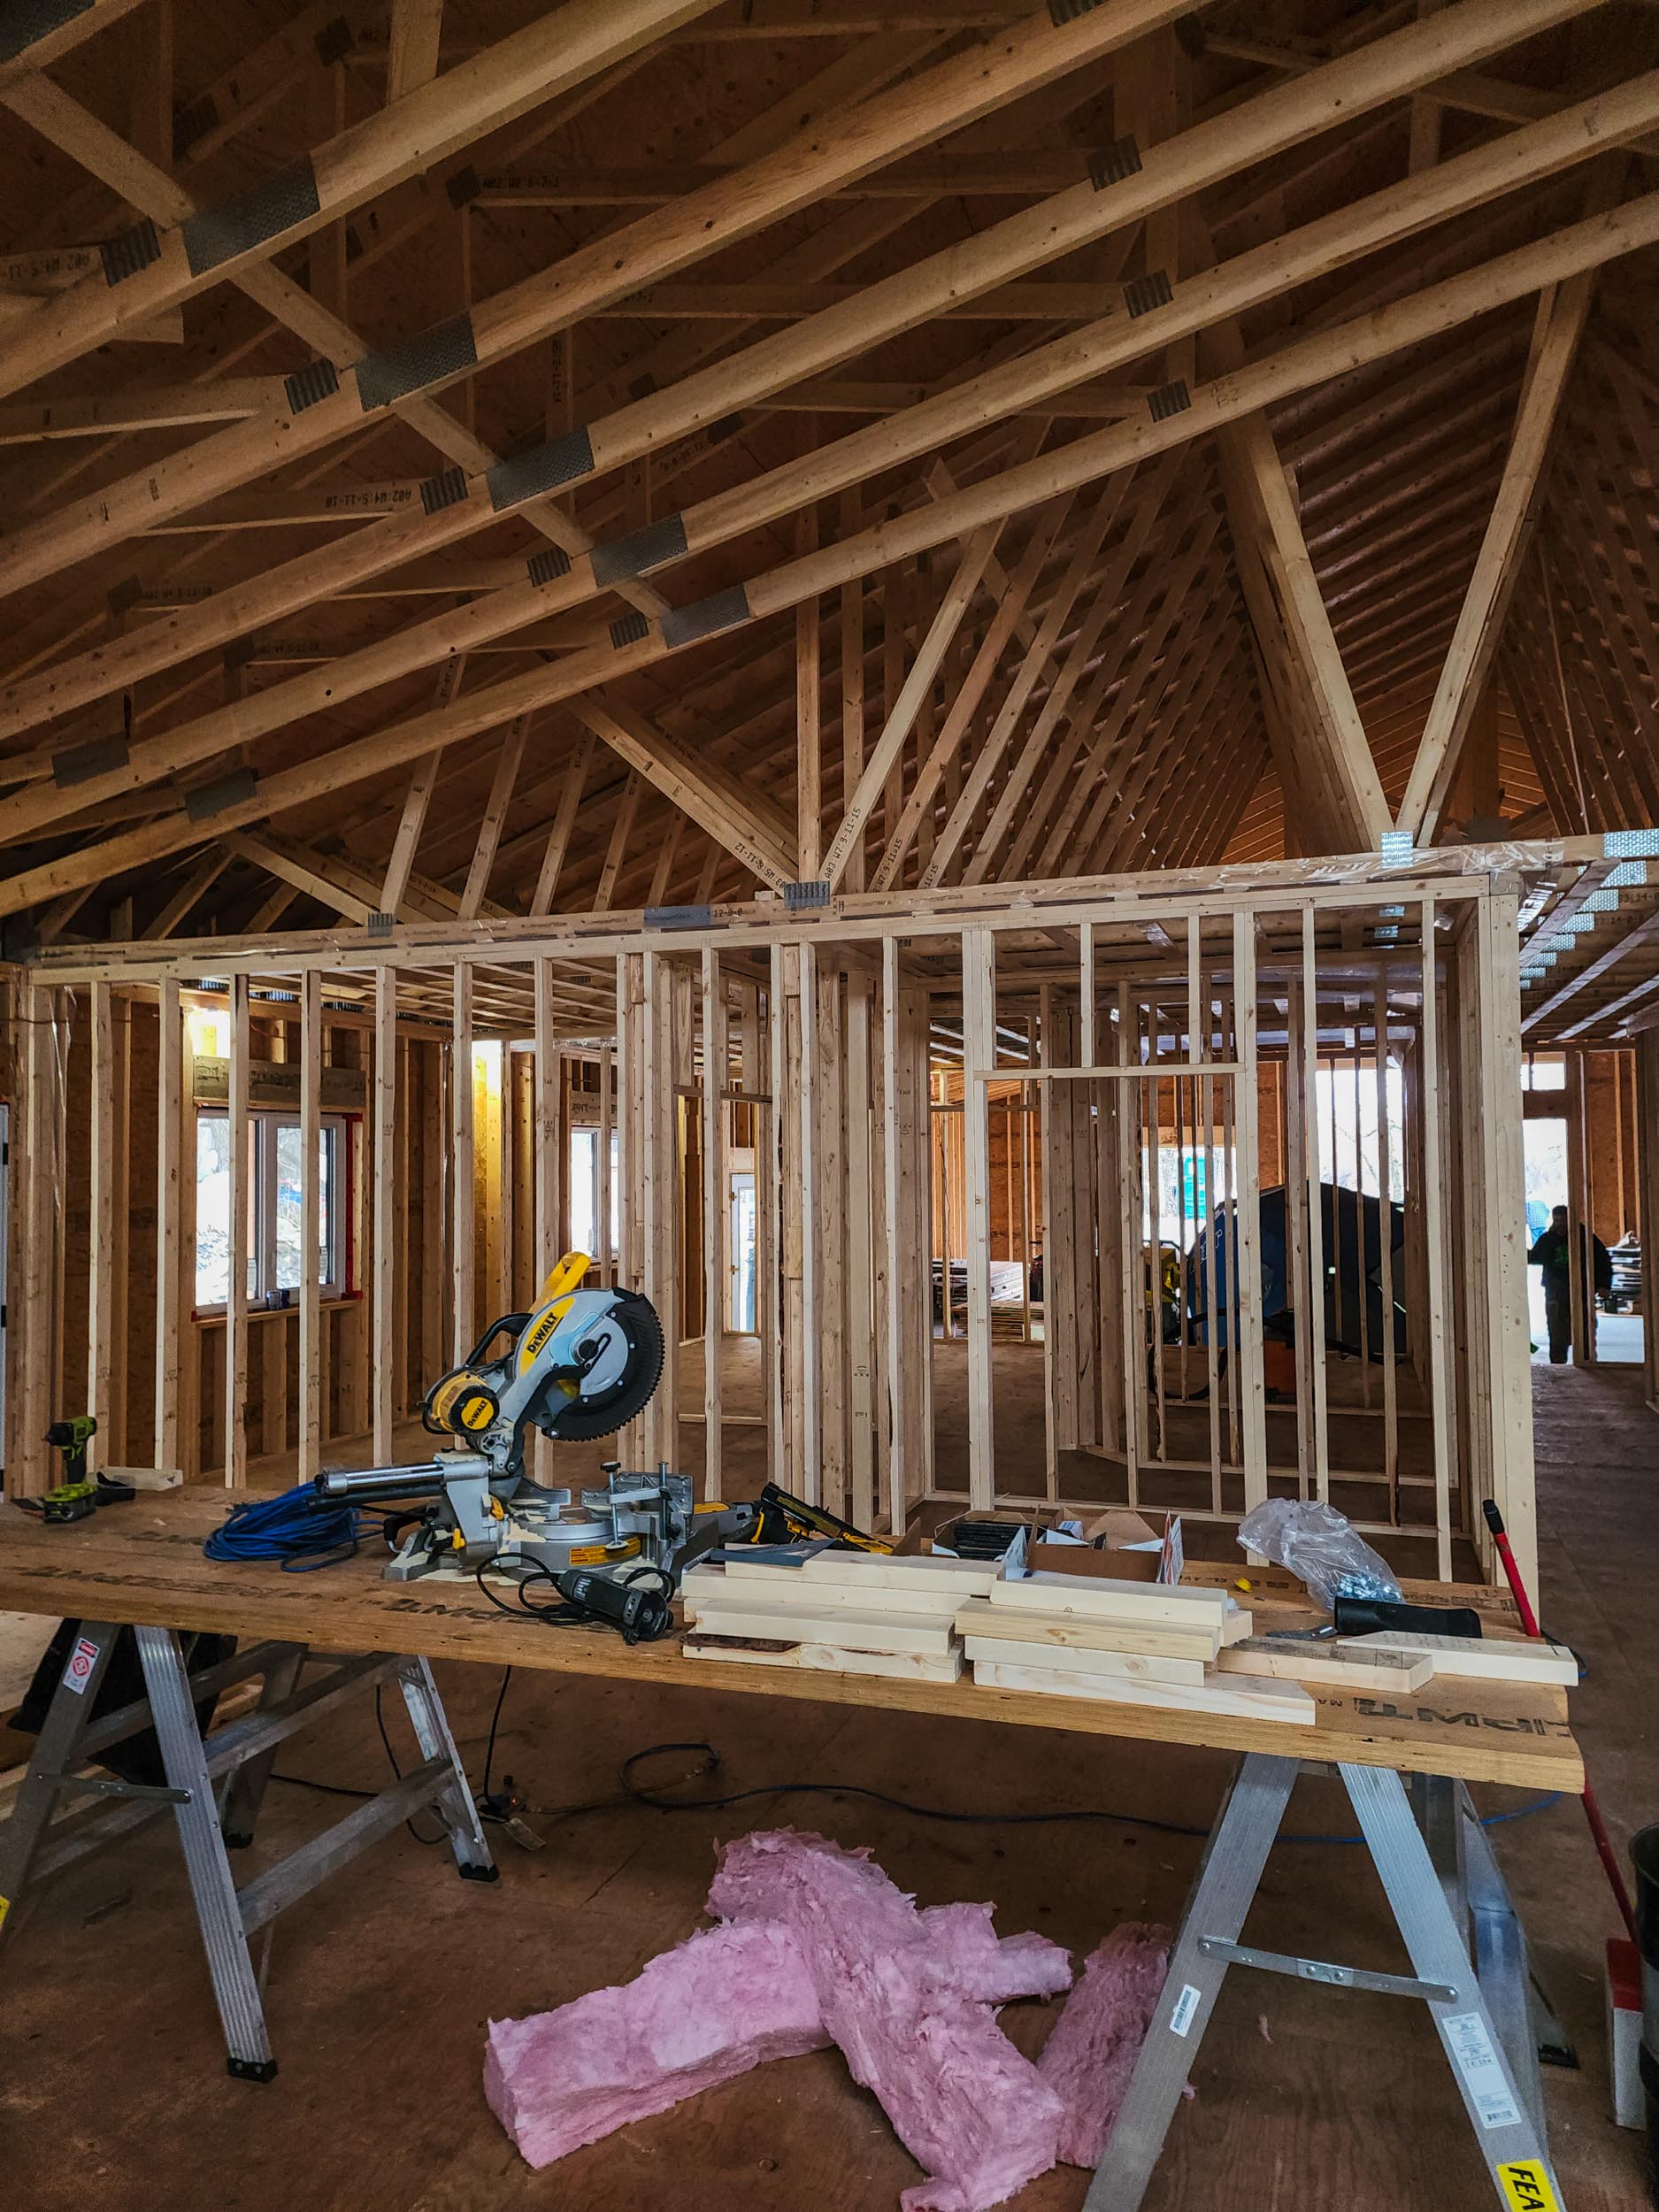
          Once the slab was ready, the garage walls and roof were framed.
          One of the more involved parts of the project was joining the
          new roof into the existing rooflines while keeping the drainage
          and finished appearance clean.
        </p>

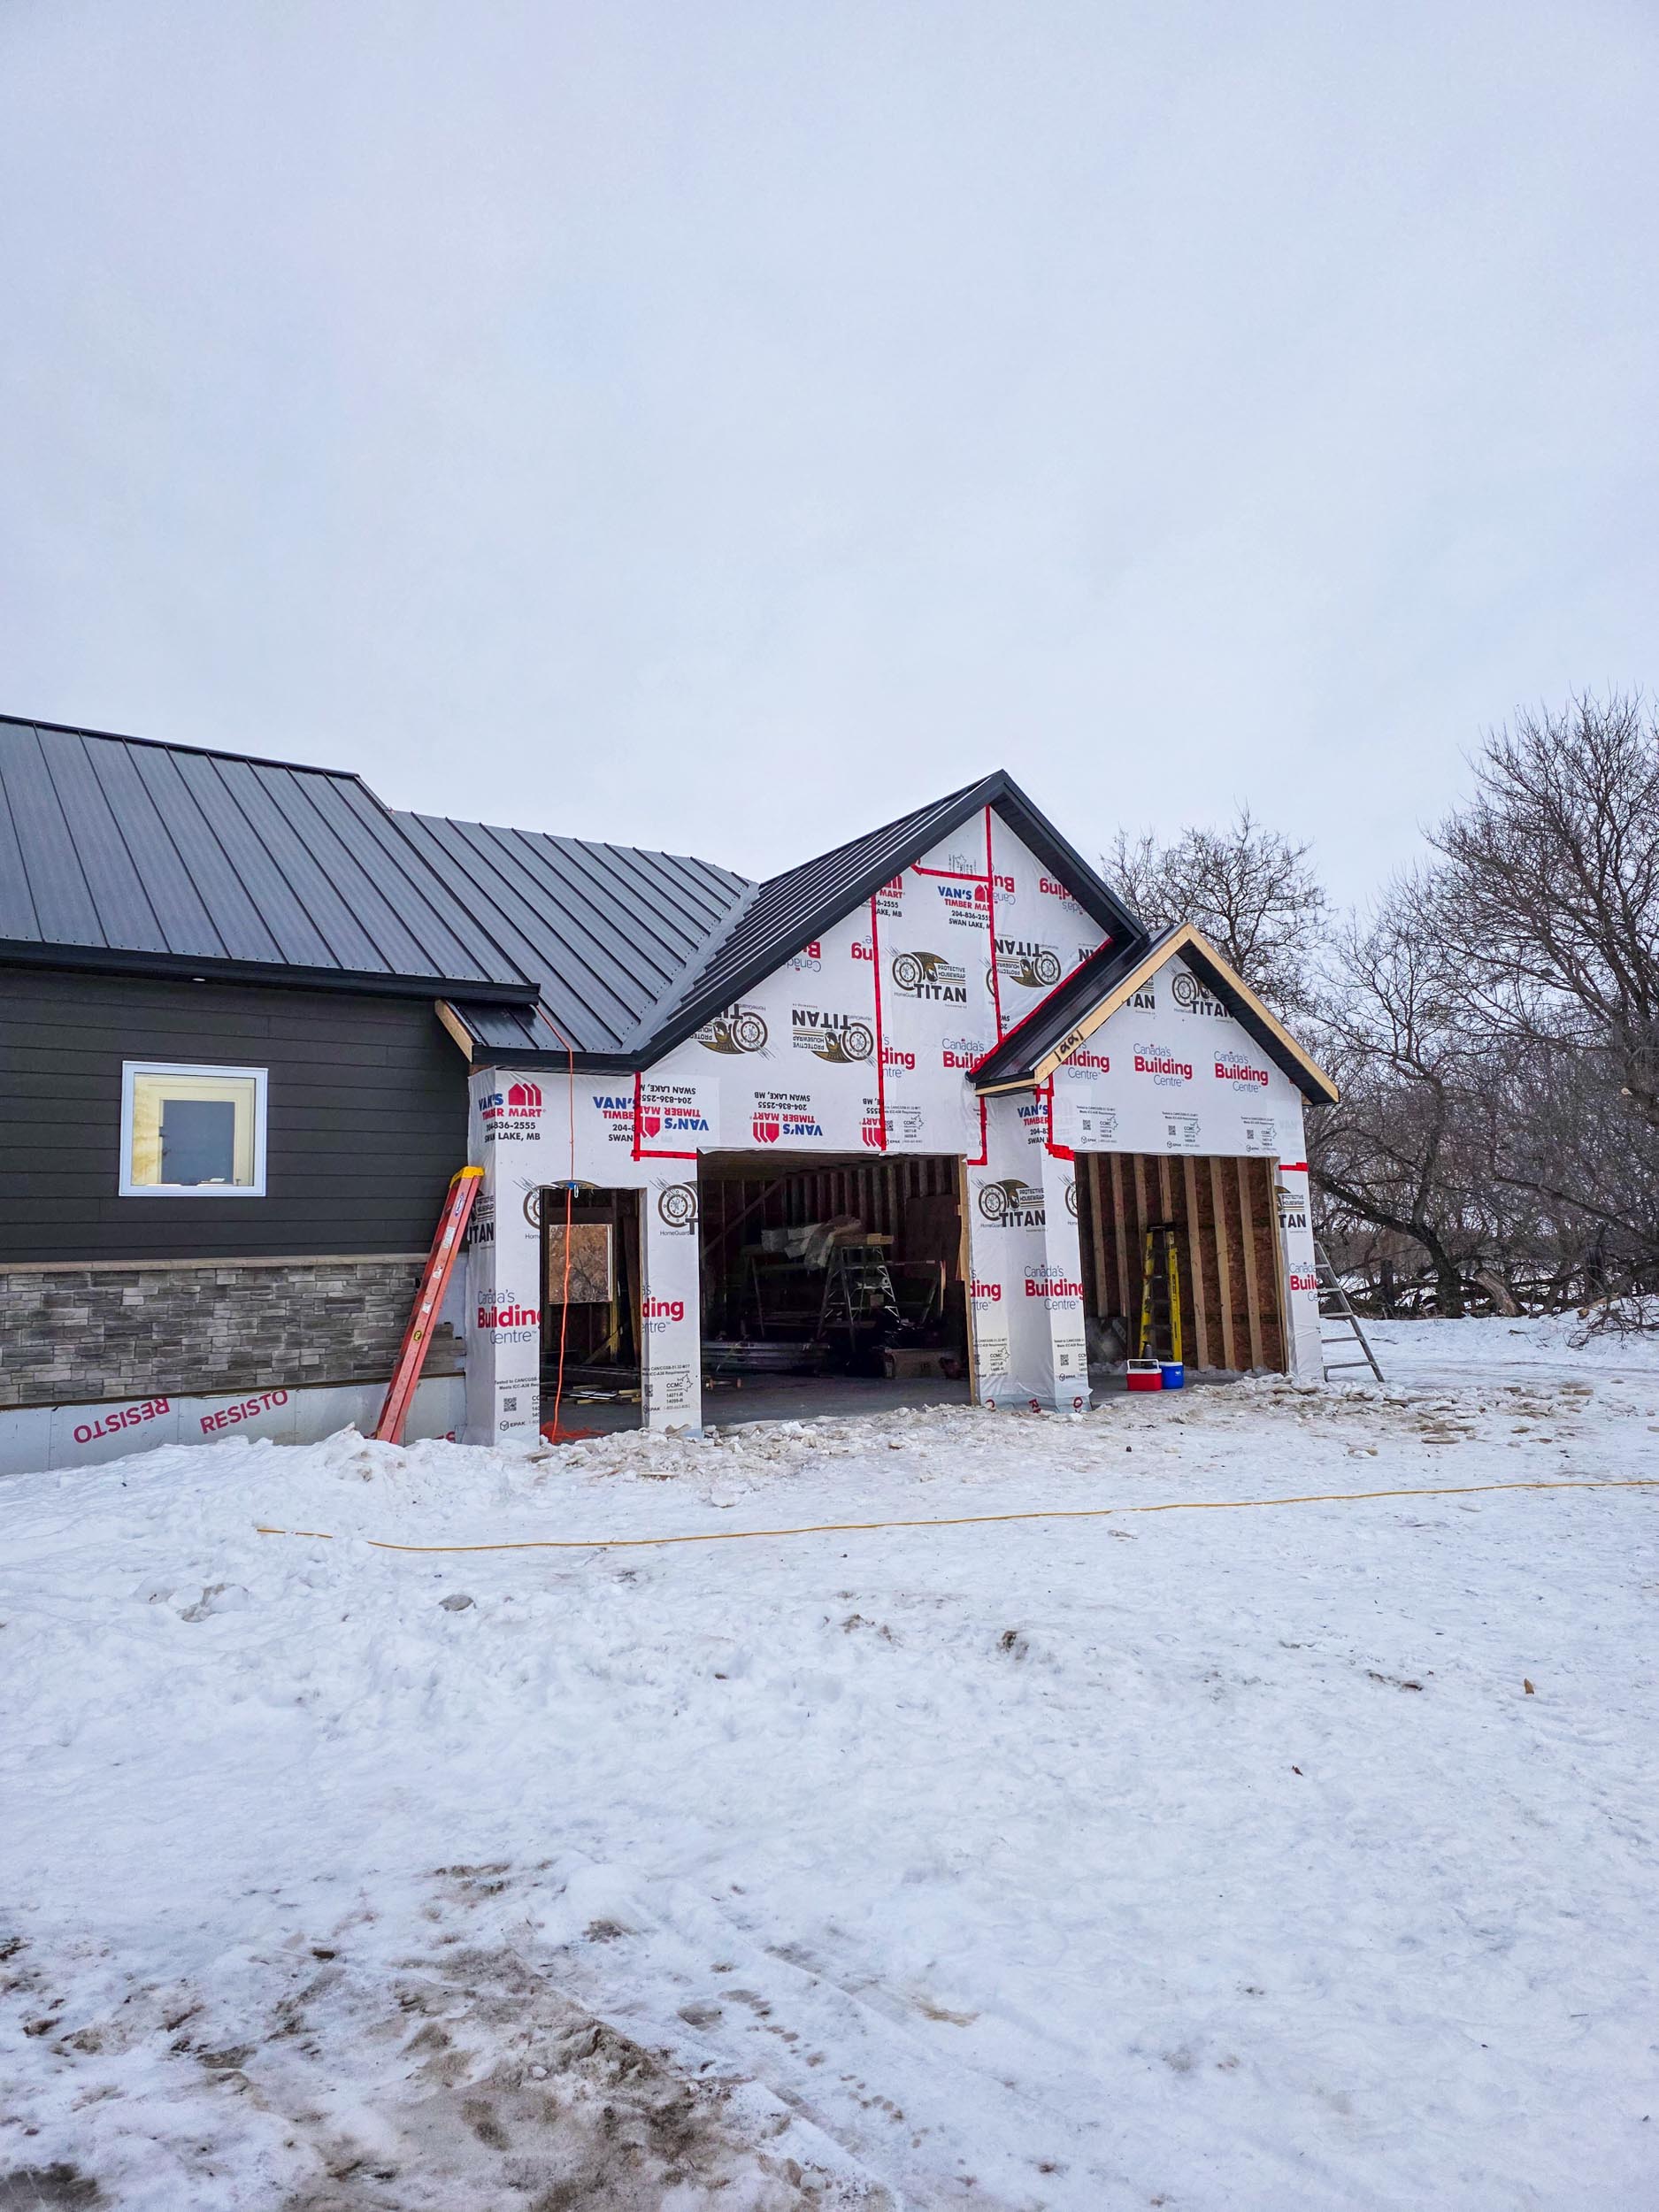
        <p>
          The metal roofing, valleys and flashing all had to work together.
          This is the kind of detail that needs to be sorted out during
          framing rather than left until the roof is almost finished.
        </p>

      </div>

    </div>

  </div>
</section></div>
<div><!-- ======================================================
     PROJECT SECTION 6: EXTERIOR FINISHING
     ====================================================== -->

<section class="go-full-bleed go-section">
  <div class="go-container--wide">

    <div class="go-split">

      <div class="go-split__media">
        <img loading="lazy"           src="./media/posts/11/gallery/4-House-Renovation-54.jpg"
          alt="Completed exterior of a two-bay garage addition"
          loading="lazy"
          width="1400"
          height="1000"
        >
      </div>

      <div class="go-split__content">

        <p class="go-eyebrow">
          Exterior Finishing
        </p>

        <h2>
          Finished to Match the Existing Home
        </h2>

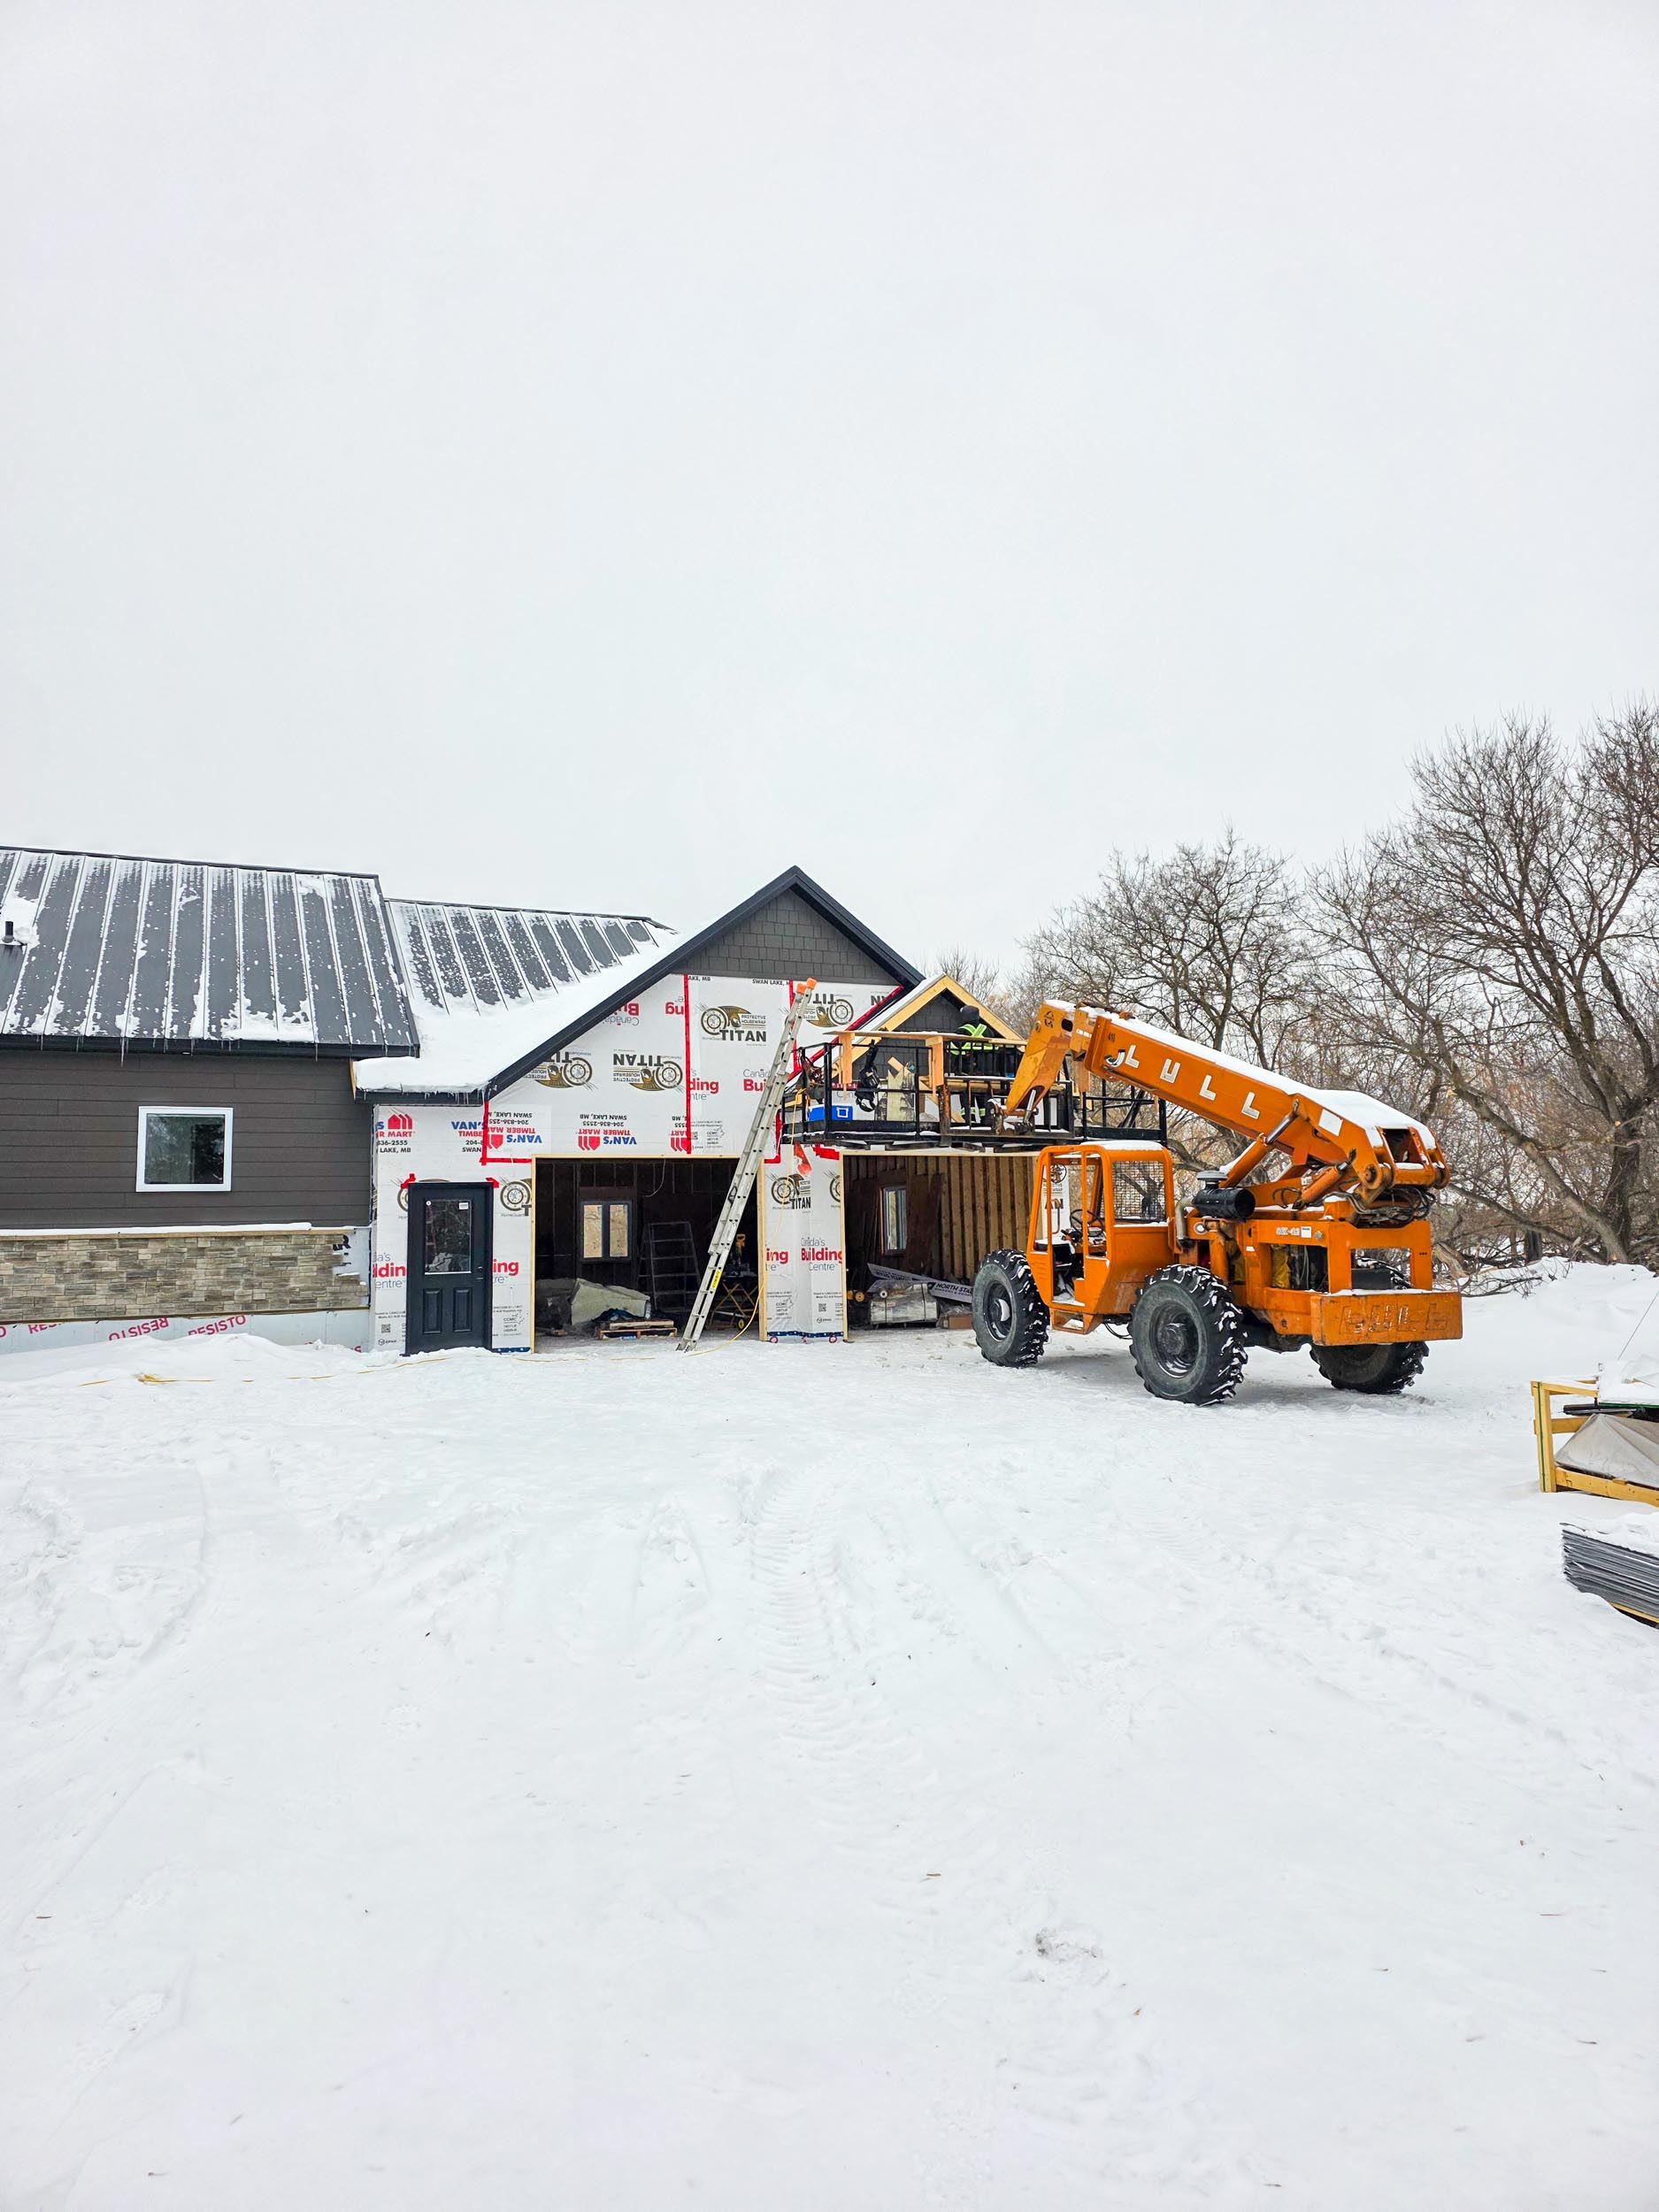
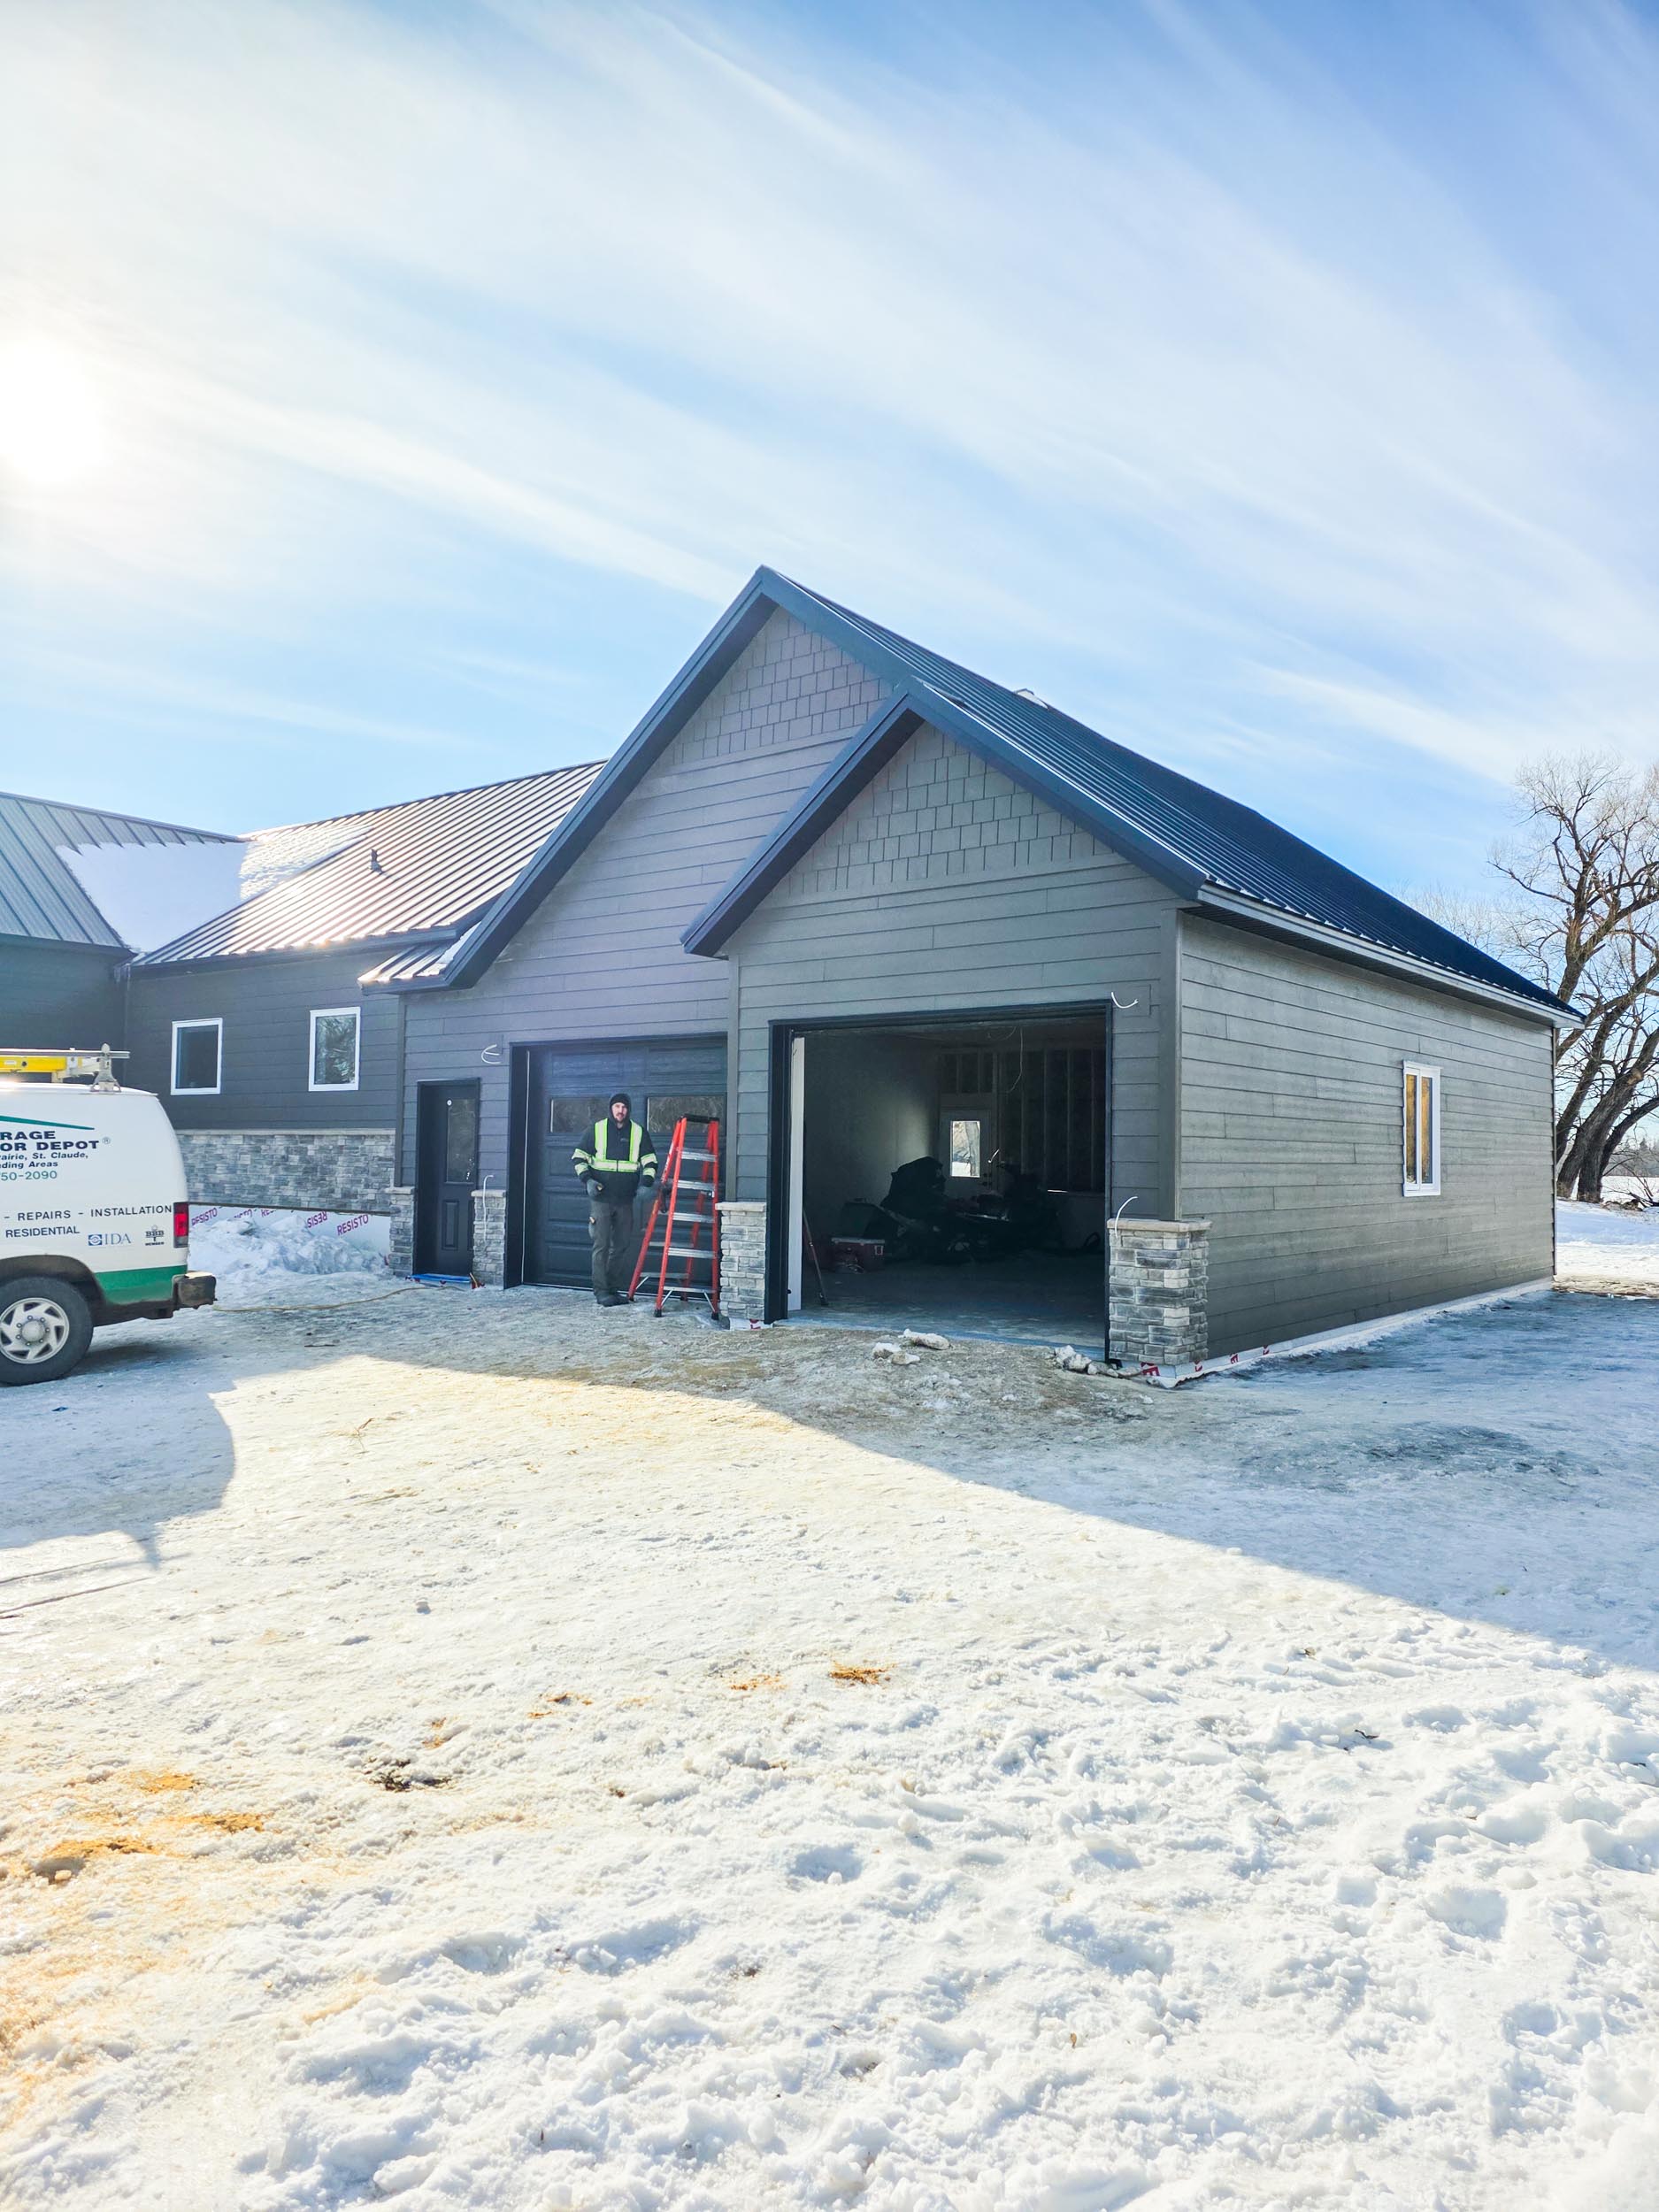
        <p>
          The exterior was finished with matching metal roofing, dark
          siding, trim and stone veneer. The goal was to make the addition
          look like it belonged with the house rather than like a separate
          building added later.
        </p>

        <p>
          Matching the existing materials and roof shapes helped the new
          garage feel like part of the original home while giving the
          owners the additional enclosed space they needed.
        </p>

      </div>

    </div>

  </div>
</section></div>
<div><!-- ======================================================
     PROJECT SECTION 7: PROJECT GALLERY
     ====================================================== -->

<section class="go-full-bleed go-section go-section--alternate">
  <div class="go-container--wide">

    <header class="go-section-heading">

      <p class="go-eyebrow">
        Project Gallery
      </p>

      <h2>
        Garage Addition From Excavation to Exterior Finishing
      </h2>

    </header>

    <div class="go-project-gallery">

      <figure class="go-project-gallery__item">
        <img loading="lazy"           src="./media/posts/11/gallery/4-House-Renovation-6.jpg"
          alt="Excavation for an attached garage addition"
          loading="lazy"
          width="1200"
          height="900"
        >

        <figcaption>
          Garage footprint excavated and laid out beside the existing home.
        </figcaption>
      </figure>

      <figure class="go-project-gallery__item">
        <img loading="lazy"           src="./media/posts/11/gallery/4-House-Renovation-7.jpg"
          alt="Garage addition foundation under construction"
          loading="lazy"
          width="1200"
          height="900"
        >

        <figcaption>
          Foundation work completed before the floor base was prepared.
        </figcaption>
      </figure>

      <figure class="go-project-gallery__item">
        <img loading="lazy"           src="./media/posts/11/gallery/4-House-Renovation-9.jpg"
          alt="Compacted base inside a garage addition foundation"
          loading="lazy"
          width="1200"
          height="900"
        >

        <figcaption>
          Base material placed and compacted ahead of the slab work.
        </figcaption>
      </figure>

      <figure class="go-project-gallery__item">
        <img loading="lazy"           src="./media/posts/11/gallery/4-House-Renovation-12.jpg"
          alt="In-floor heating lines and reinforcement for a garage slab"
          loading="lazy"
          width="1200"
          height="900"
        >

        <figcaption>
          Insulation, reinforcing steel and in-floor heating prepared before the pour.
        </figcaption>
      </figure>

      <figure class="go-project-gallery__item">
        <img loading="lazy"           src="./media/posts/11/gallery/4-House-Renovation-19.jpg"
          alt="Two-bay garage addition framed beside an existing house"
          loading="lazy"
          width="1200"
          height="900"
        >

        <figcaption>
          Wall and roof framing underway on the two-bay garage.
        </figcaption>
      </figure>

      <figure class="go-project-gallery__item">
        <img loading="lazy"           src="./media/posts/11/gallery/4-House-Renovation-43.jpg"
          alt="Metal roof valleys on an attached garage addition"
          loading="lazy"
          width="1200"
          height="900"
        >

        <figcaption>
          New rooflines tied into the existing metal roof.
        </figcaption>
      </figure>

      <figure class="go-project-gallery__item">
        <img loading="lazy"           src="./media/posts/11/gallery/4-House-Renovation-51.jpg"
          alt="Exterior siding being installed on a garage addition"
          loading="lazy"
          width="1200"
          height="900"
        >

        <figcaption>
          Siding and trim installed to match the existing home.
        </figcaption>
      </figure>

      <figure class="go-project-gallery__item">
        <img loading="lazy"           src="./media/posts/11/gallery/4-House-Renovation-55.jpg"
          alt="Completed attached two-bay garage near Notre-Dame-de-Lourdes"
          loading="lazy"
          width="1200"
          height="900"
        >

        <figcaption>
          Completed garage addition ready for the final garage doors.
        </figcaption>
      </figure>

    </div>

  </div>
</section></div>
<div><!-- ======================================================
     PROJECT SECTION 8: PLANNING A SIMILAR PROJECT
     ====================================================== -->

<section class="go-full-bleed go-section go-section--dark">
  <div class="go-container">

    <div class="go-reading-width">

      <p class="go-eyebrow">
        Planning Advice
      </p>

      <h2>
        Planning an Addition to an Existing Home?
      </h2>

      <p>
        The difficult part of an addition is usually not building the new
        section. It is making the new foundation, floor height, roofline
        and exterior finishes work properly with what is already there.
      </p>

      <p>
        Those connections need to be considered before the excavation
        starts. If the heights or roof layout are off, the problem follows
        the project all the way through framing and finishing.
      </p>

      <p>
        We prefer to work through those details early so the addition
        functions properly and looks like it belongs with the original house.
      </p>

    </div>
    <div class="go-actions">

        <a
          class="go-button go-button--light go-button--large"
          href="/request-a-quote/"
        >
          Let us know about your project
        </a>
        

      </div>


  </div>
</section></div>
<div><!-- ======================================================
     PROJECT SECTION 9: FINAL CALL TO ACTION
     ====================================================== -->

<section class="go-full-bleed go-section">
  <div class="go-container">

    <div class="go-project-cta">

      <div class="go-project-cta__content">

        <p class="go-eyebrow">
          Start a Project
        </p>

        <h2>
          Planning a Home or Garage Addition?
        </h2>

        <p>
          Tell us what you want to add, where the property is located
          and how the new space needs to connect with the existing home.
          Grey Owl Construction can review the project and discuss what
          would be involved.
        </p>

      </div>

      <div class="go-actions">

       <a
          class="go-button go-button--primary go-button--large"
          href="/request-a-quote/"
        >
          Book a Quote
        </a>

        <a
          class="go-button go-button--secondary go-button--large"
          href="tel:+12042420822"
        >
          Call Grey Owl
        </a>


      </div>

    </div>

  </div>
</section></div>
            ]]>
        </content>
    </entry>
    <entry>
        <title>ICF Foundation and Basement Pour Near Altamont, Manitoba</title>
        <author>
            <name>Miguel Talbot</name>
        </author>
        <link href="https://greyowlconstruction.ca/icf-foundation-and-basement-pour-near-altamont-manitoba.html"/>
        <id>https://greyowlconstruction.ca/icf-foundation-and-basement-pour-near-altamont-manitoba.html</id>
        <media:content url="https://greyowlconstruction.ca/media/posts/10/Foundation-Pour-51.jpg" medium="image" />
            <category term="concrete-and-foundations"/>
            <category term="Projects"/>

        <updated>2026-07-01T14:37:58-07:00</updated>
            <summary type="html">
                <![CDATA[
                        <img src="https://greyowlconstruction.ca/media/posts/10/Foundation-Pour-51.jpg" alt="" />
                    Concrete and Foundation Work A complete ICF foundation and basement built for a new home, from excavation and footings through to the finished concrete floor. Project Overview Grey Owl Construction completed the foundation and basement work for a new home near Altamont. The job started&hellip;
                ]]>
            </summary>
        <content type="html">
            <![CDATA[
                    <p><img src="https://greyowlconstruction.ca/media/posts/10/Foundation-Pour-51.jpg" class="type:primaryImage" alt="" /></p>
                <div><section class="go-project-hero">

  <div class="go-project-hero__image">
    <img loading="lazy"       src="./media/posts/10/gallery/Foundation-Pour-50.jpg"
      alt="Completed ICF foundation and basement near Altamont, Manitoba"
      width="1800"
      height="1100"
    >
  </div>

  <div class="go-project-hero__content">

    <p class="go-eyebrow">
      Concrete and Foundation Work
    </p>

    <h1>
      ICF Foundation and Basement Pour Near Altamont, Manitoba
    </h1>

    <p>
      A complete ICF foundation and basement built for a new home,
      from excavation and footings through to the finished concrete floor.
    </p>

  </div>

</section></div>
<div><section class="go-full-bleed go-section">
  <div class="go-container--wide">

    <div class="go-project-overview">

      <div class="go-project-overview__content">

        <p class="go-eyebrow">
          Project Overview
        </p>

        <h2>
          A Complete ICF Basement Ready for the Home Build
        </h2>

        <p>
          Grey Owl Construction completed the foundation and basement
          work for a new home near Altamont. The job started with
          excavation and layout, followed by the footings, ICF walls,
          reinforcement, service openings and basement floor preparation.
        </p>

        <p>
          Once the walls were poured and the under-slab work was in
          place, the basement floor was poured and finished. The result
          was a complete concrete foundation ready for the next stage
          of the house build.
        </p>

      </div>

      <aside class="go-project-details">

        <p class="go-eyebrow">
          Project Details
        </p>

        <dl>

          <div>
            <dt>Location</dt>
            <dd>Near Altamont, Manitoba</dd>
          </div>

          <div>
            <dt>Project Type</dt>
            <dd>Concrete and Foundation Work</dd>
          </div>

          <div>
            <dt>Scope</dt>
            <dd>Excavation, Footings, ICF Foundation and Basement Slab</dd>
          </div>

          <div>
            <dt>Completed</dt>
            <dd>2025</dd>
          </div>

        </dl>

      </aside>

    </div>

  </div>
</section></div>
<div><section class="go-full-bleed go-section go-section--alternate">
  <div class="go-container">

    <div class="go-reading-width">

      <p class="go-eyebrow">
        What Was Built
      </p>

      <h2>
        Foundation Work From Excavation to Finished Floor
      </h2>

      <p>
        Grey Owl Construction handled the major foundation stages needed
        to take the site from an open excavation to a complete ICF
        basement ready for framing.
      </p>

      <ul class="go-built-points">

        <li>Excavation and building layout</li>

        <li>Formed and poured concrete footings</li>

        <li>ICF foundation wall construction</li>

        <li>Reinforcing steel and wall bracing</li>

        <li>Window and service openings</li>

        <li>Under-slab insulation and service preparation</li>

        <li>Basement floor reinforcement</li>

        <li>Poured and finished concrete basement slab</li>

      </ul>

    </div>

  </div>
</section></div>
<div><section class="go-full-bleed go-section">
  <div class="go-container--wide">

    <div class="go-split">

      <div class="go-split__media">
        <img loading="lazy"           src="./media/posts/10/gallery/Foundation-Pour-3.jpg"
          alt="Excavation underway for a new home foundation near Altamont"
          loading="lazy"
          width="1400"
          height="1000"
        >
      </div>

      <div class="go-split__content">

        <p class="go-eyebrow">
          Excavation and Footings
        </p>

        <h2>
          Getting the Layout Right Before the Concrete Arrived
        </h2>

        <p>
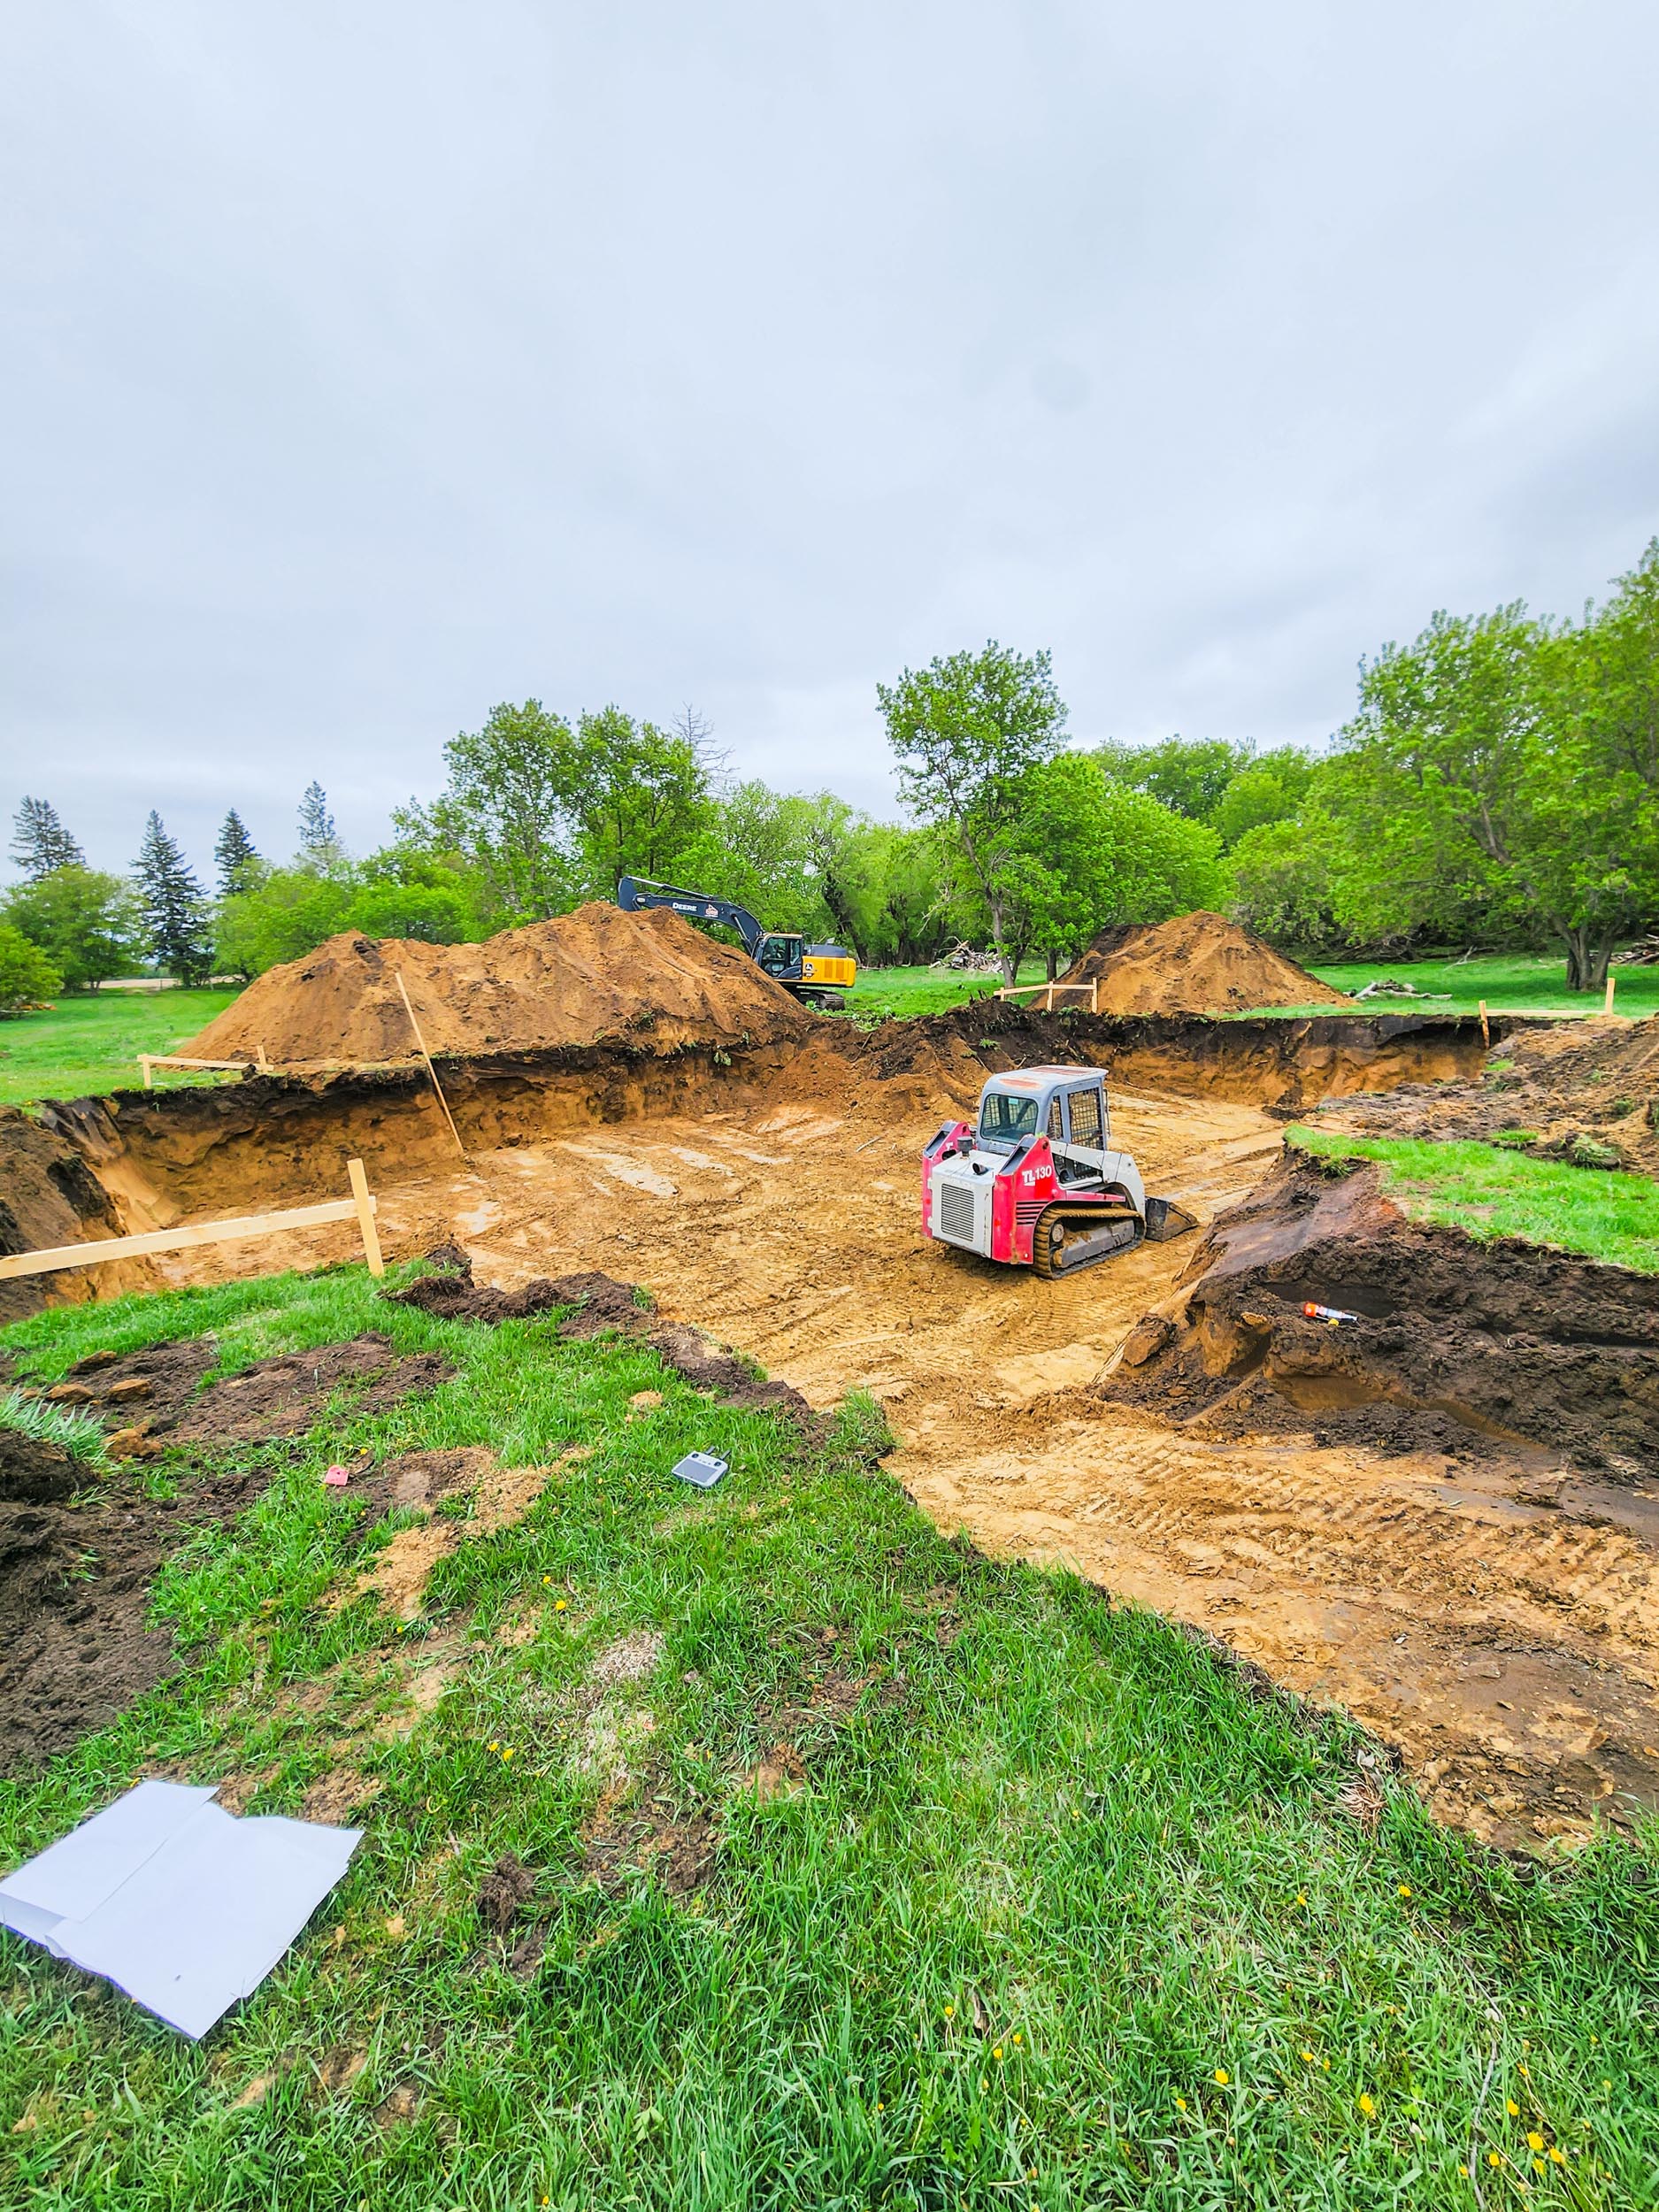
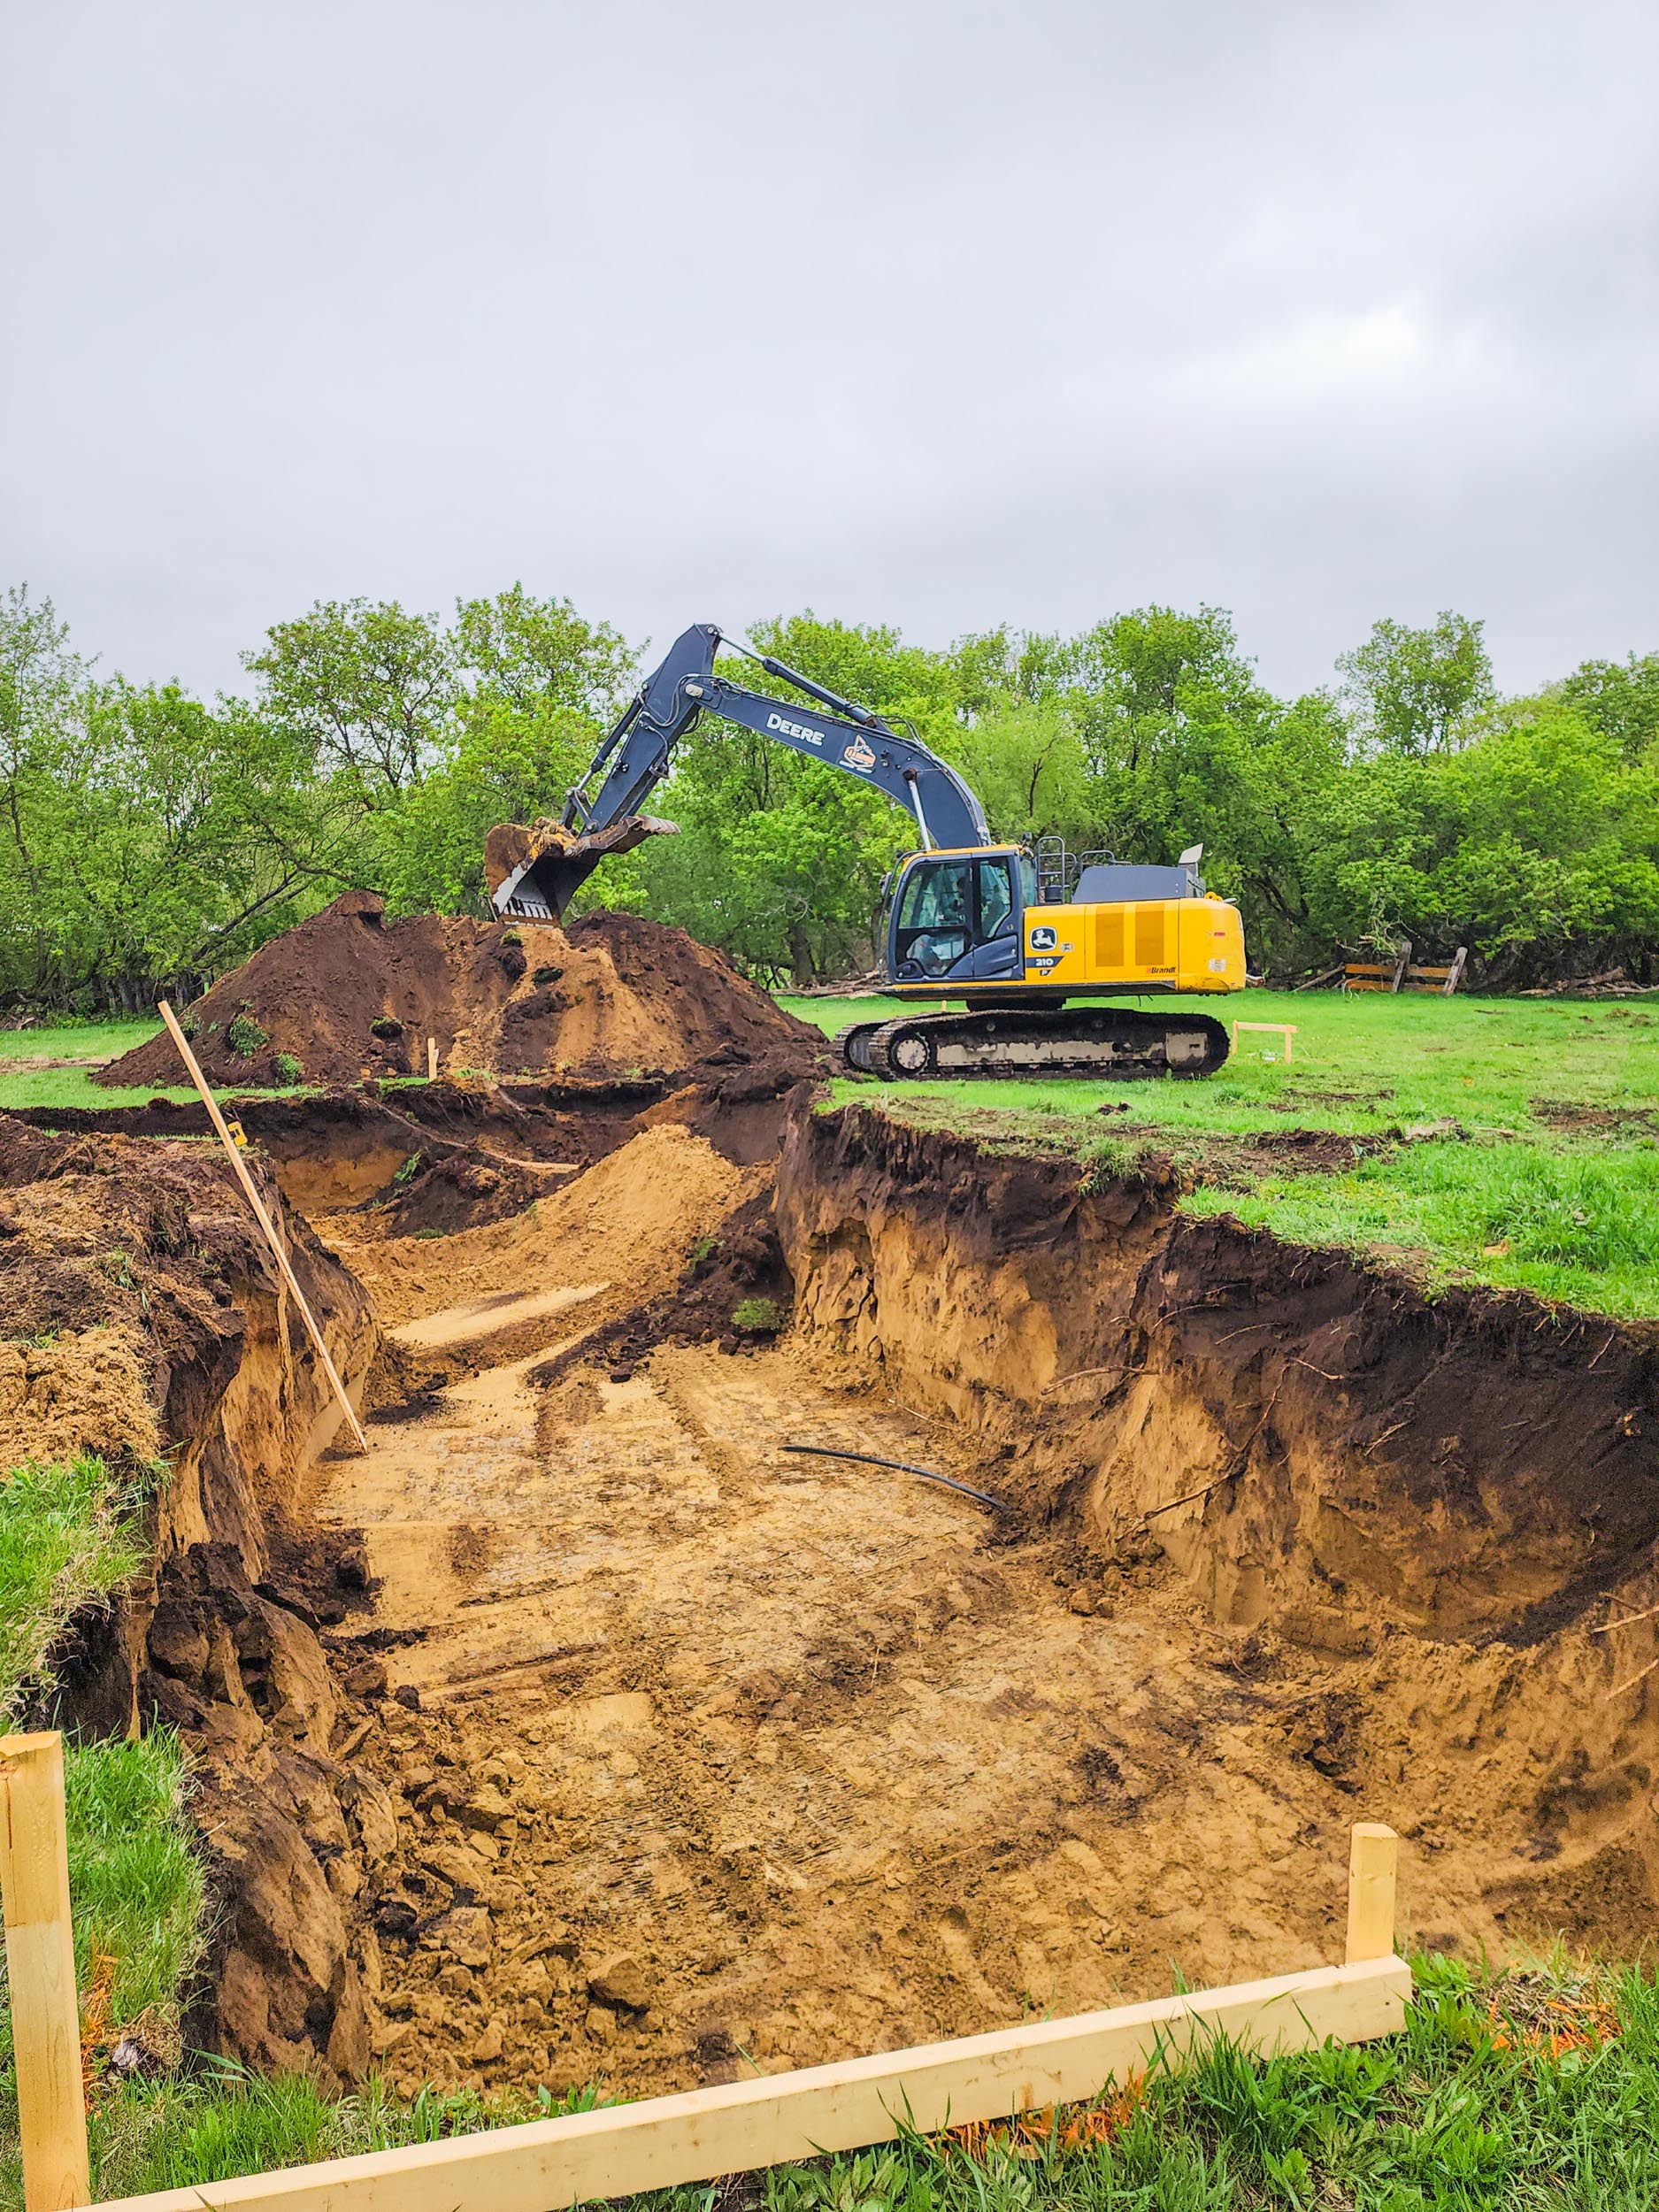
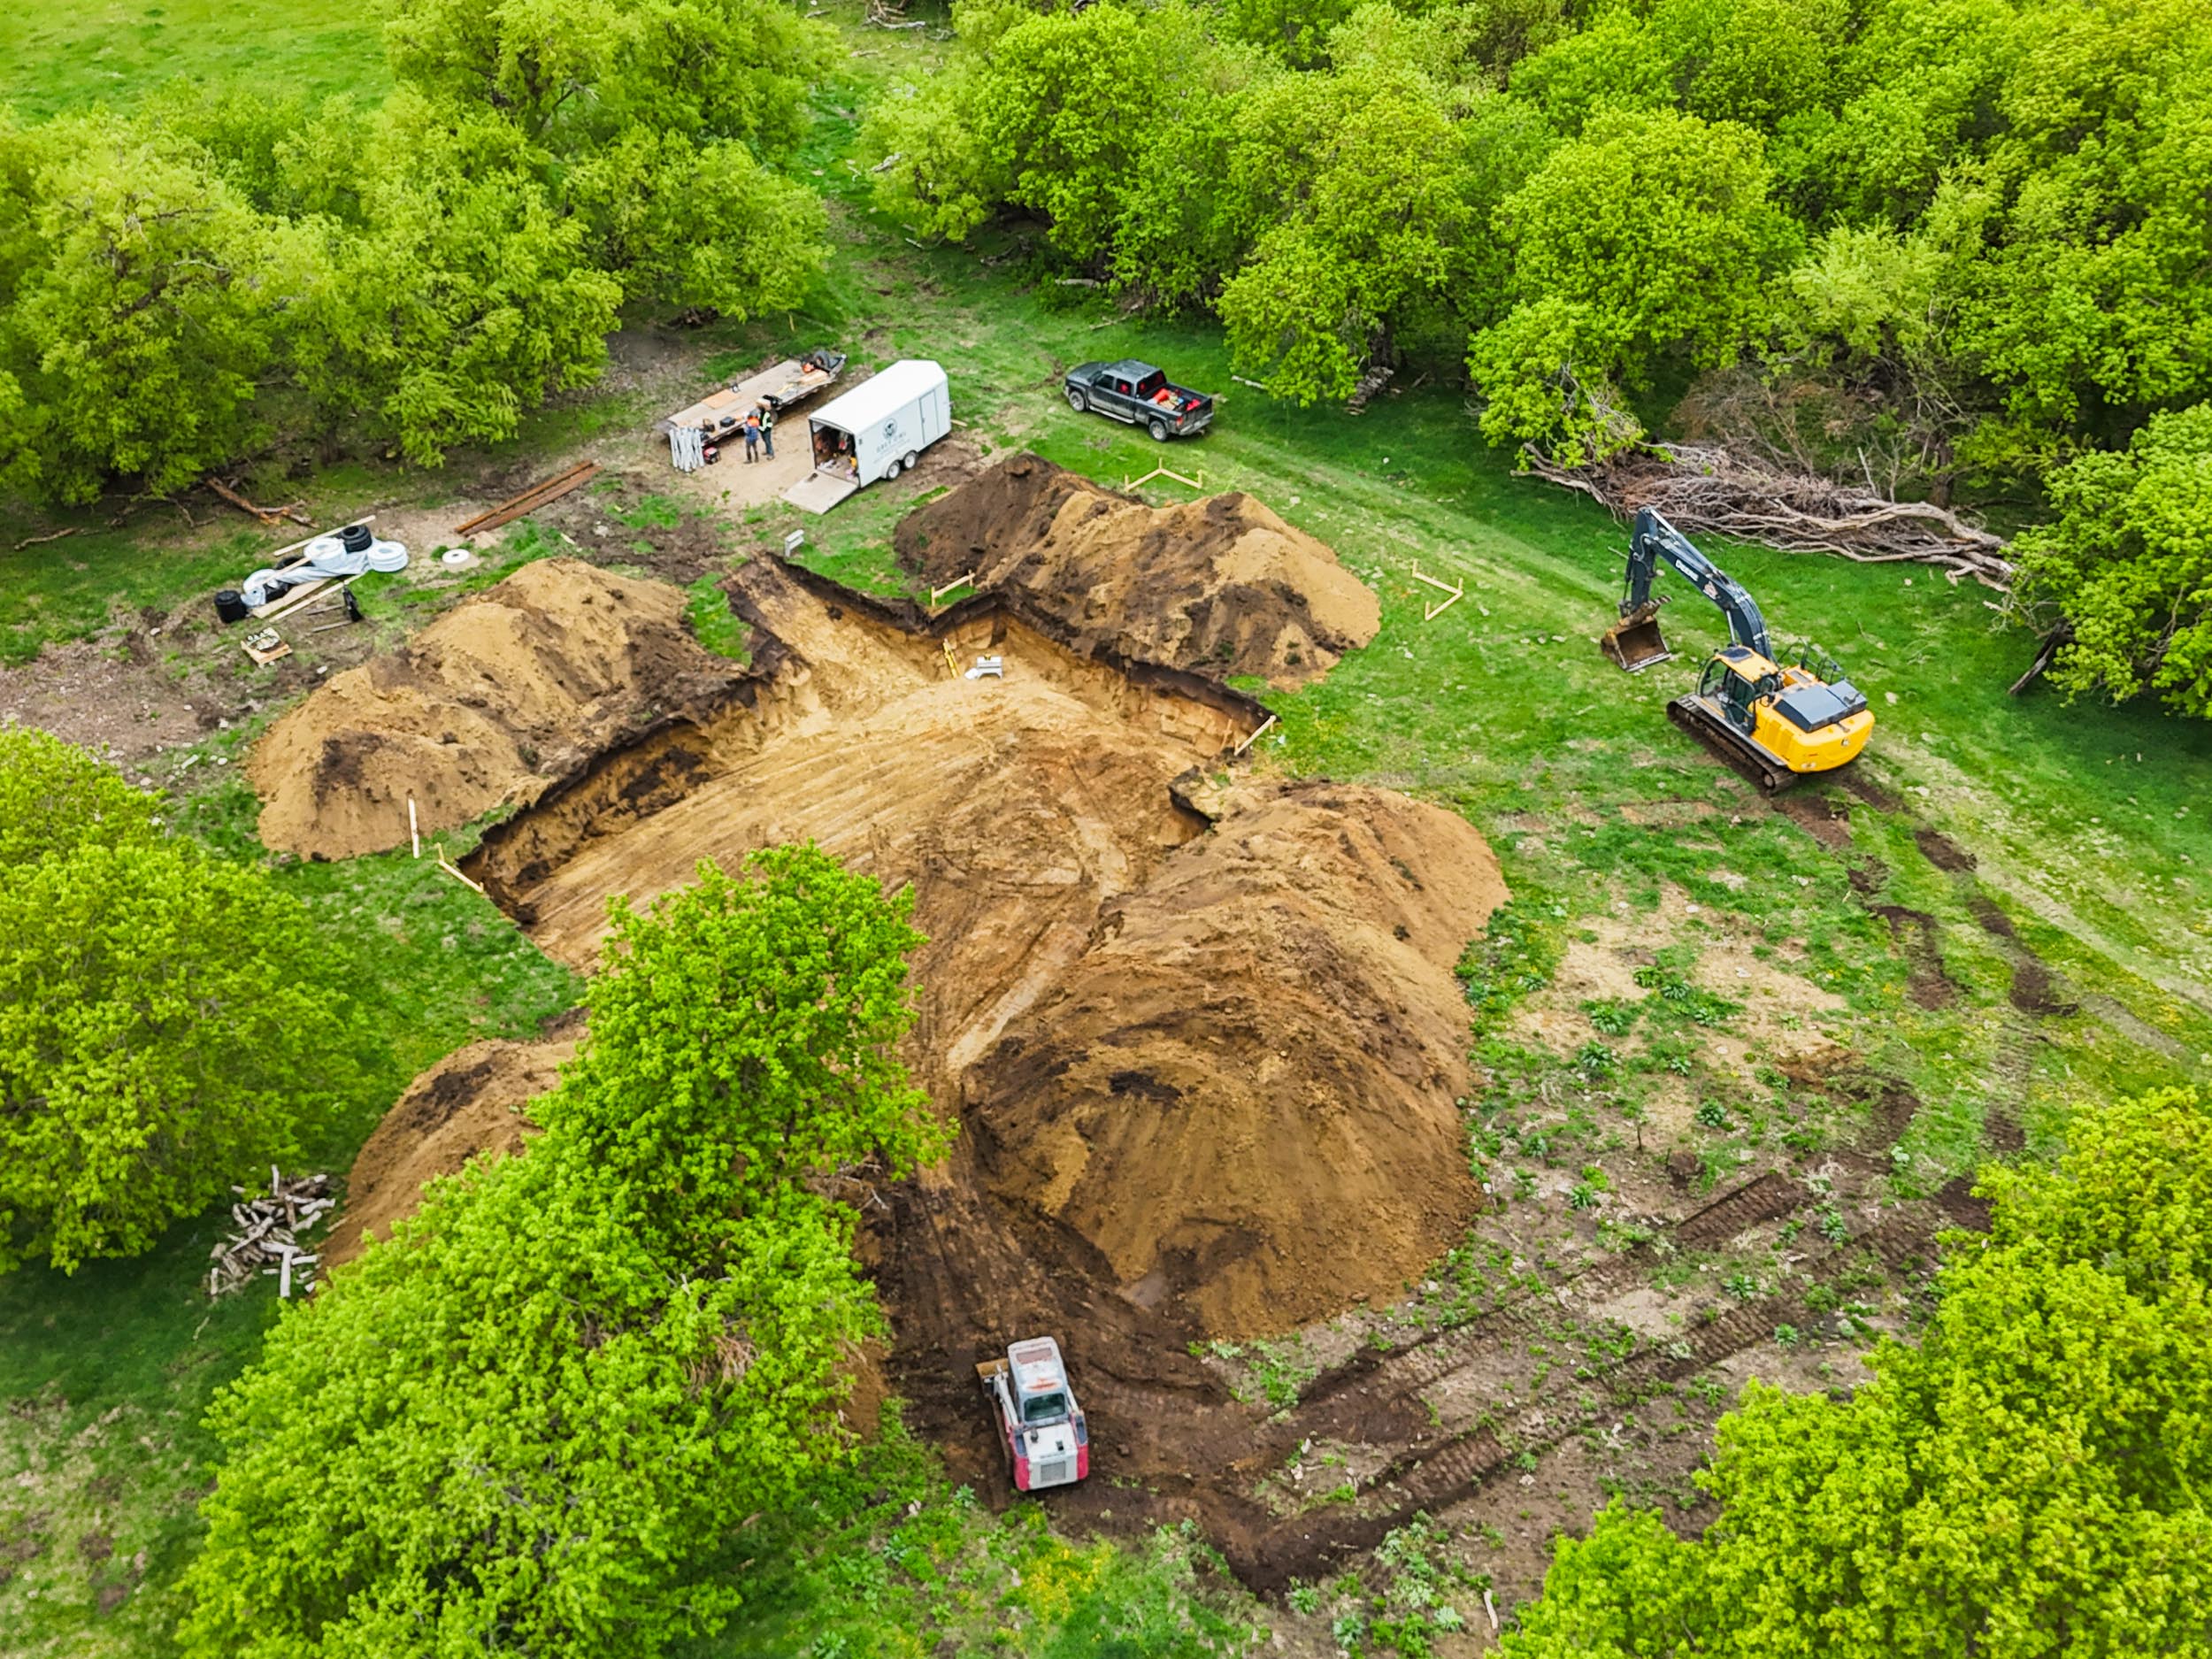
          The first step was excavating the site to the required depth
          and laying out the foundation in the correct position.
        </p>

        <p>
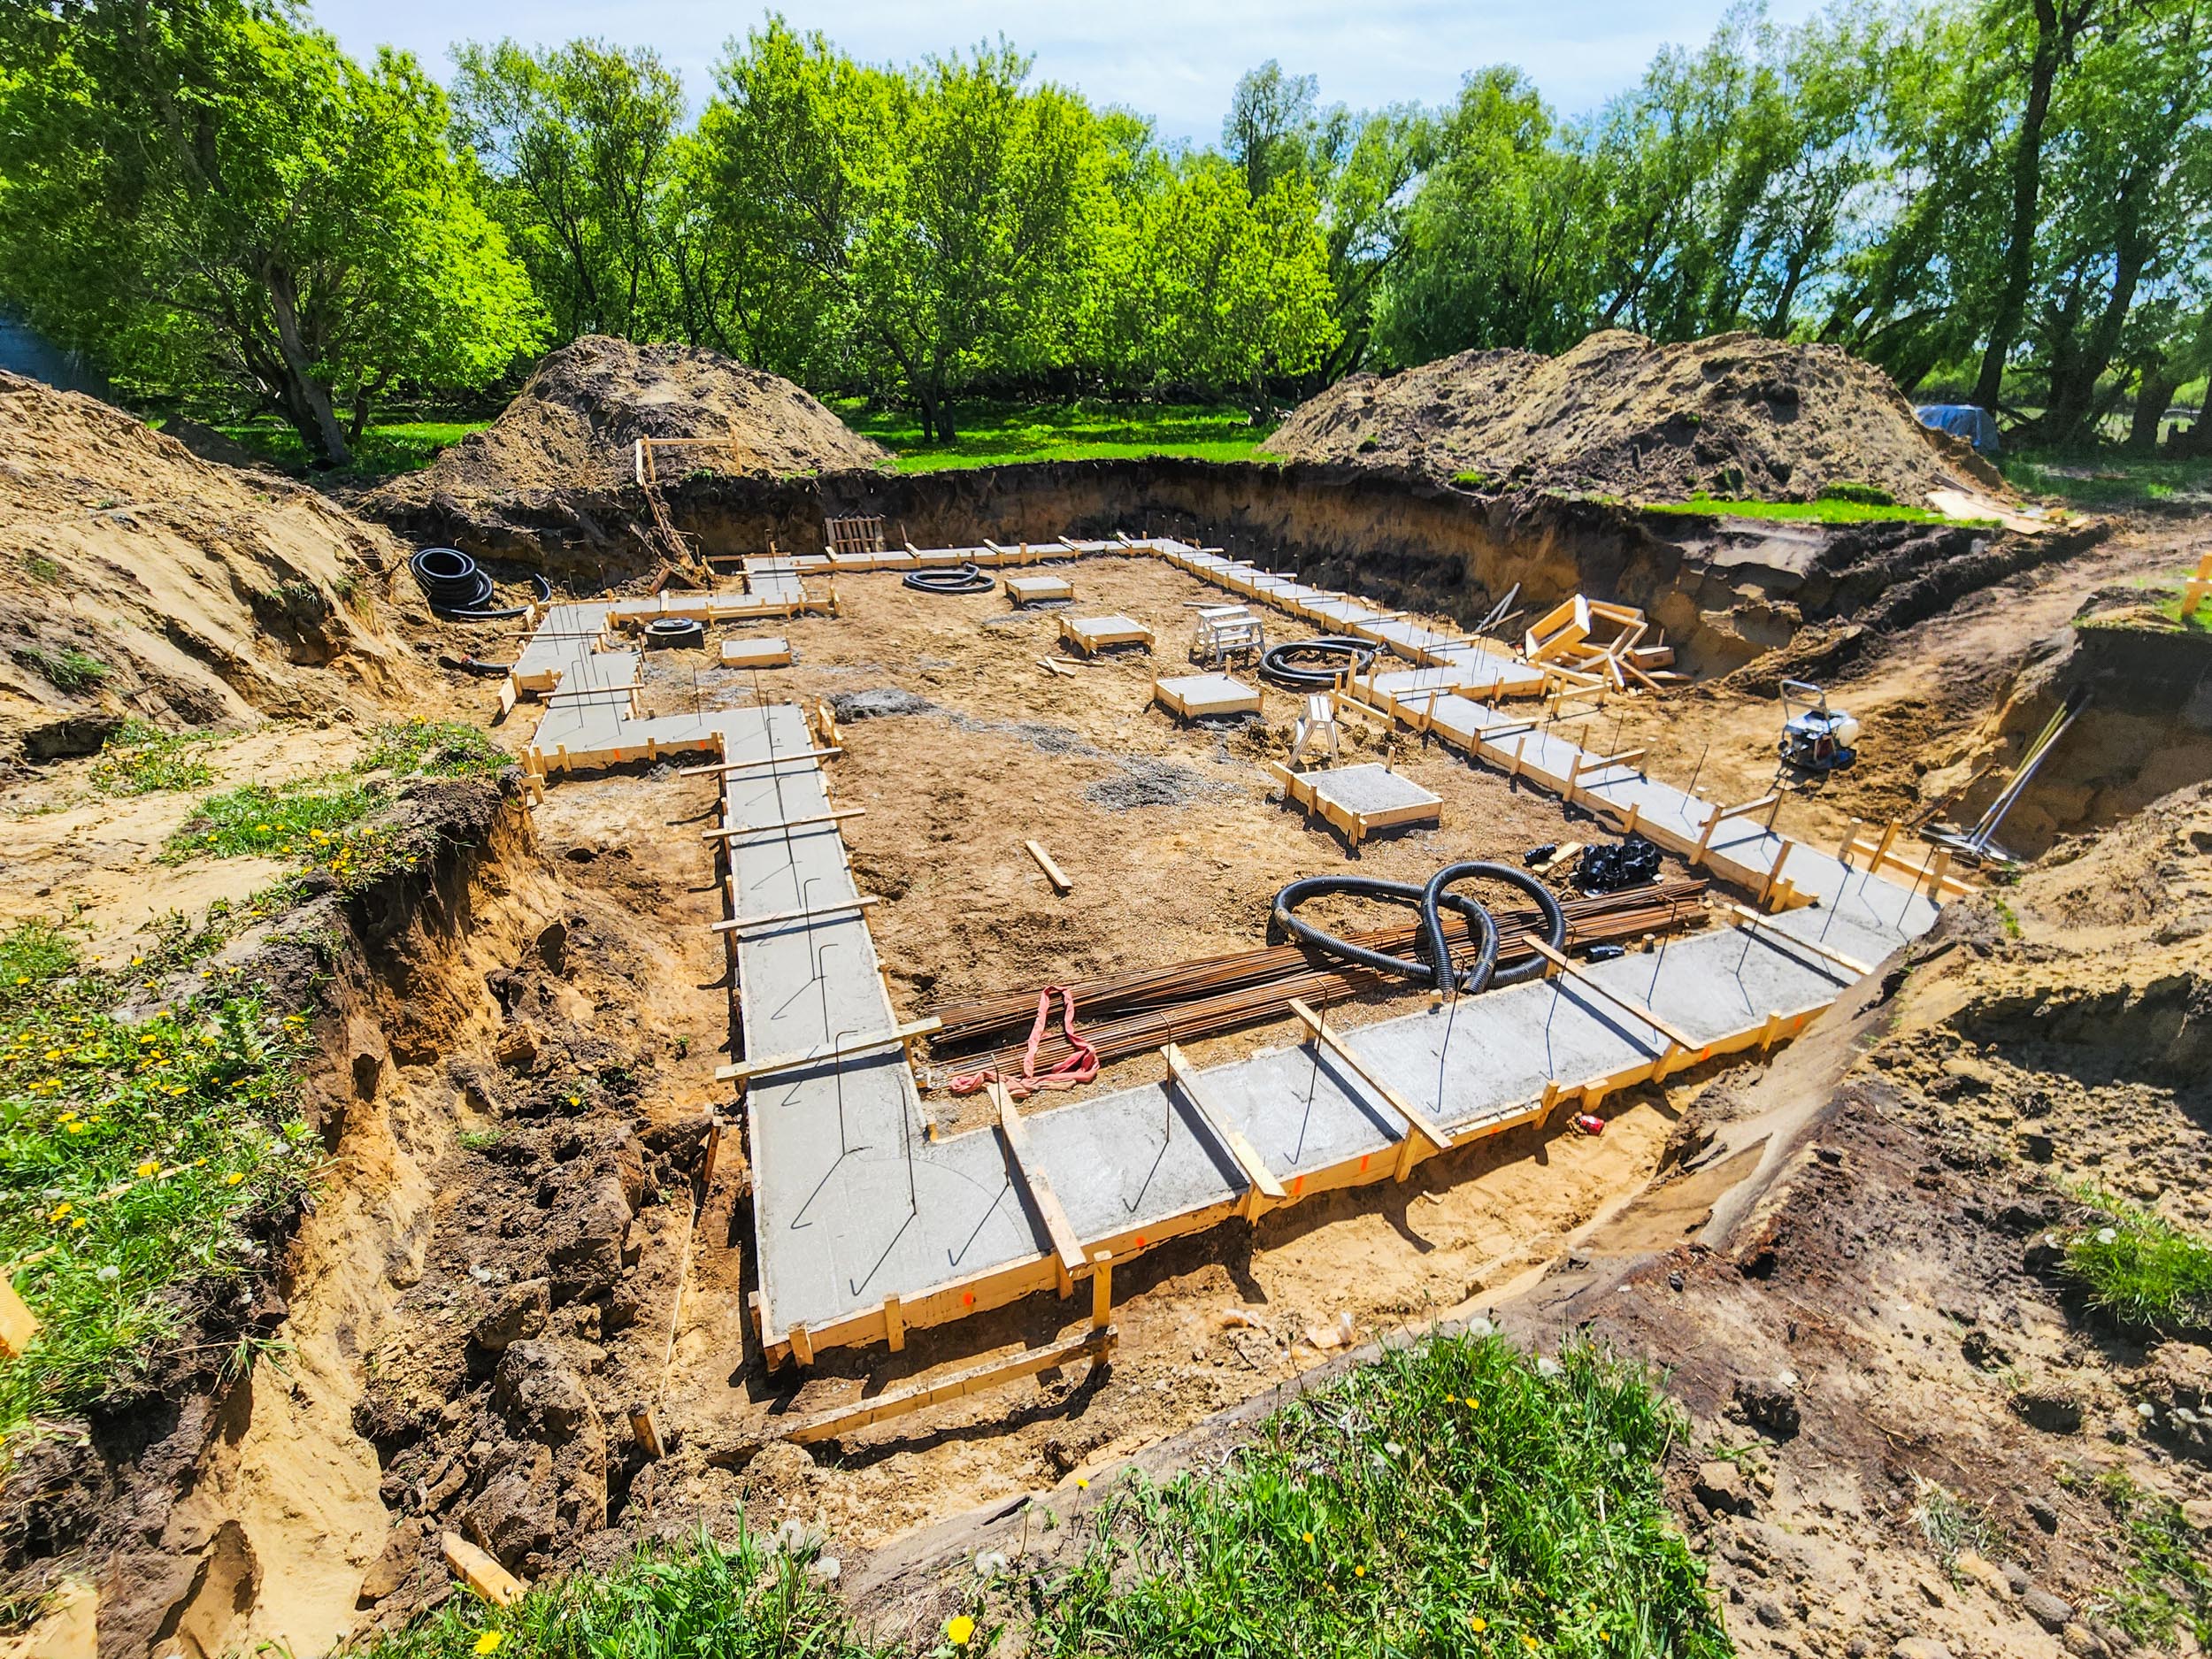
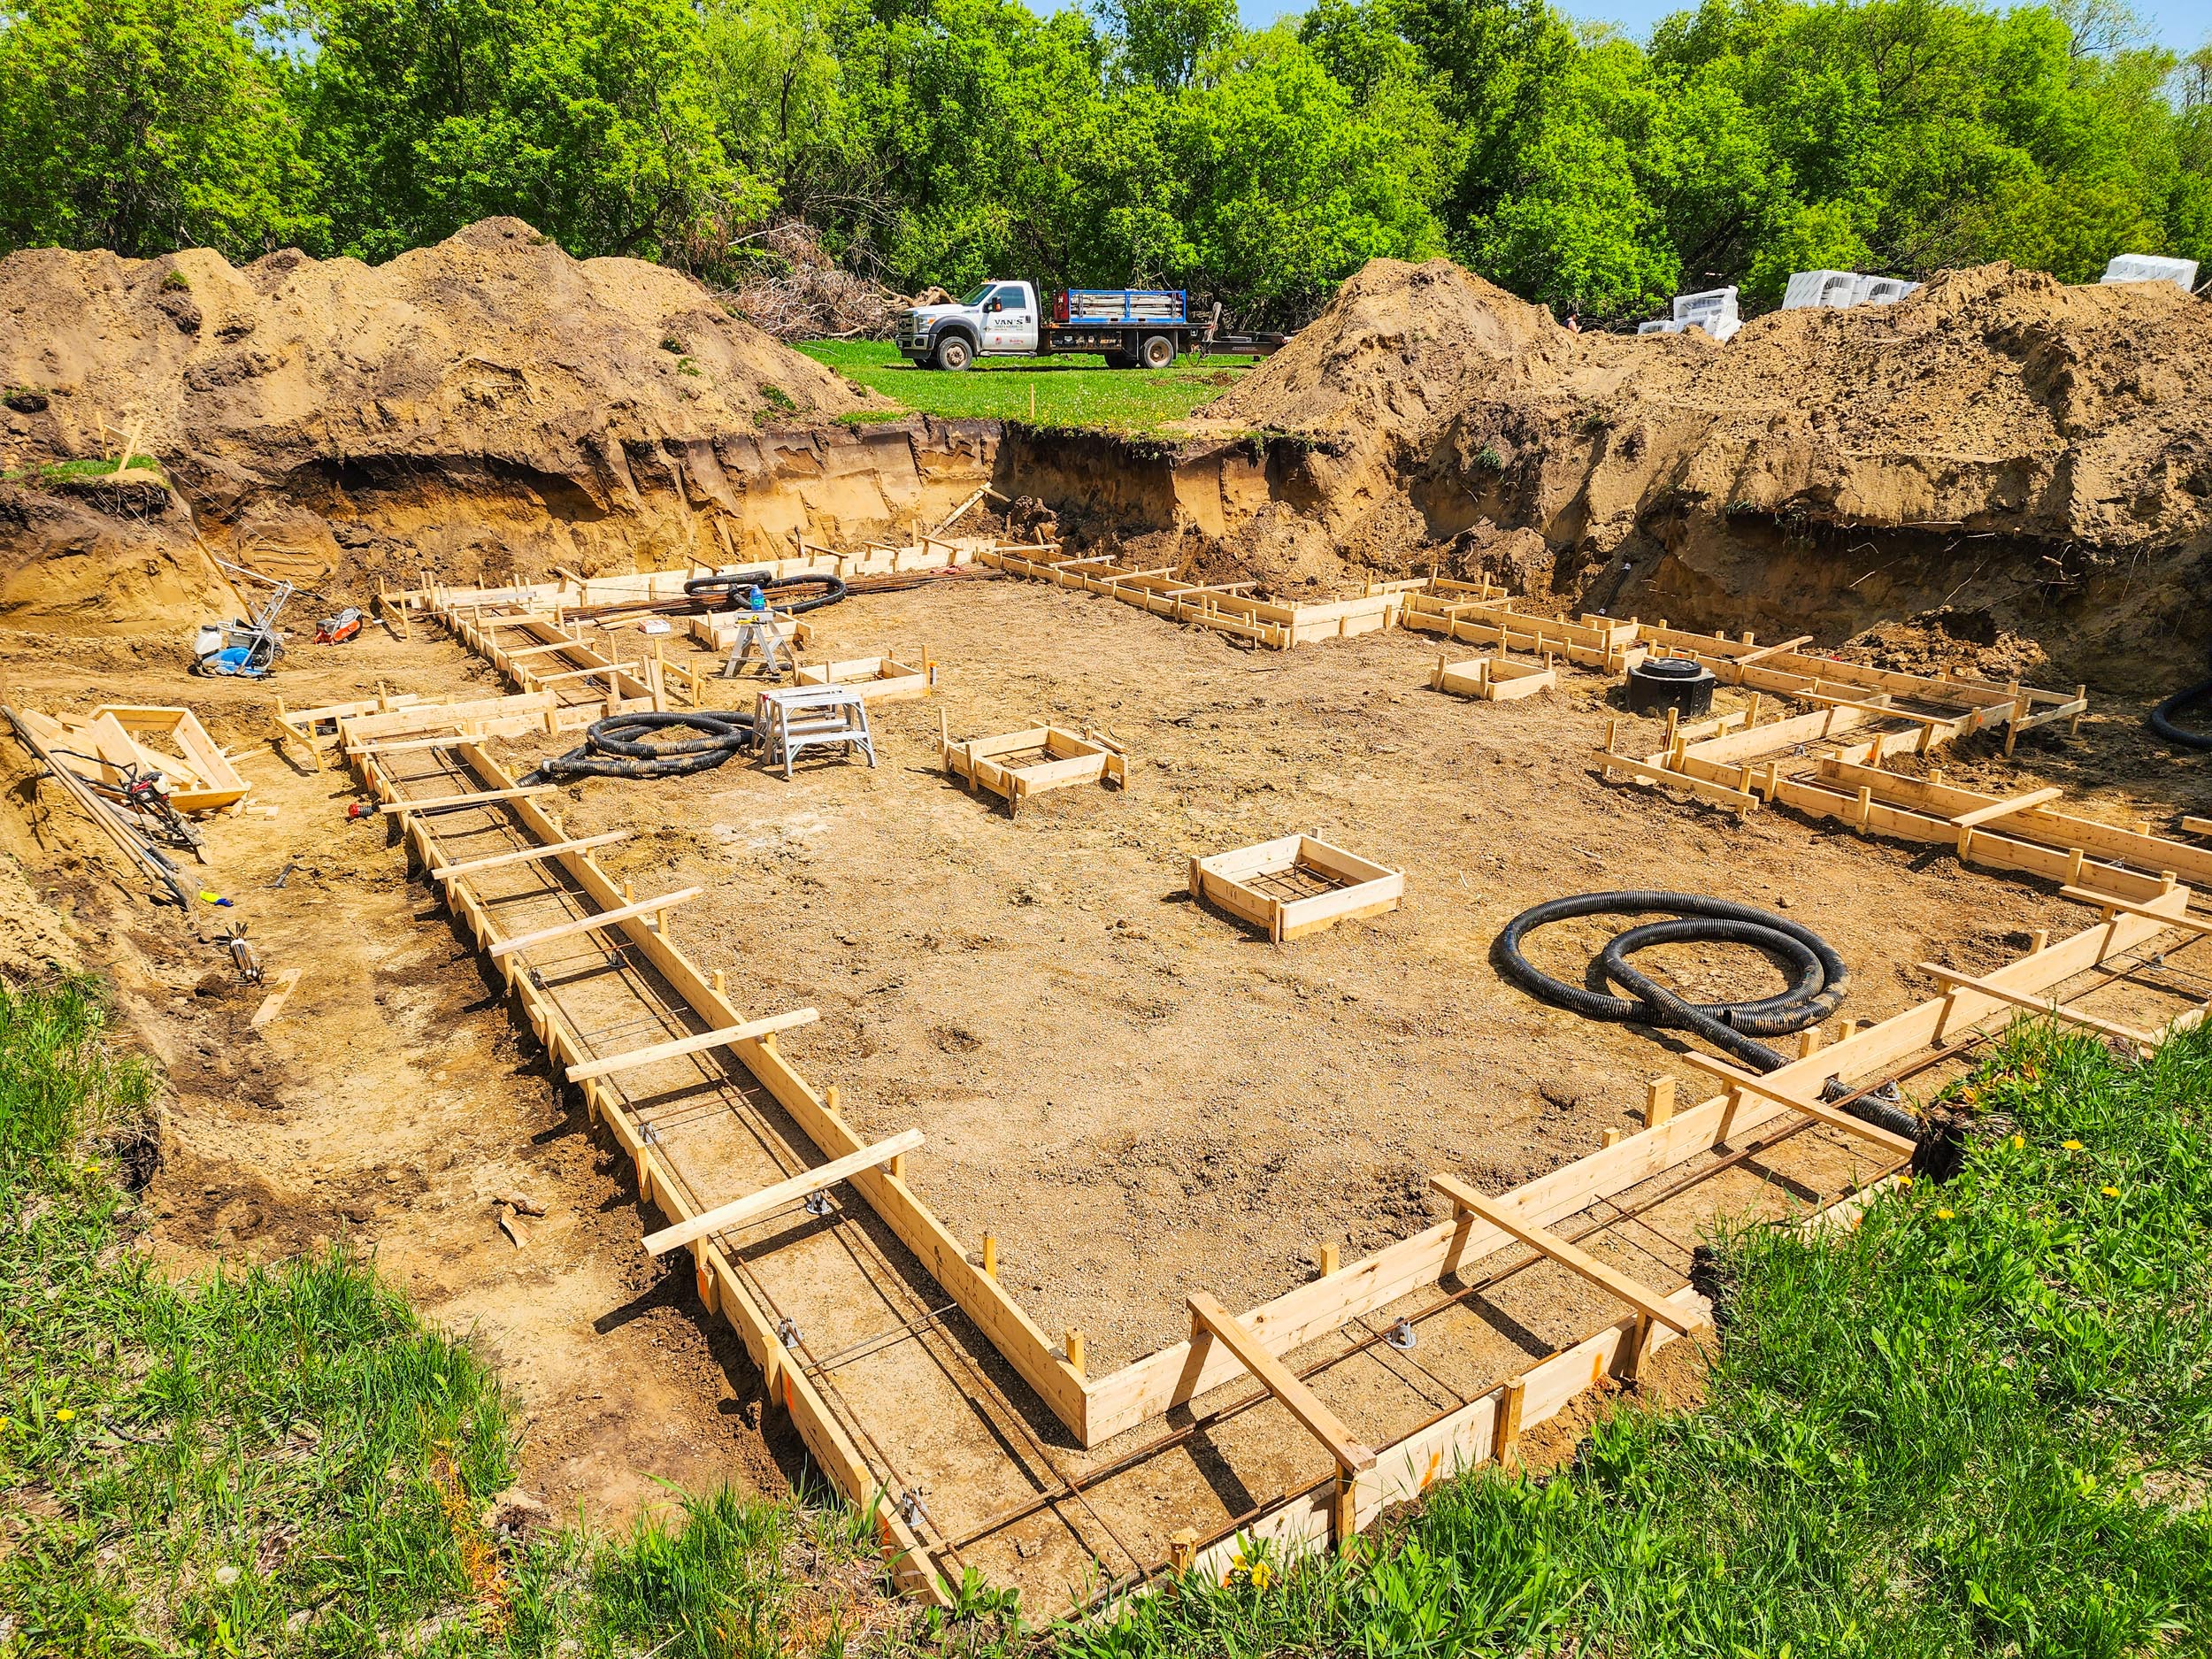
          Once the excavation was ready, the footing forms were built
          around the house layout and checked before the concrete was
          poured. This stage matters because every wall above follows
          the footing locations. If the layout is wrong here, it causes
          problems through the rest of the build.
        </p>

      </div>

    </div>

  </div>
</section></div>

    <figure class="post__image post__image--center">
      <img loading="lazy" src="https://greyowlconstruction.ca/media/posts/10/Foundation-Pour-14.jpg" height="1875" width="2500" alt="Footing poured and ready for ICF "  sizes="(max-width: 1920px) 100vw, 1920px" srcset="https://greyowlconstruction.ca/media/posts/10/responsive/Foundation-Pour-14-xs.jpg 640w ,https://greyowlconstruction.ca/media/posts/10/responsive/Foundation-Pour-14-sm.jpg 768w ,https://greyowlconstruction.ca/media/posts/10/responsive/Foundation-Pour-14-md.jpg 1024w ,https://greyowlconstruction.ca/media/posts/10/responsive/Foundation-Pour-14-lg.jpg 1366w ,https://greyowlconstruction.ca/media/posts/10/responsive/Foundation-Pour-14-xl.jpg 1600w ,https://greyowlconstruction.ca/media/posts/10/responsive/Foundation-Pour-14-2xl.jpg 1920w">
      <figcaption>Footings poured for ICF installation</figcaption>
    </figure>
<div><section class="go-full-bleed go-section go-section--alternate">
  <div class="go-container--wide">

    <div class="go-split go-split--reverse">

      <div class="go-split__media">
        <img loading="lazy"           src="./media/posts/10/gallery/Foundation-Pour-15.jpg"
          alt="ICF foundation walls under construction near Altamont Manitoba"
          loading="lazy"
          width="1400"
          height="1000"
        >
      </div>

      <div class="go-split__content">

        <p class="go-eyebrow">
          ICF Foundation Walls
        </p>

        <h2>
          Building, Bracing and Pouring the Basement Walls
        </h2>

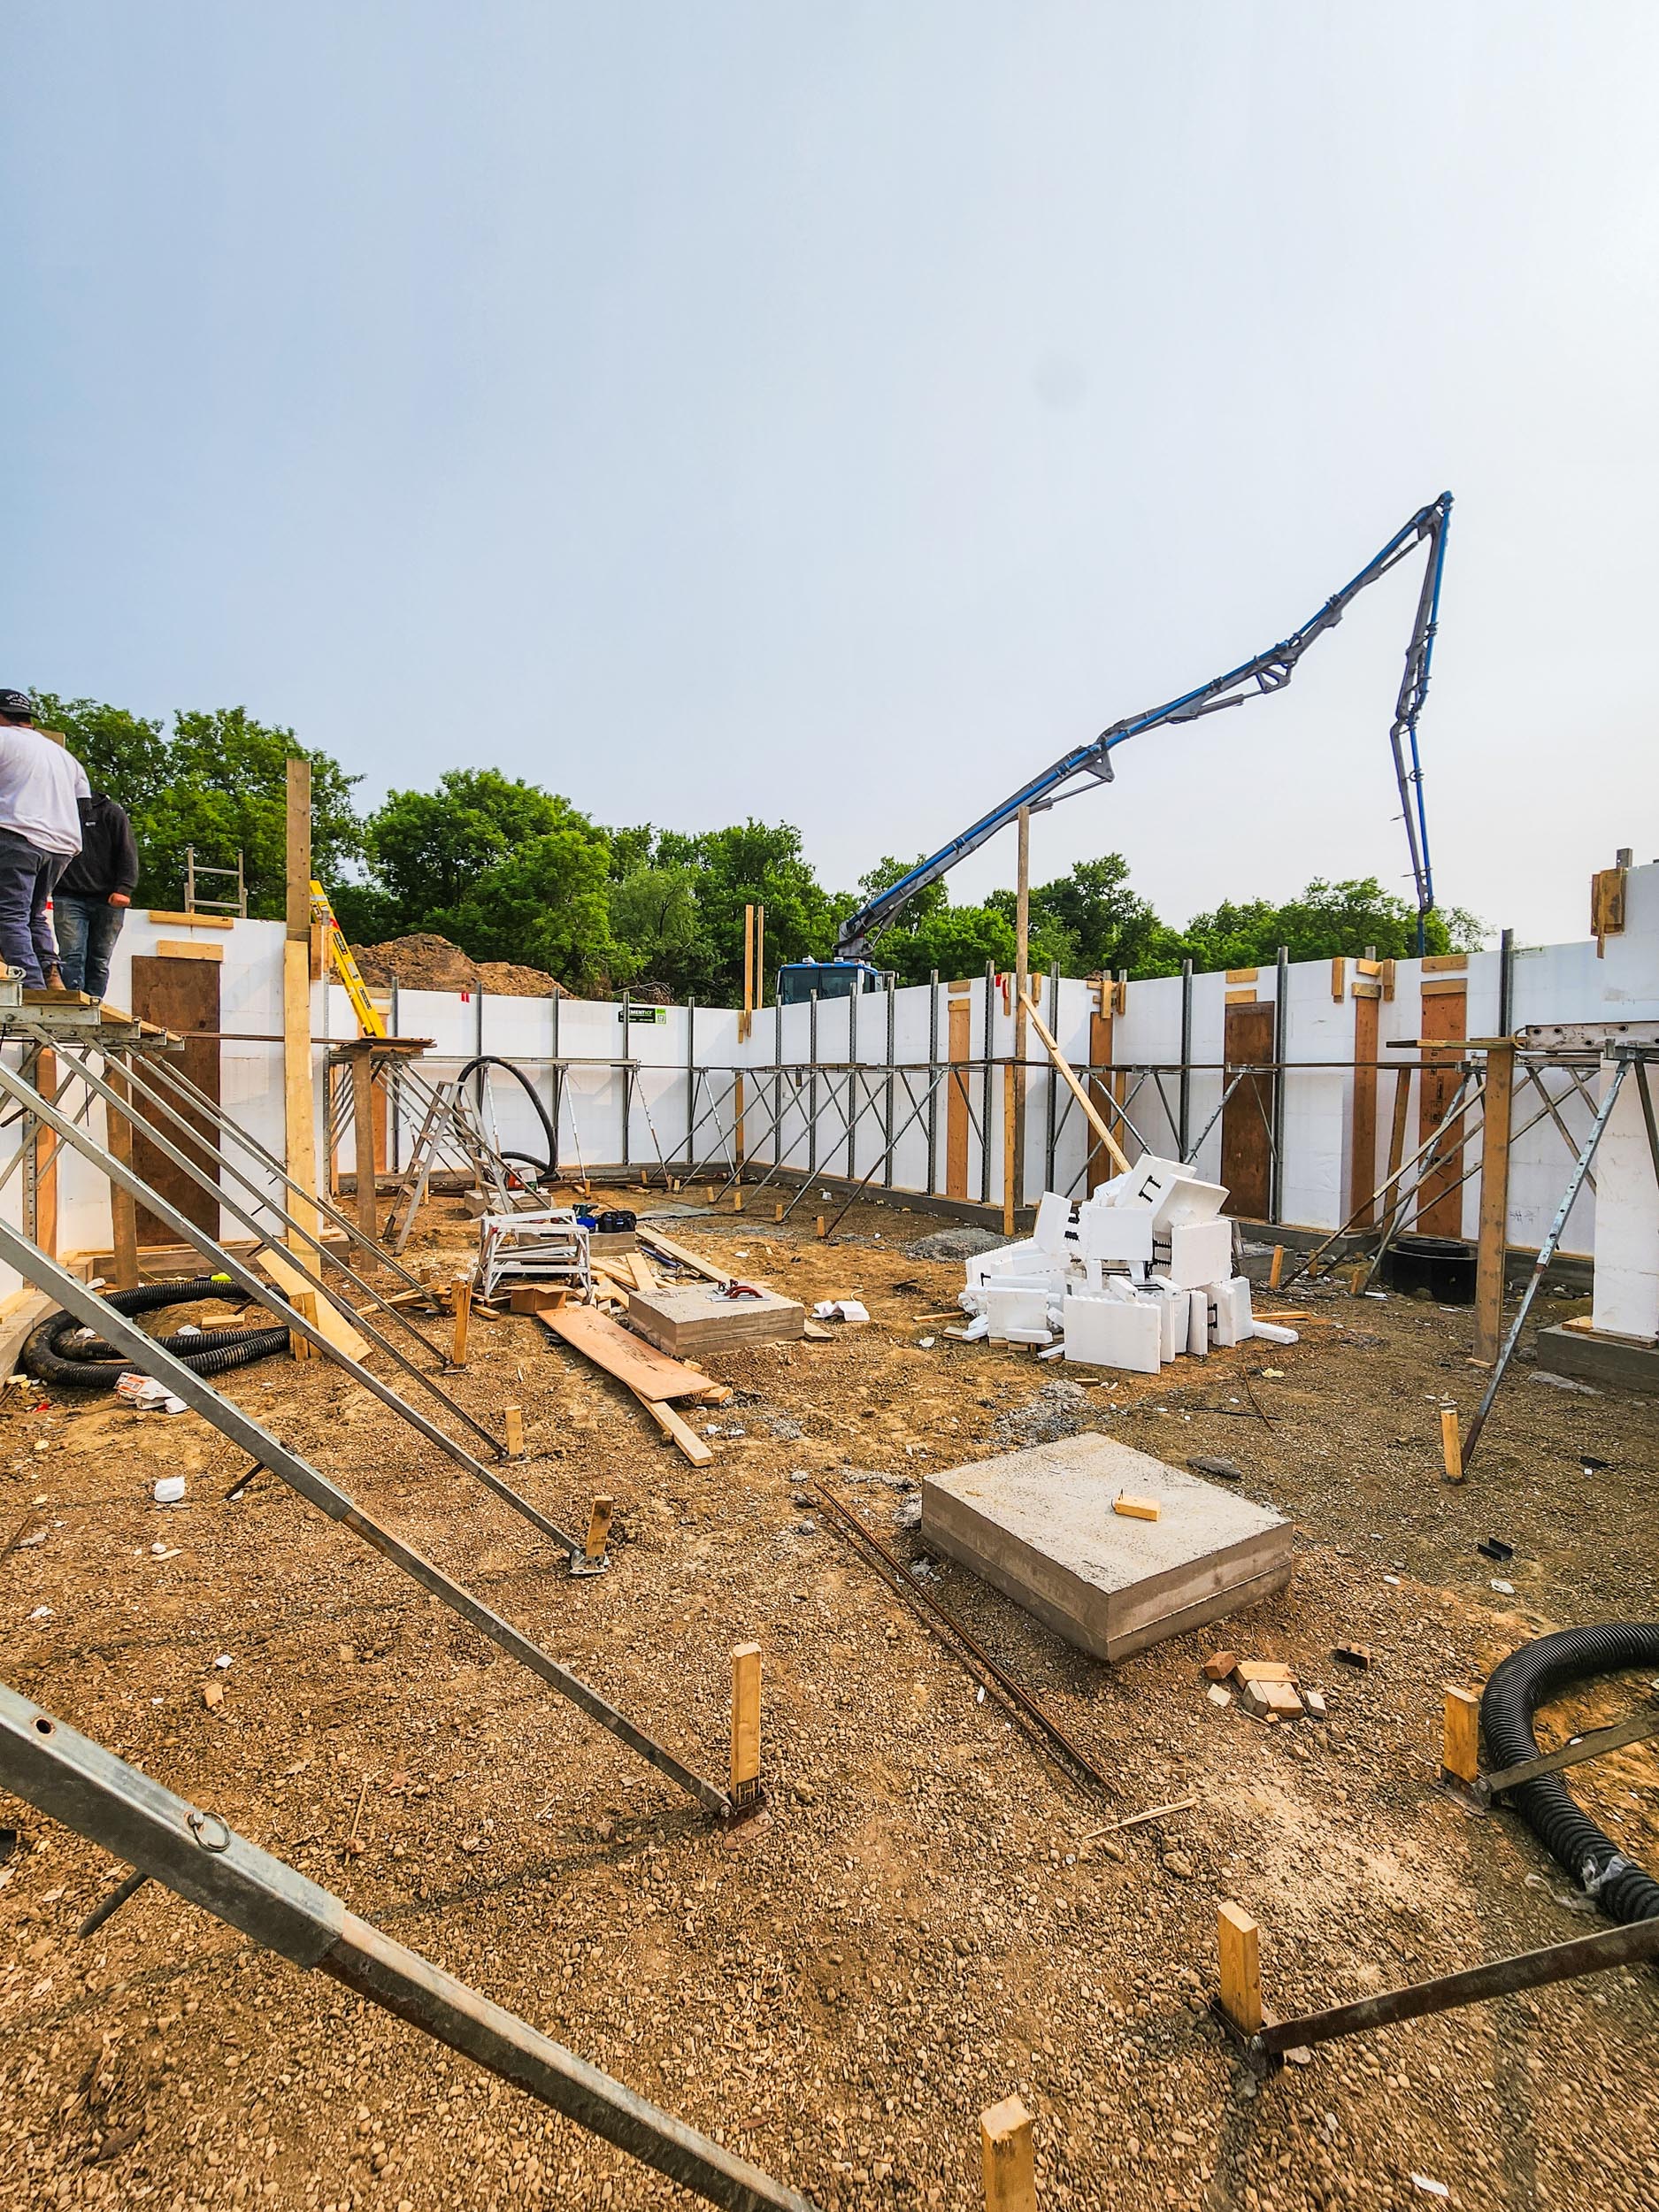
        <p>
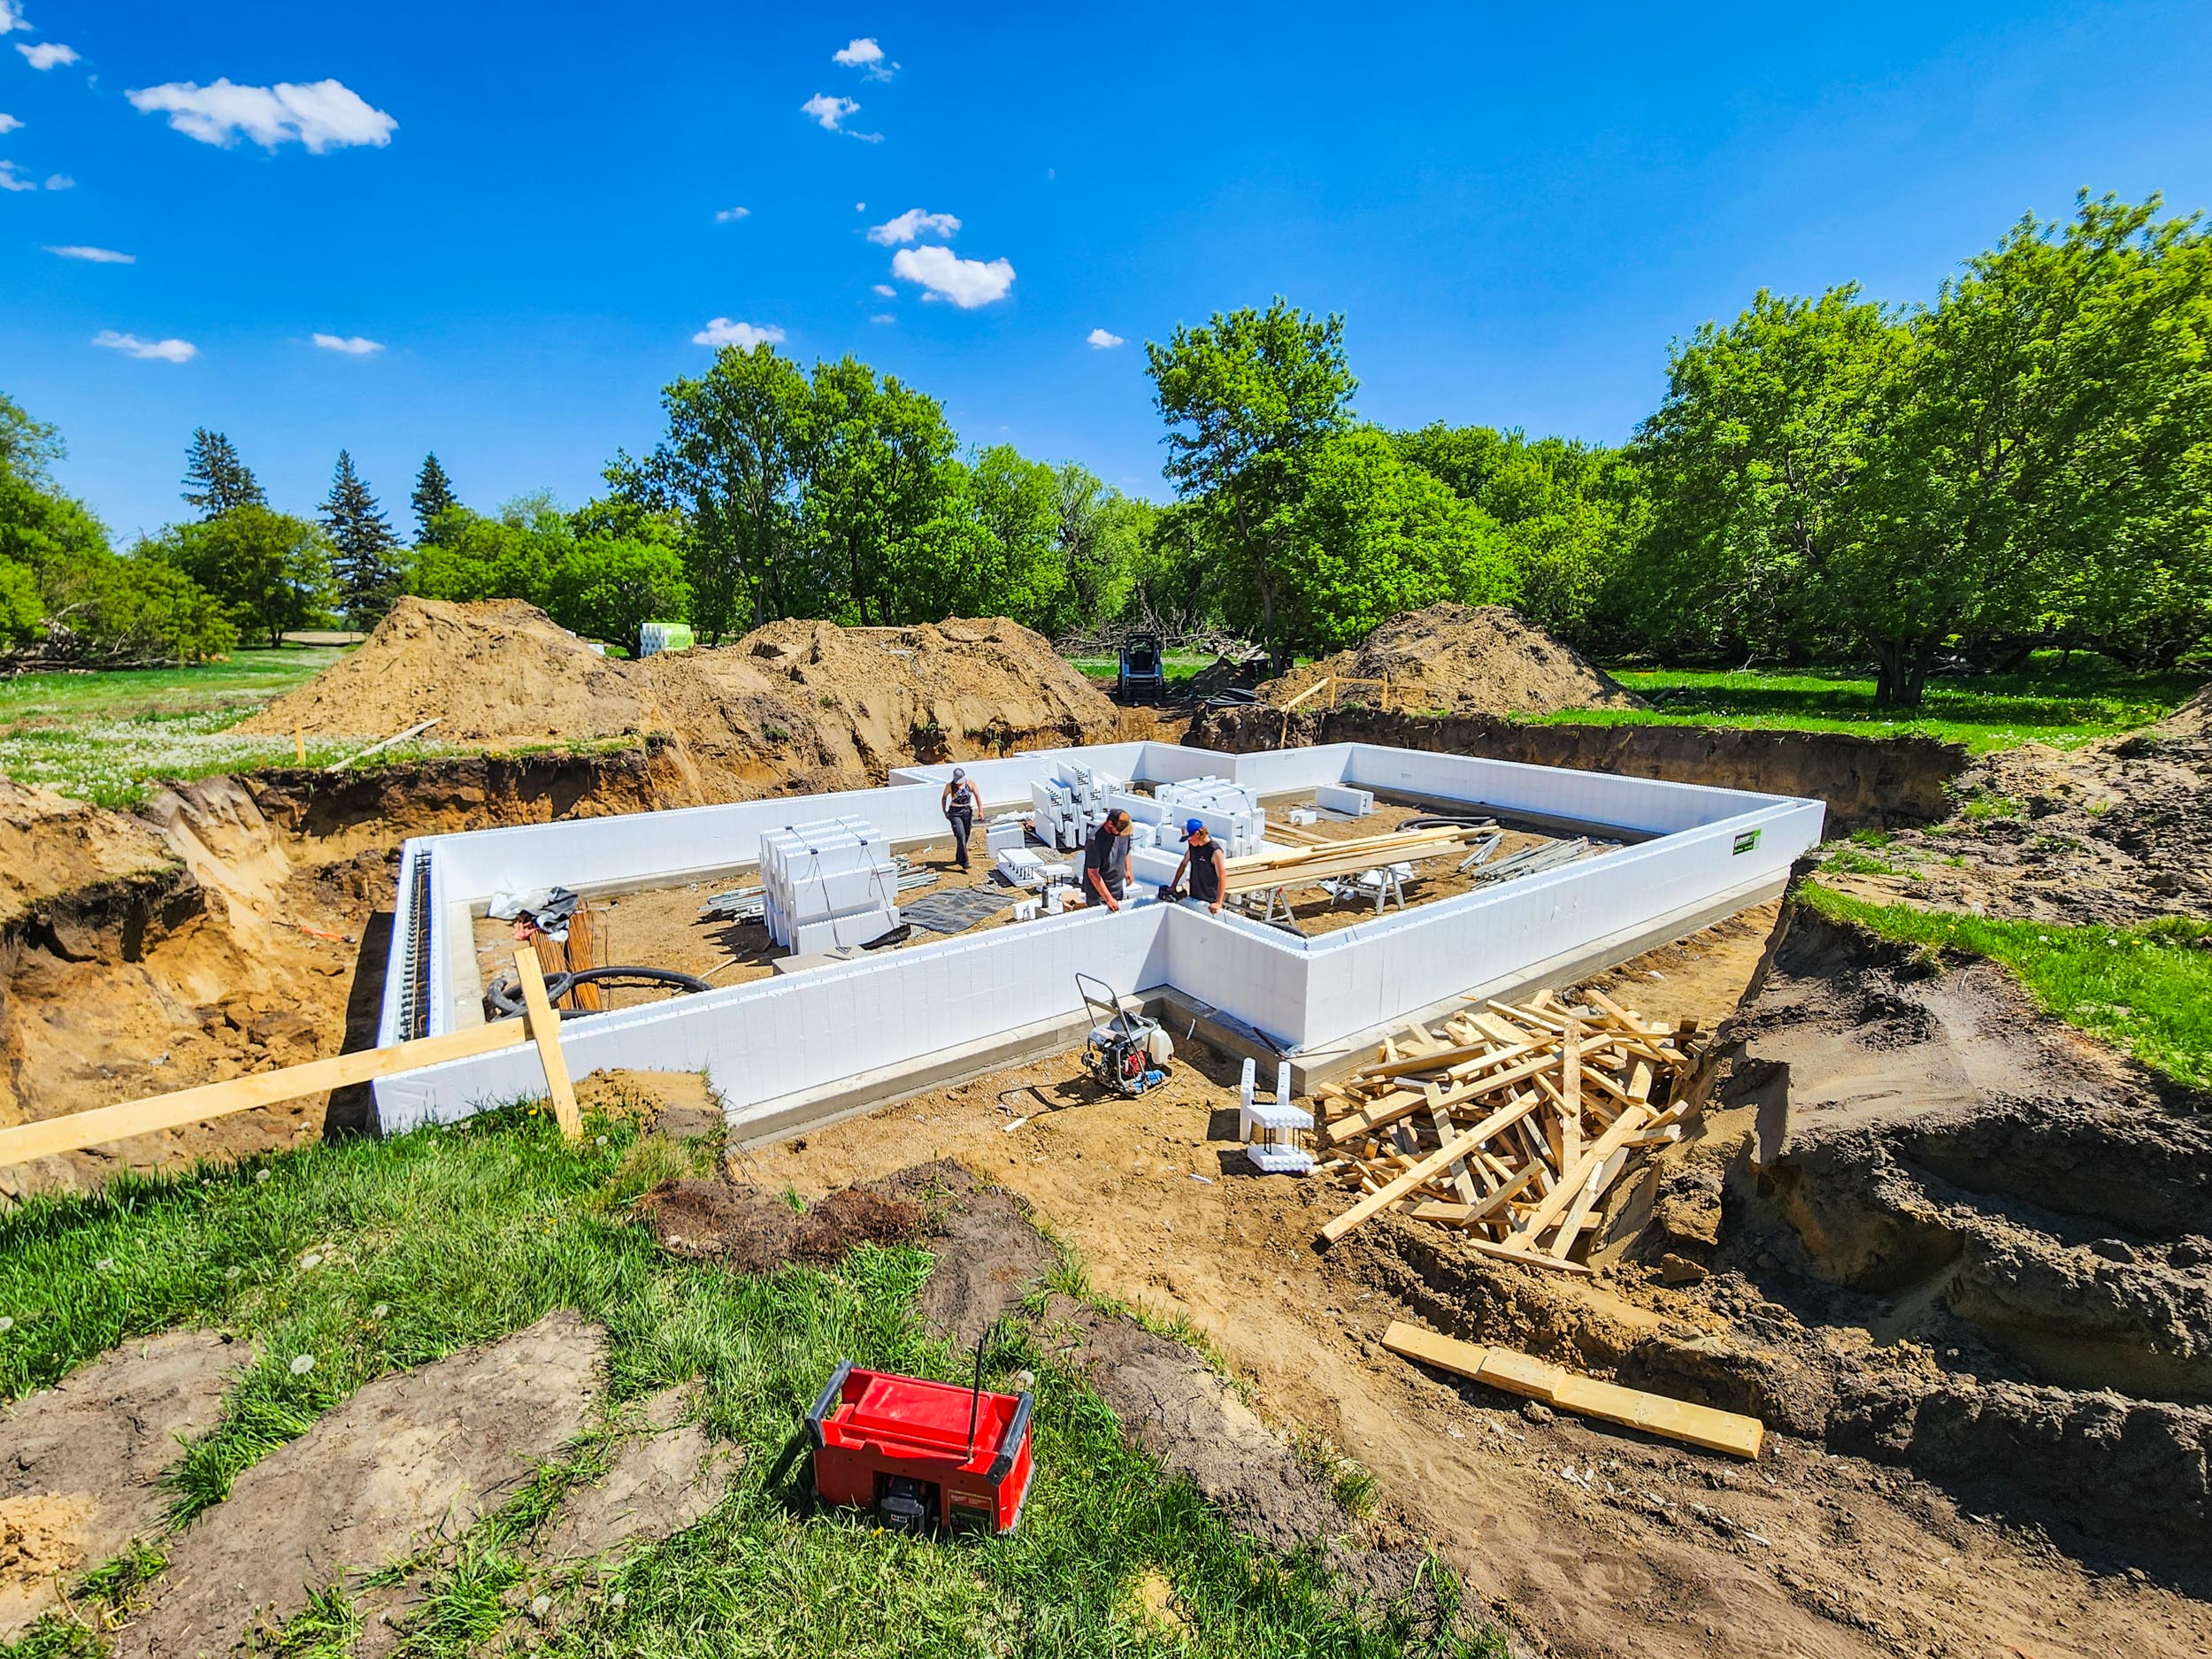
          The ICF blocks were assembled on the footings to form the
          basement walls. Reinforcement, openings and service locations
          were worked into the wall system as construction progressed.
        </p>

        <p>
          Before the concrete was placed, the walls were braced and
          checked so they remained straight and stayed in the correct
          position during the pour. ICF was a good fit for this project
          because the wall structure and insulation were completed
          together.
        </p>

      </div>

    </div>

  </div>
</section></div>

    <figure class="post__image post__image--center">
      <img loading="lazy" src="https://greyowlconstruction.ca/media/posts/10/Foundation-Pour-29.jpg" height="1875" width="2500" alt=""  sizes="(max-width: 1920px) 100vw, 1920px" srcset="https://greyowlconstruction.ca/media/posts/10/responsive/Foundation-Pour-29-xs.jpg 640w ,https://greyowlconstruction.ca/media/posts/10/responsive/Foundation-Pour-29-sm.jpg 768w ,https://greyowlconstruction.ca/media/posts/10/responsive/Foundation-Pour-29-md.jpg 1024w ,https://greyowlconstruction.ca/media/posts/10/responsive/Foundation-Pour-29-lg.jpg 1366w ,https://greyowlconstruction.ca/media/posts/10/responsive/Foundation-Pour-29-xl.jpg 1600w ,https://greyowlconstruction.ca/media/posts/10/responsive/Foundation-Pour-29-2xl.jpg 1920w">
      
    </figure>
<div><section class="go-full-bleed go-section">
  <div class="go-container--wide">

    <div class="go-split">

      <div class="go-split__media">
        <img loading="lazy"           src="./media/posts/10/gallery/Foundation-Pour-46.jpg"
          alt="Under-slab insulation and reinforcement prepared for a basement floor"
          loading="lazy"
          width="1400"
          height="1000"
        >
      </div>

      <div class="go-split__content">

        <p class="go-eyebrow">
          Basement Floor Preparation
        </p>

        <h2>
          Finishing the Work That Had to Be Under the Slab
        </h2>

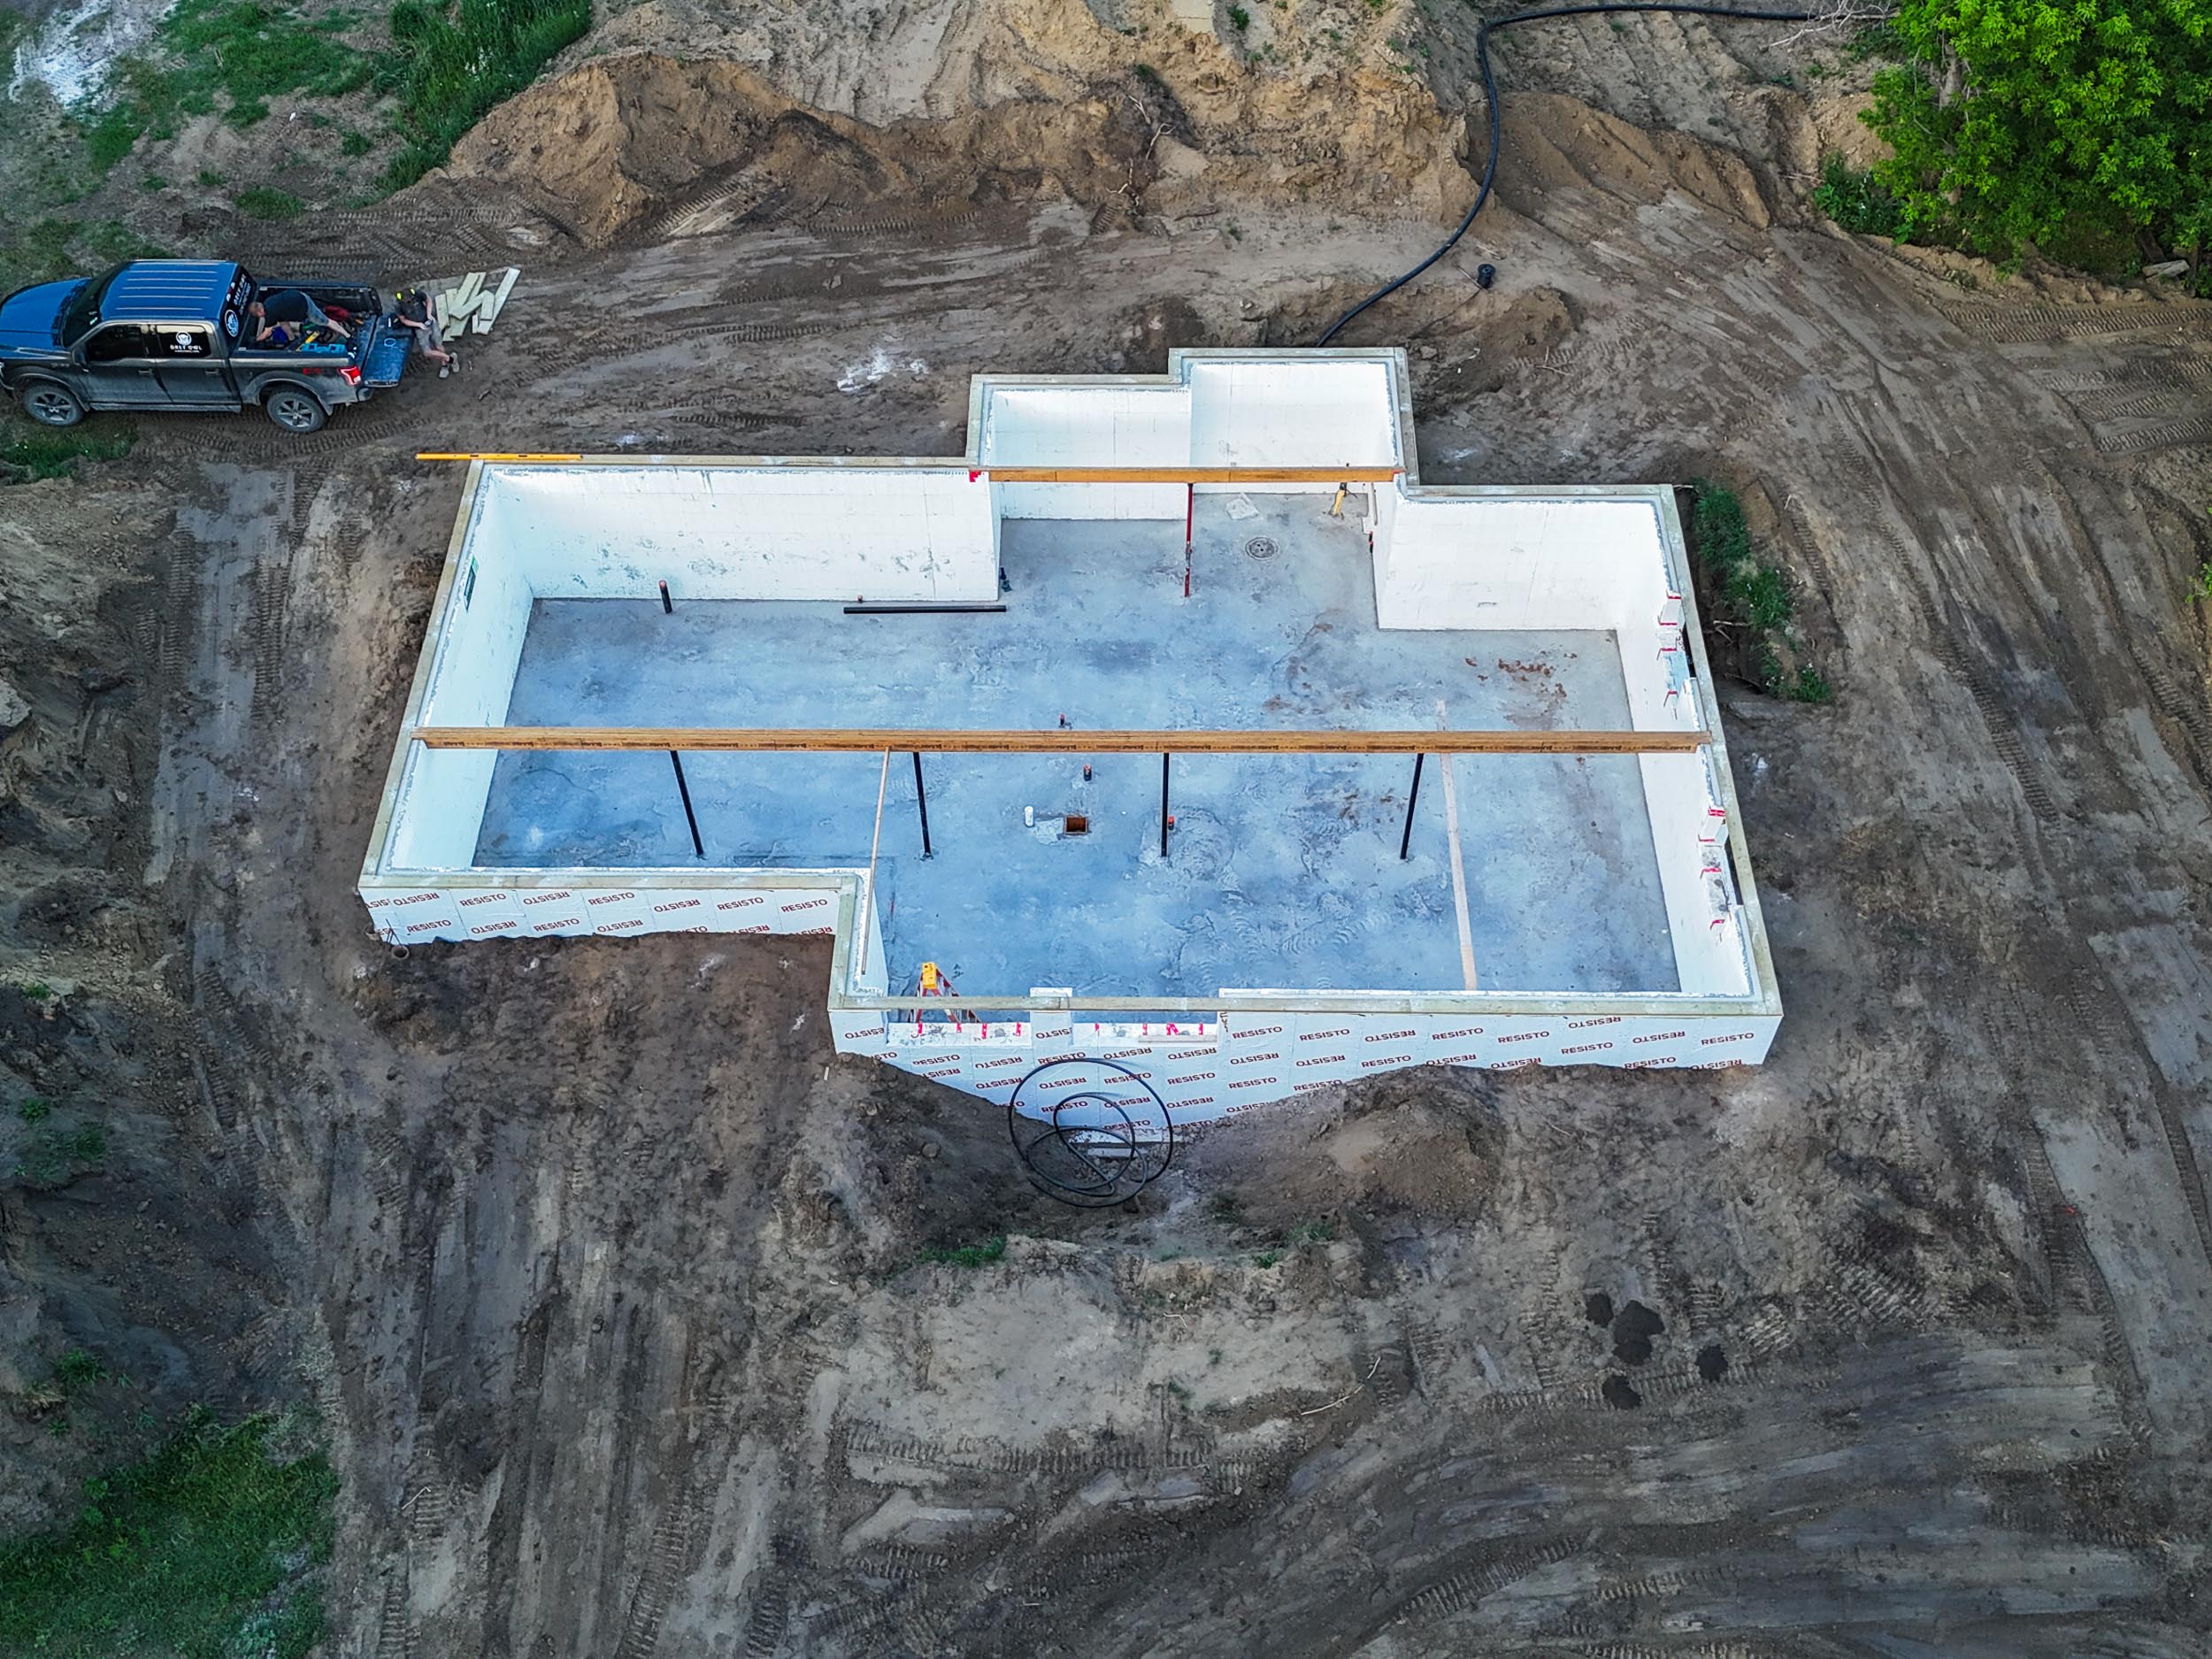
        <p>
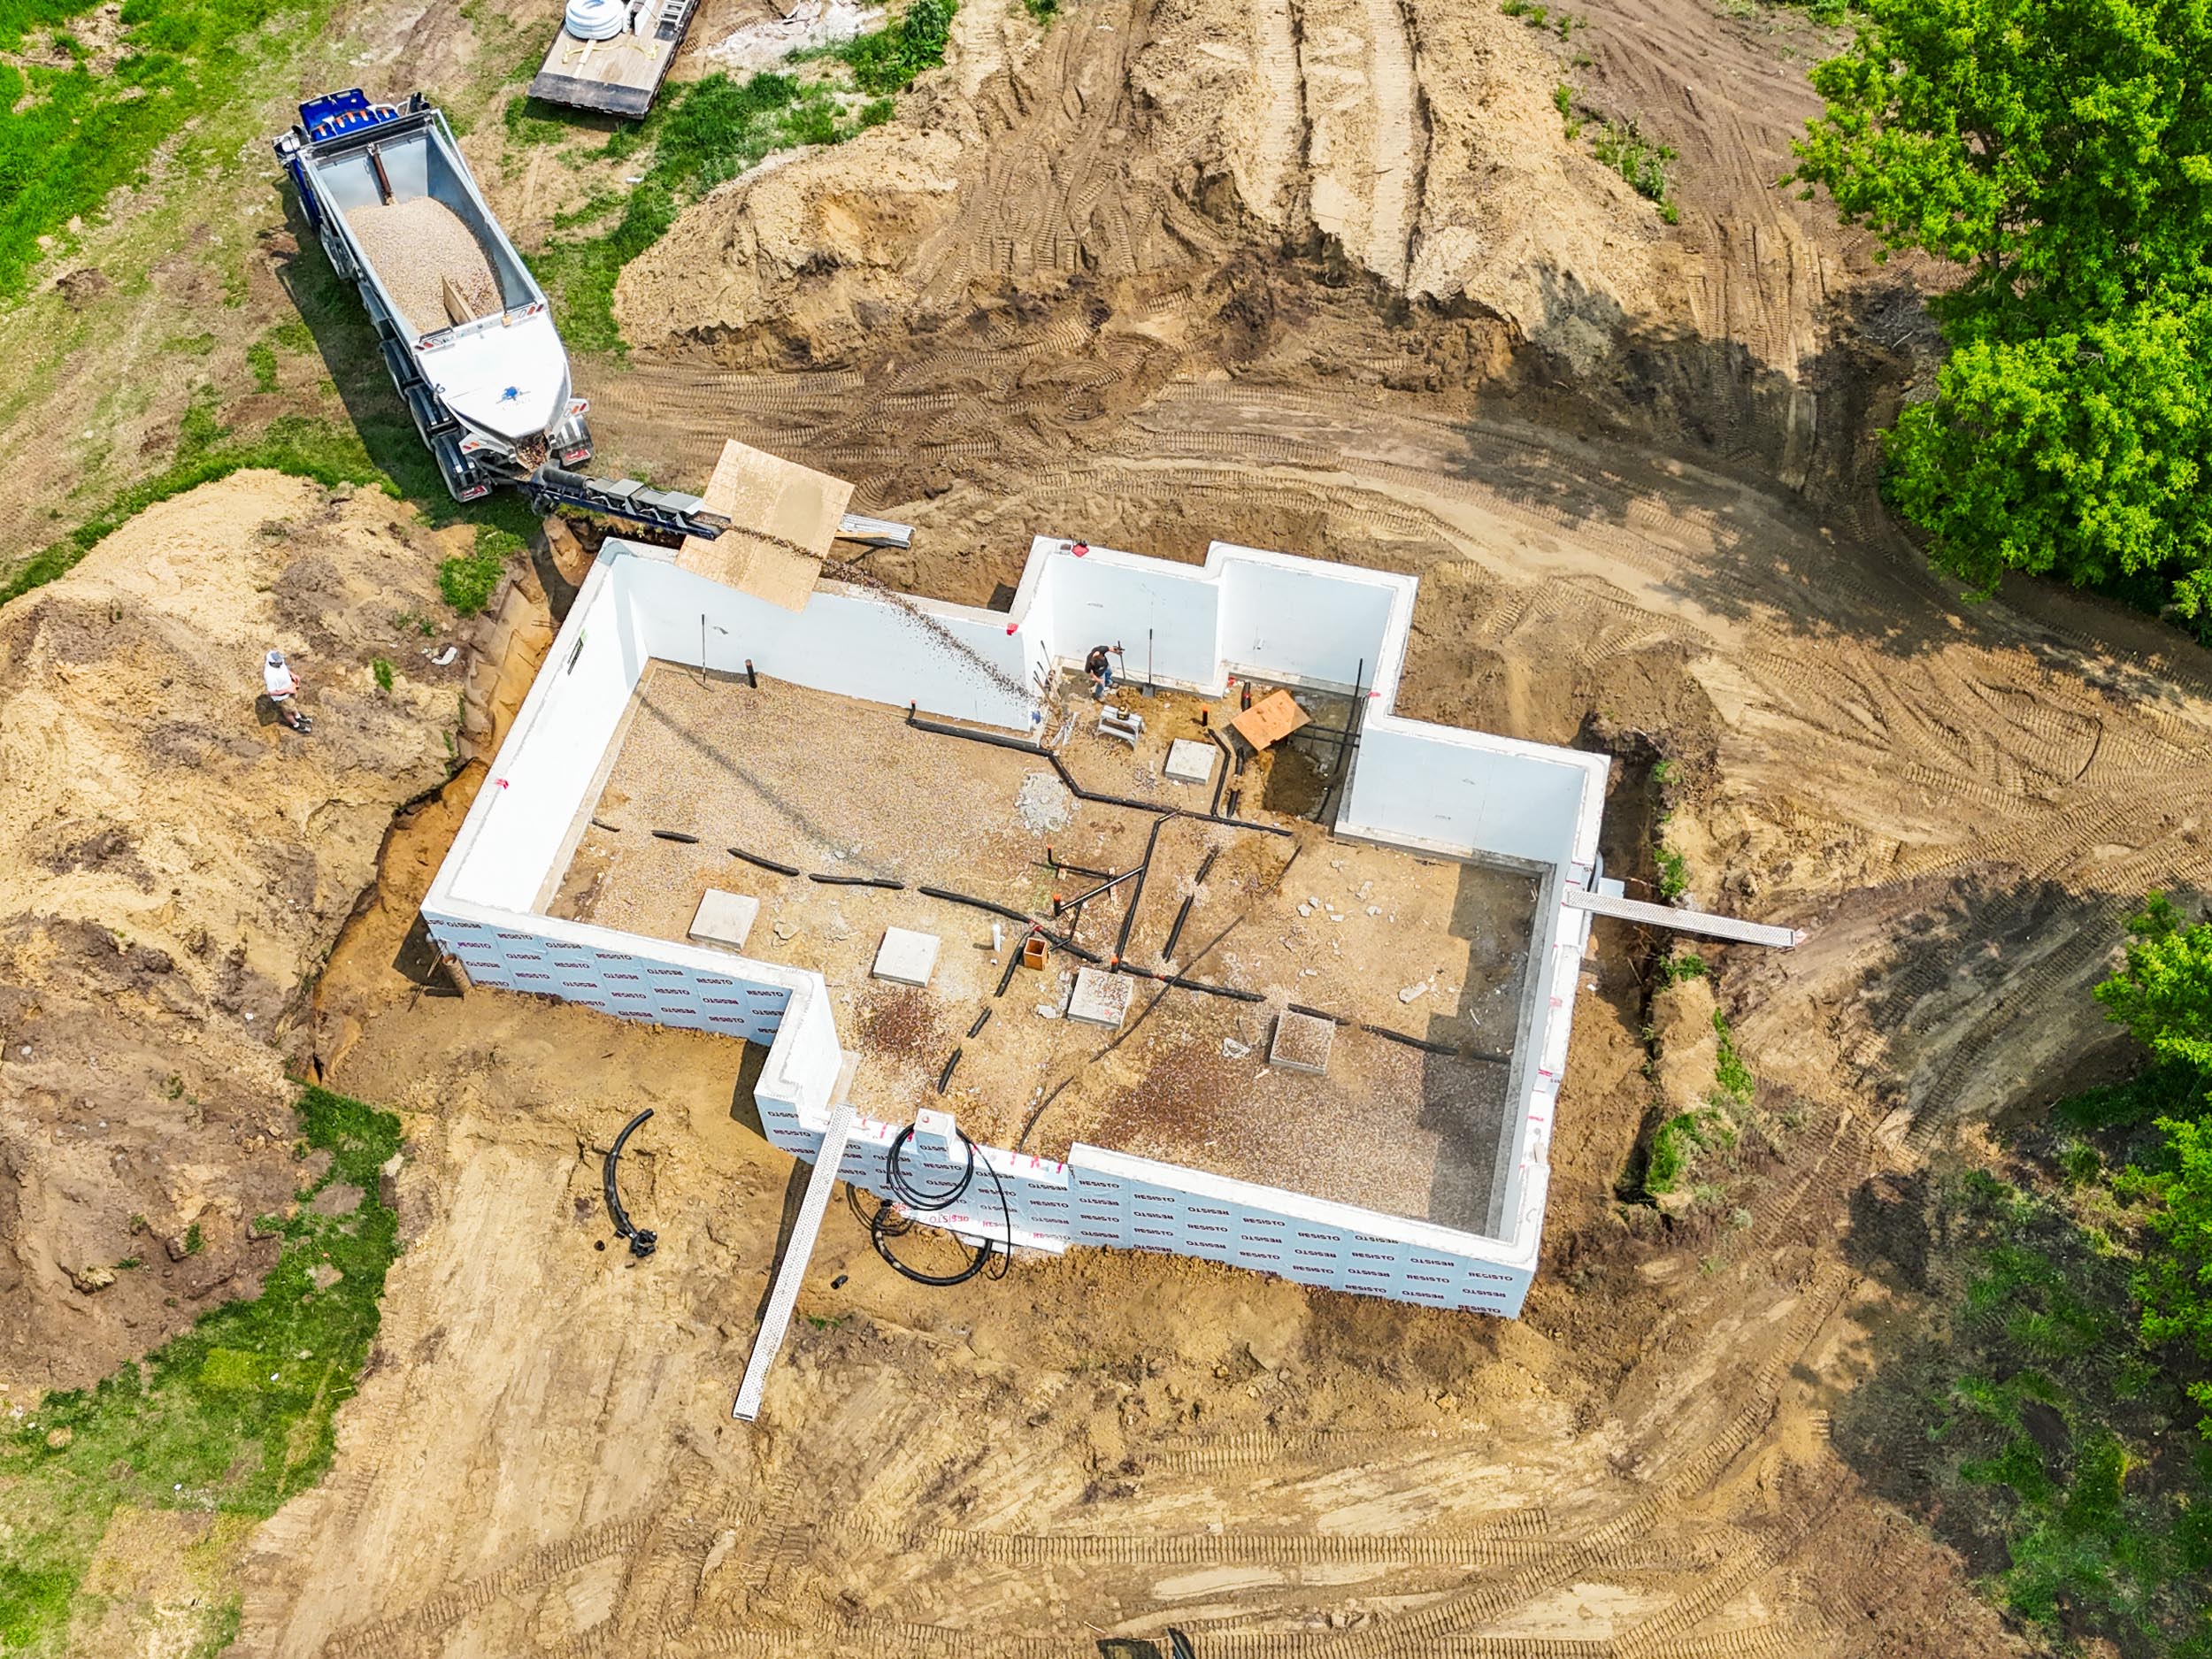
          Before the basement floor could be poured, the insulation,
          plumbing and service work underneath it had to be completed.
          Reinforcing steel was then installed over the insulated floor
          area.
        </p>

        <p>
          This is one of those stages where it pays to check everything
          carefully. Once the slab is poured, moving a drain, pipe or
          service location becomes a much larger job.
        </p>

      </div>

    </div>

  </div>
</section></div>
<div><section class="go-full-bleed go-section go-section--alternate">
  <div class="go-container--wide">

    <header class="go-section-heading">

      <p class="go-eyebrow">
        Project Gallery
      </p>

      <h2>
        From Excavation to Finished Basement
      </h2>

    </header>

    <div class="go-project-gallery">

      <figure class="go-project-gallery__item">
        <img loading="lazy"           src="./media/posts/10/gallery/Foundation-Pour-2.jpg"
          alt="Excavator preparing the site for a new home foundation"
          loading="lazy"
          width="1200"
          height="900"
        >

        <figcaption>
          Excavation underway before the footing layout was completed.
        </figcaption>
      </figure>

      <figure class="go-project-gallery__item">
        <img loading="lazy"           src="./media/posts/10/gallery/Foundation-Pour-6.jpg"
          alt="Aerial view of excavation for a new home foundation"
          loading="lazy"
          width="1200"
          height="900"
        >

        <figcaption>
          The full excavation showing the new home footprint and site access.
        </figcaption>
      </figure>

      <figure class="go-project-gallery__item">
        <img loading="lazy"           src="./media/posts/10/gallery/Foundation-Pour-9.jpg"
          alt="Concrete footing forms prepared for an ICF foundation"
          loading="lazy"
          width="1200"
          height="900"
        >

        <figcaption>
          Footing forms laid out and checked before the concrete pour.
        </figcaption>
      </figure>

      <figure class="go-project-gallery__item">
        <img loading="lazy"           src="./media/posts/10/gallery/Foundation-Pour-14.jpg"
          alt="Poured concrete footings for a new home foundation"
          loading="lazy"
          width="1200"
          height="900"
        >

        <figcaption>
          Completed footings ready for the ICF wall system.
        </figcaption>
      </figure>

      <figure class="go-project-gallery__item">
        <img loading="lazy"           src="./media/posts/10/gallery/Foundation-Pour-15.jpg"
          alt="ICF foundation walls being assembled"
          loading="lazy"
          width="1200"
          height="900"
        >

        <figcaption>
          ICF walls taking shape around the basement layout.
        </figcaption>
      </figure>

      <figure class="go-project-gallery__item">
        <img loading="lazy"           src="./media/posts/10/gallery/Foundation-Pour-25.jpg"
          alt="Braced ICF basement walls before concrete placement"
          loading="lazy"
          width="1200"
          height="900"
        >

        <figcaption>
          Wall bracing installed before the ICF concrete pour.
        </figcaption>
      </figure>

      <figure class="go-project-gallery__item">
        <img loading="lazy"           src="./media/posts/10/gallery/Foundation-Pour-46.jpg"
          alt="Under-slab insulation and reinforcing steel in an ICF basement"
          loading="lazy"
          width="1200"
          height="900"
        >

        <figcaption>
          Under-slab insulation, reinforcement and service locations prepared.
        </figcaption>
      </figure>

      <figure class="go-project-gallery__item">
        <img loading="lazy"           src="./media/posts/10/gallery/Foundation-Pour-52.jpg"
          alt="Finished concrete basement slab inside an ICF foundation"
          loading="lazy"
          width="1200"
          height="900"
        >

        <figcaption>
          Finished basement floor ready for the next stage of construction.
        </figcaption>
      </figure>

    </div>

  </div>
</section></div>
<div><section class="go-full-bleed go-section go-section--dark">
  <div class="go-container">

    <div class="go-reading-width">

      <p class="go-eyebrow">
        Planning Advice
      </p>

      <h2>
        Planning an ICF Foundation?
      </h2>

      <p>
        Foundation work needs to be sorted out before the concrete trucks
        arrive. The house layout, wall locations, openings, plumbing,
        service penetrations and floor heights all need to work together.
      </p>

      <p>
        Once the footings, walls or slab are poured, changes become much
        harder and more expensive. We prefer to go through those details
        early and make sure everyone involved knows what has to be ready
        before each pour.
      </p>

      <p>
        A few extra checks at the start can prevent a lot of trouble once
        the rest of the house construction begins.
      </p>

    </div>
    <div class="go-actions">

        <a
          class="go-button go-button--light go-button--large"
          href="/request-a-quote/"
        >
          Let us know about your project
        </a>
        

      </div>


  </div>
</section></div>
<div><section class="go-full-bleed go-section">
  <div class="go-container">

    <div class="go-project-cta">

      <div class="go-project-cta__content">

        <p class="go-eyebrow">
          Start a Project
        </p>

        <h2>
          Ready to Discuss Your Foundation Project?
        </h2>

        <p>
          Planning a new home, basement or ICF foundation? Tell us where
          the project is located, how far along the plans are and when
          you hope to begin. Grey Owl Construction can review the scope
          and discuss the next steps.
        </p>

      </div>

      <div class="go-actions">

        <a
          class="go-button go-button--primary go-button--large"
          href="/request-a-quote/"
        >
          Book a Quote
        </a>

        <a
          class="go-button go-button--secondary go-button--large"
          href="tel:+12042420822"
        >
          Call Grey Owl
        </a>
        

      </div>

    </div>

  </div>
</section></div>
            ]]>
        </content>
    </entry>
    <entry>
        <title>House Shell Construction Near St. Léon, Manitoba</title>
        <author>
            <name>Miguel Talbot</name>
        </author>
        <link href="https://greyowlconstruction.ca/house-shell-construction-near-st-leon-manitoba-2.html"/>
        <id>https://greyowlconstruction.ca/house-shell-construction-near-st-leon-manitoba-2.html</id>
        <media:content url="https://greyowlconstruction.ca/media/posts/8/2-House-Build-33.jpg" medium="image" />
            <category term="Projects"/>
            <category term="Home build"/>

        <updated>2026-06-22T15:42:42-07:00</updated>
            <summary type="html">
                <![CDATA[
                        <img src="https://greyowlconstruction.ca/media/posts/8/2-House-Build-33.jpg" alt="House shell construction with framing, roof, windows and exterior envelope completed by Grey Owl Construction near St. Léon, Manitoba." />
                    Residential Construction A professionally built, weather-tight home shell completed to lock-up stage so the homeowner could take on the interior work. Project Overview A local homeowner wanted to take an active role in building their home while still ensuring the structure was completed properly from&hellip;
                ]]>
            </summary>
        <content type="html">
            <![CDATA[
                    <p><img src="https://greyowlconstruction.ca/media/posts/8/2-House-Build-33.jpg" class="type:primaryImage" alt="House shell construction with framing, roof, windows and exterior envelope completed by Grey Owl Construction near St. Léon, Manitoba." /></p>
                <div><section class="go-project-hero">

  <div class="go-project-hero__image">
    <img loading="lazy"       src="./media/posts/8/gallery/2-House-Build-33.jpg"
      alt="House shell construction near St. Léon, Manitoba"
      width="1800"
      height="1100"
    >
  </div>

  <div class="go-project-hero__content">

    <p class="go-eyebrow">
      Residential Construction
    </p>

    <h1>
      House Shell Construction Near St. Léon, Manitoba
    </h1>

    <p>
      A professionally built, weather-tight home shell completed to
      lock-up stage so the homeowner could take on the interior work.
    </p>

  </div>

</section></div>
<div><section class="go-full-bleed go-section">
  <div class="go-container--wide">

    <div class="go-project-overview">

      <div class="go-project-overview__content">

        <p class="go-eyebrow">
          Project Overview
        </p>

        <h2>
          A Weather-Tight Home Shell Ready for Interior Construction
        </h2>

        <p>
          A local homeowner wanted to take an active role in building
          their home while still ensuring the structure was completed
          properly from the start. Grey Owl Construction was hired to
          complete the exterior shell, creating a weather-tight structure
          that allowed the owner to take over the interior work at their
          own pace.
        </p>

        <p>
          The project included framing, roofing, exterior finishing,
          window installation and the critical components required to
          bring the building to lock-up stage. Once completed, the owner
          could move forward with the interior knowing the home was
          protected from the elements and built on a solid foundation.
        </p>

      </div>

      <aside class="go-project-details">

        <p class="go-eyebrow">
          Project Details
        </p>

        <dl>

          <div>
            <dt>Location</dt>
            <dd>Near St. Léon, Manitoba</dd>
          </div>

          <div>
            <dt>Project Type</dt>
            <dd>Residential Construction</dd>
          </div>

          <div>
            <dt>Scope</dt>
            <dd>House Shell Construction</dd>
          </div>

          <div>
            <dt>Completed</dt>
            <dd>2025</dd>
          </div>

        </dl>

      </aside>

    </div>

  </div>
</section></div>
<div><section class="go-full-bleed go-section go-section--alternate">
  <div class="go-container">

    <div class="go-reading-width">

      <p class="go-eyebrow">
        What Was Built
      </p>

      <h2>
        Structural and Exterior Work Completed to Lock-Up Stage
      </h2>

      <p>
        The project focused on completing the structural and
        weatherproof portions of the home. This allowed the owner to
        take over the interior work without having to complete the most
        equipment-intensive and technically demanding stages themselves.
      </p>

      <ul class="go-built-points">

        <li>
          Structural framing of the home
        </li>

        <li>
          Roof framing and roofing installation
        </li>

        <li>
          Window installation
        </li>

        <li>
          Exterior wall finishing
        </li>

        <li>
          Completion of the exterior building envelope
        </li>

        <li>
          Weather protection and preparation for interior construction
        </li>

      </ul>

    </div>

  </div>
</section></div>
<div><section class="go-full-bleed go-section">
  <div class="go-container--wide">

    <header class="go-section-heading">

      <p class="go-eyebrow">
        Building Progress
      </p>

      <h2>
        From Framing to a Weather-Tight Shell
      </h2>

      <p>
        The project moved through framing, roof construction, window
        installation and exterior finishing. Each stage brought the
        home closer to a secure structure ready for interior work.
      </p>

    </header>

    <div class="go-project-gallery">

      <figure class="go-project-gallery__item">

        <img loading="lazy"           src="./media/posts/8/gallery/2-House-Build.jpg"
          alt="House framing underway near St. Léon, Manitoba"
          loading="lazy"
          width="1200"
          height="900"
        >

        <figcaption>
          Structural framing and sheeting underway as the shape and layout of the
          home began to take form.
        </figcaption>

      </figure>

      <figure class="go-project-gallery__item">

        <img loading="lazy"           src="./media/posts/8/gallery/2-House-Build-16.jpg"
          alt="Roof construction on a house shell near St. Léon"
          loading="lazy"
          width="1200"
          height="900"
        >

        <figcaption>
          Roof construction completed to begin protecting the future
          living space from the weather.
        </figcaption>

      </figure>

      <figure class="go-project-gallery__item">

        <img loading="lazy"           src="./media/posts/8/gallery/2-House-Build-12.jpg"
          alt="Windows installed during house shell construction"
          loading="lazy"
          width="1200"
          height="900"
        >

        <figcaption>
          Window installation underway as the building moved closer to
          lock-up stage.
        </figcaption>

      </figure>

      <figure class="go-project-gallery__item">

        <img loading="lazy"           src="./media/posts/8/gallery/2-House-Build-13.jpg"
          alt="Interior framing for house in southern manitoba"
          loading="lazy"
          width="1200"
          height="900"
        >

        <figcaption>
          Interior framing and window installs
        </figcaption>

      </figure>
      
      <figure class="go-project-gallery__item">

        <img loading="lazy"           src="./media/posts/8/gallery/2-House-Build-2.jpg"
          alt="Exterior finishing on a house shell in Southern Manitoba"
          loading="lazy"
          width="1200"
          height="900"
        >

        <figcaption>
          Exterior finishing completed to create a durable,
          weather-resistant building envelope with insulation.
        </figcaption>

      </figure>
    </div>

  </div>
</section></div>
<div><section class="go-full-bleed go-section go-section--alternate">
  <div class="go-container--wide">

    <div class="go-split">

      <div class="go-split__media">

        <img loading="lazy"           src="./media/posts/8/gallery/2-House-Build-20.jpg"
          alt="Completed house shell near St. Léon, Manitoba"
          loading="lazy"
          width="1400"
          height="1000"
        >

      </div>

      <div class="go-split__content">

        <p class="go-eyebrow">
          Completed Project
        </p>

        <h2>
          Ready for the Homeowner to Complete the Interior
        </h2>

        <p>
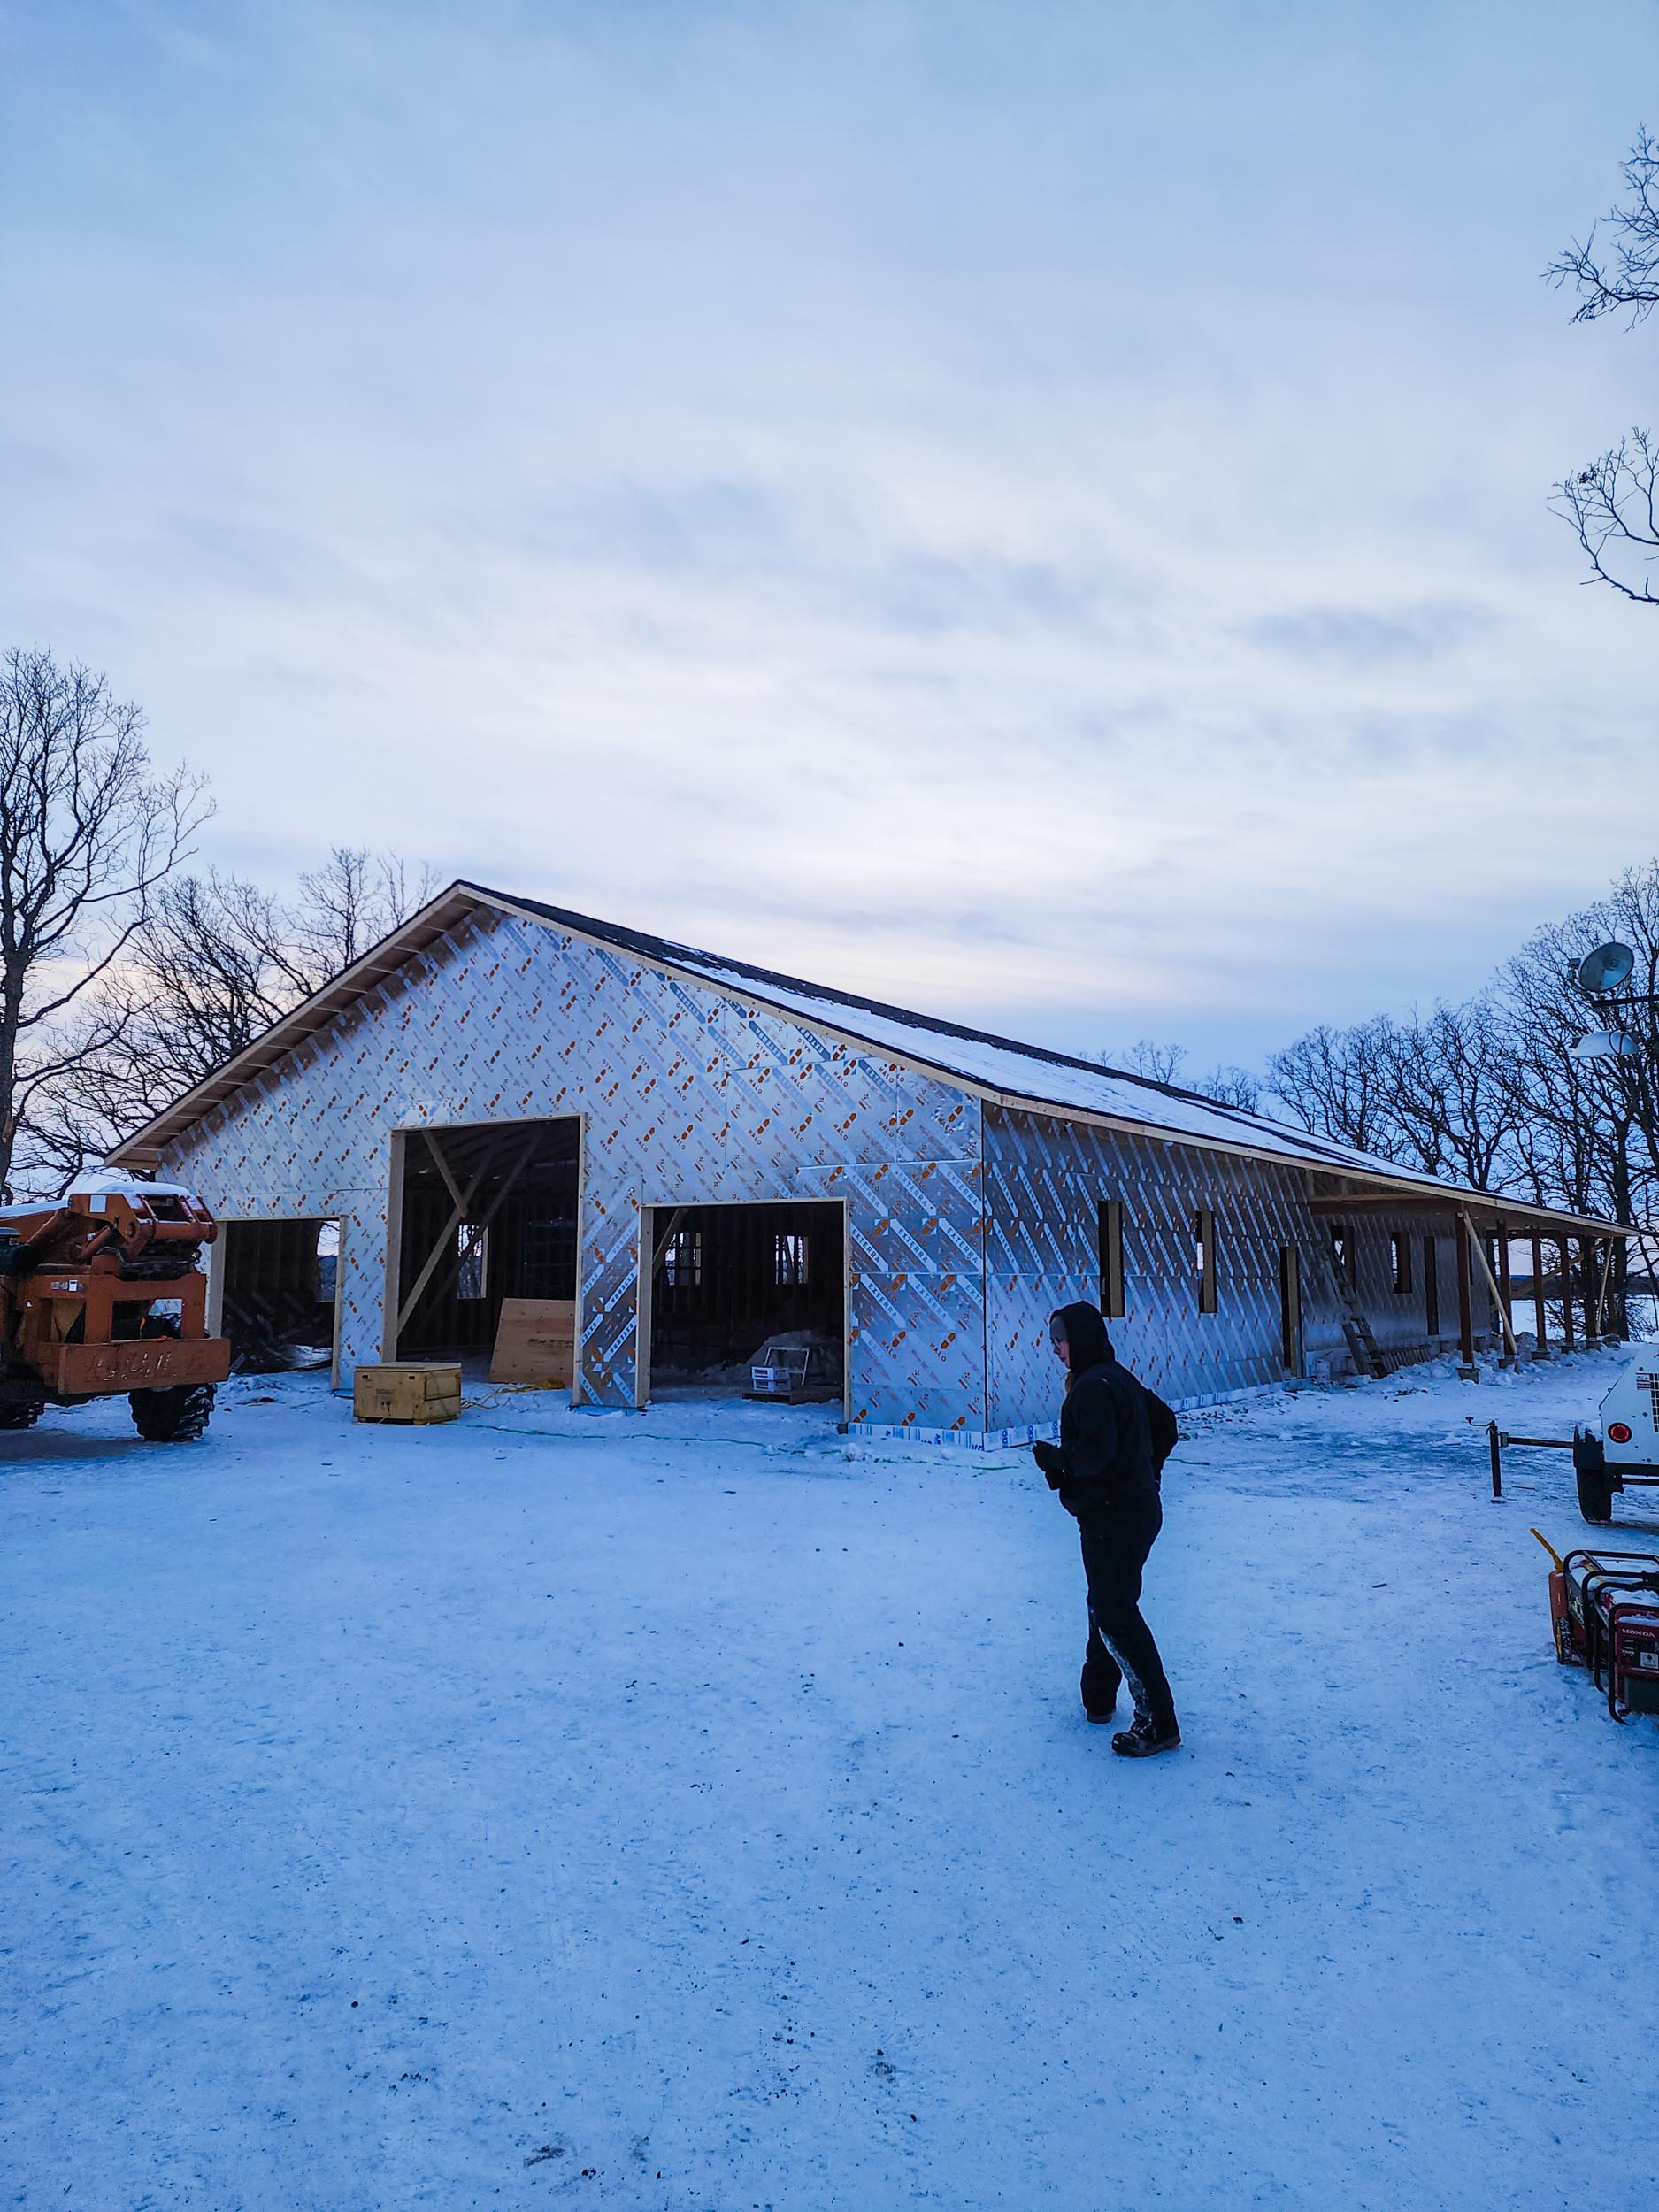
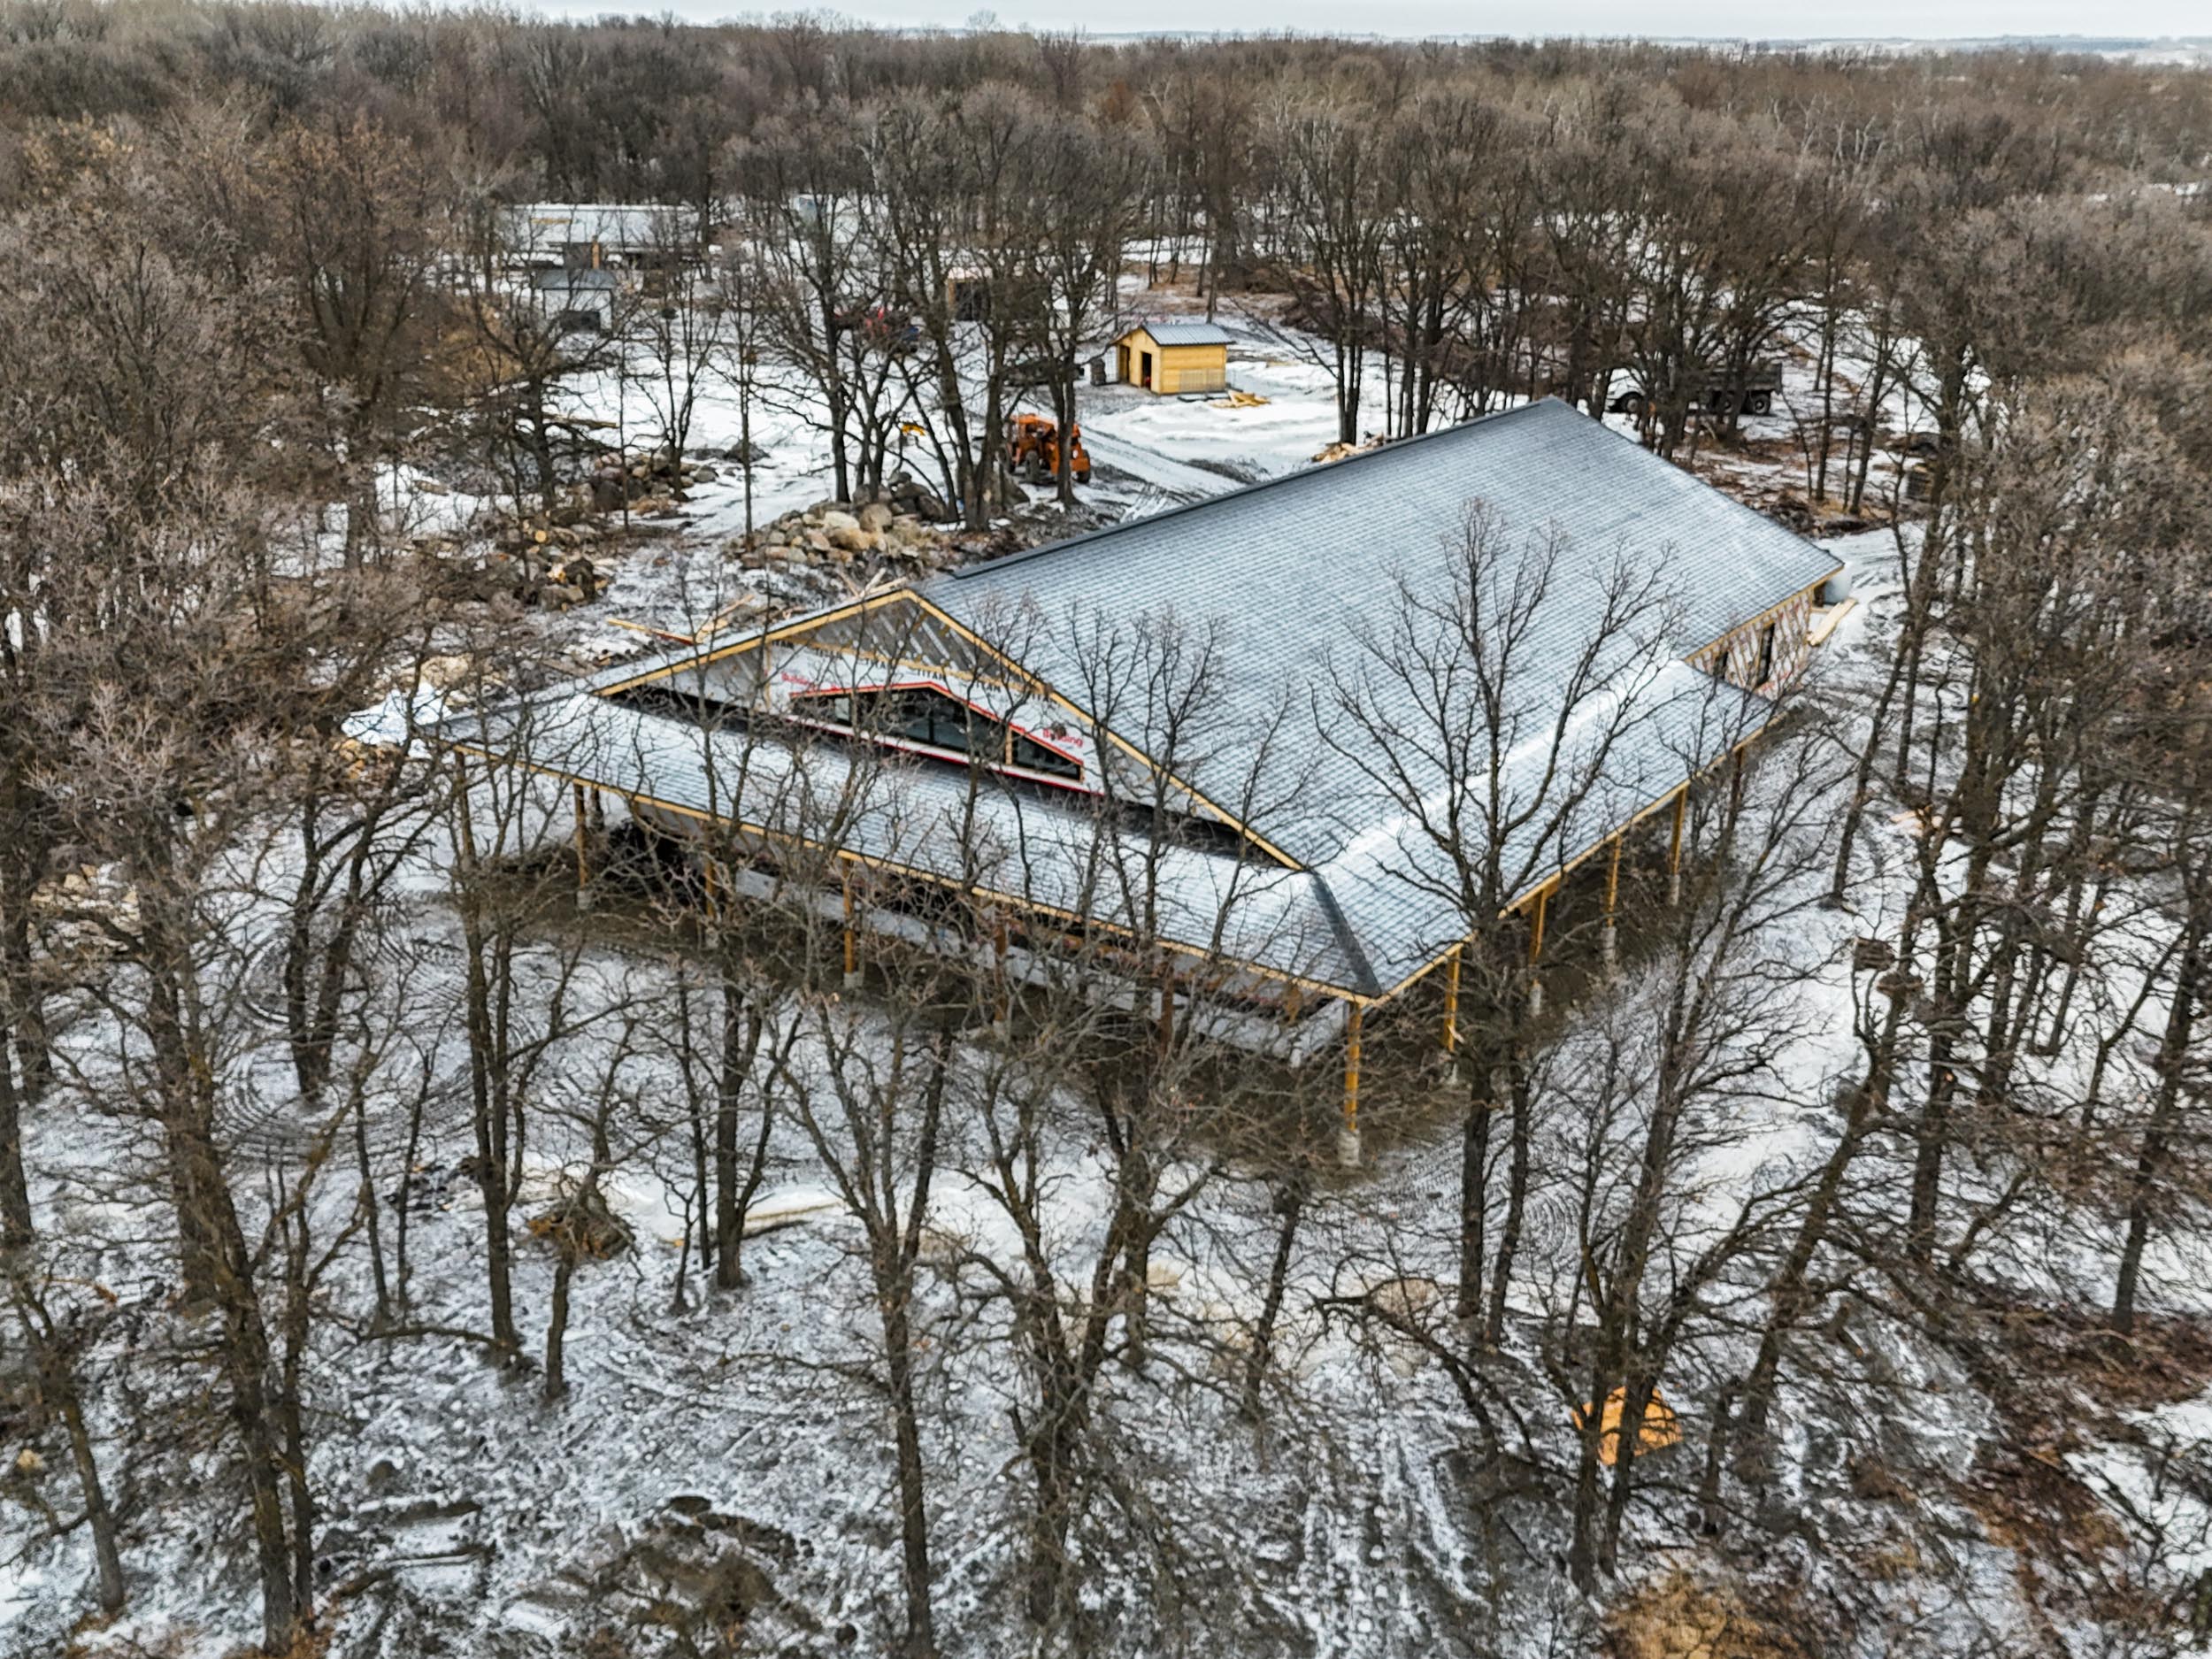
          The finished shell provided a secure and weather-resistant
          structure ready for interior development. With the framing,
          roofing, windows and exterior envelope complete, the homeowner
          could move forward with finishing the inside according to
          their own timeline and budget.
        </p>

        <p>
          This approach allowed the owner to remain actively involved
          while benefiting from professional construction during the
          most critical structural phases of the build.
        </p>

      </div>

    </div>

  </div>
</section></div>
<div><section class="go-full-bleed go-section go-section--dark">
  <div class="go-container">

    <div class="go-reading-width">

      <p class="go-eyebrow">
        Planning Advice
      </p>

      <h2>
        Planning a Similar Project?
      </h2>

      <p>
        Not every homeowner wants a contractor to complete every stage
        of construction. In some cases, it makes sense to have the
        structural shell professionally built and then complete portions
        of the interior yourself.
      </p>

      <p>
        The important part is deciding where the contractor’s work ends
        and the owner’s work begins. Permits, inspections, scheduling
        and material deliveries all need to line up properly so the
        transition does not create delays or leave important work
        unfinished.
      </p>

      <p>
        Starting with a properly framed and weather-tight structure
        gives you a solid place to take over. We are happy to discuss
        which stages you want help with and determine whether an
        owner-finished approach makes sense for your project.
      </p>

    </div>
   
      <div class="go-actions">

        <a
          class="go-button go-button--light go-button--large"
          href="/request-a-quote/"
        >
          Let us know about your project
        </a>
        

      </div>


  </div>
</section></div>
<div><section class="go-full-bleed go-section">
  <div class="go-container">

    <div class="go-project-cta">

      <div class="go-project-cta__content">

        <p class="go-eyebrow">
          Start a Project
        </p>

        <h2>
          Ready to Discuss Your Project?
        </h2>

        <p>
          Whether you are planning a custom home, an addition or an
          owner-finished build, tell us what you want to complete
          yourself and where you need professional help. We can discuss
          the scope and find an approach that works for your project.
        </p>

      </div>

      <div class="go-actions">

        <a
          class="go-button go-button--primary go-button--large"
          href="/request-a-quote/"
        >
          Book a Quote
        </a>

        <a
          class="go-button go-button--secondary go-button--large"
          href="tel:+12042420822"
        >
          Call Grey Owl
        </a>

      </div>

    </div>

  </div>
</section></div>
            ]]>
        </content>
    </entry>
    <entry>
        <title>Pole Equipment Shed Near St. Léon, Manitoba</title>
        <author>
            <name>Miguel Talbot</name>
        </author>
        <link href="https://greyowlconstruction.ca/pole-equipment-shed-near-st-leon-manitoba.html"/>
        <id>https://greyowlconstruction.ca/pole-equipment-shed-near-st-leon-manitoba.html</id>
        <media:content url="https://greyowlconstruction.ca/media/posts/6/2-Shop-Build-11.jpg" medium="image" />
            <category term="Projects"/>
            <category term="Agricultural Construction"/>

        <updated>2026-06-22T14:16:52-07:00</updated>
            <summary type="html">
                <![CDATA[
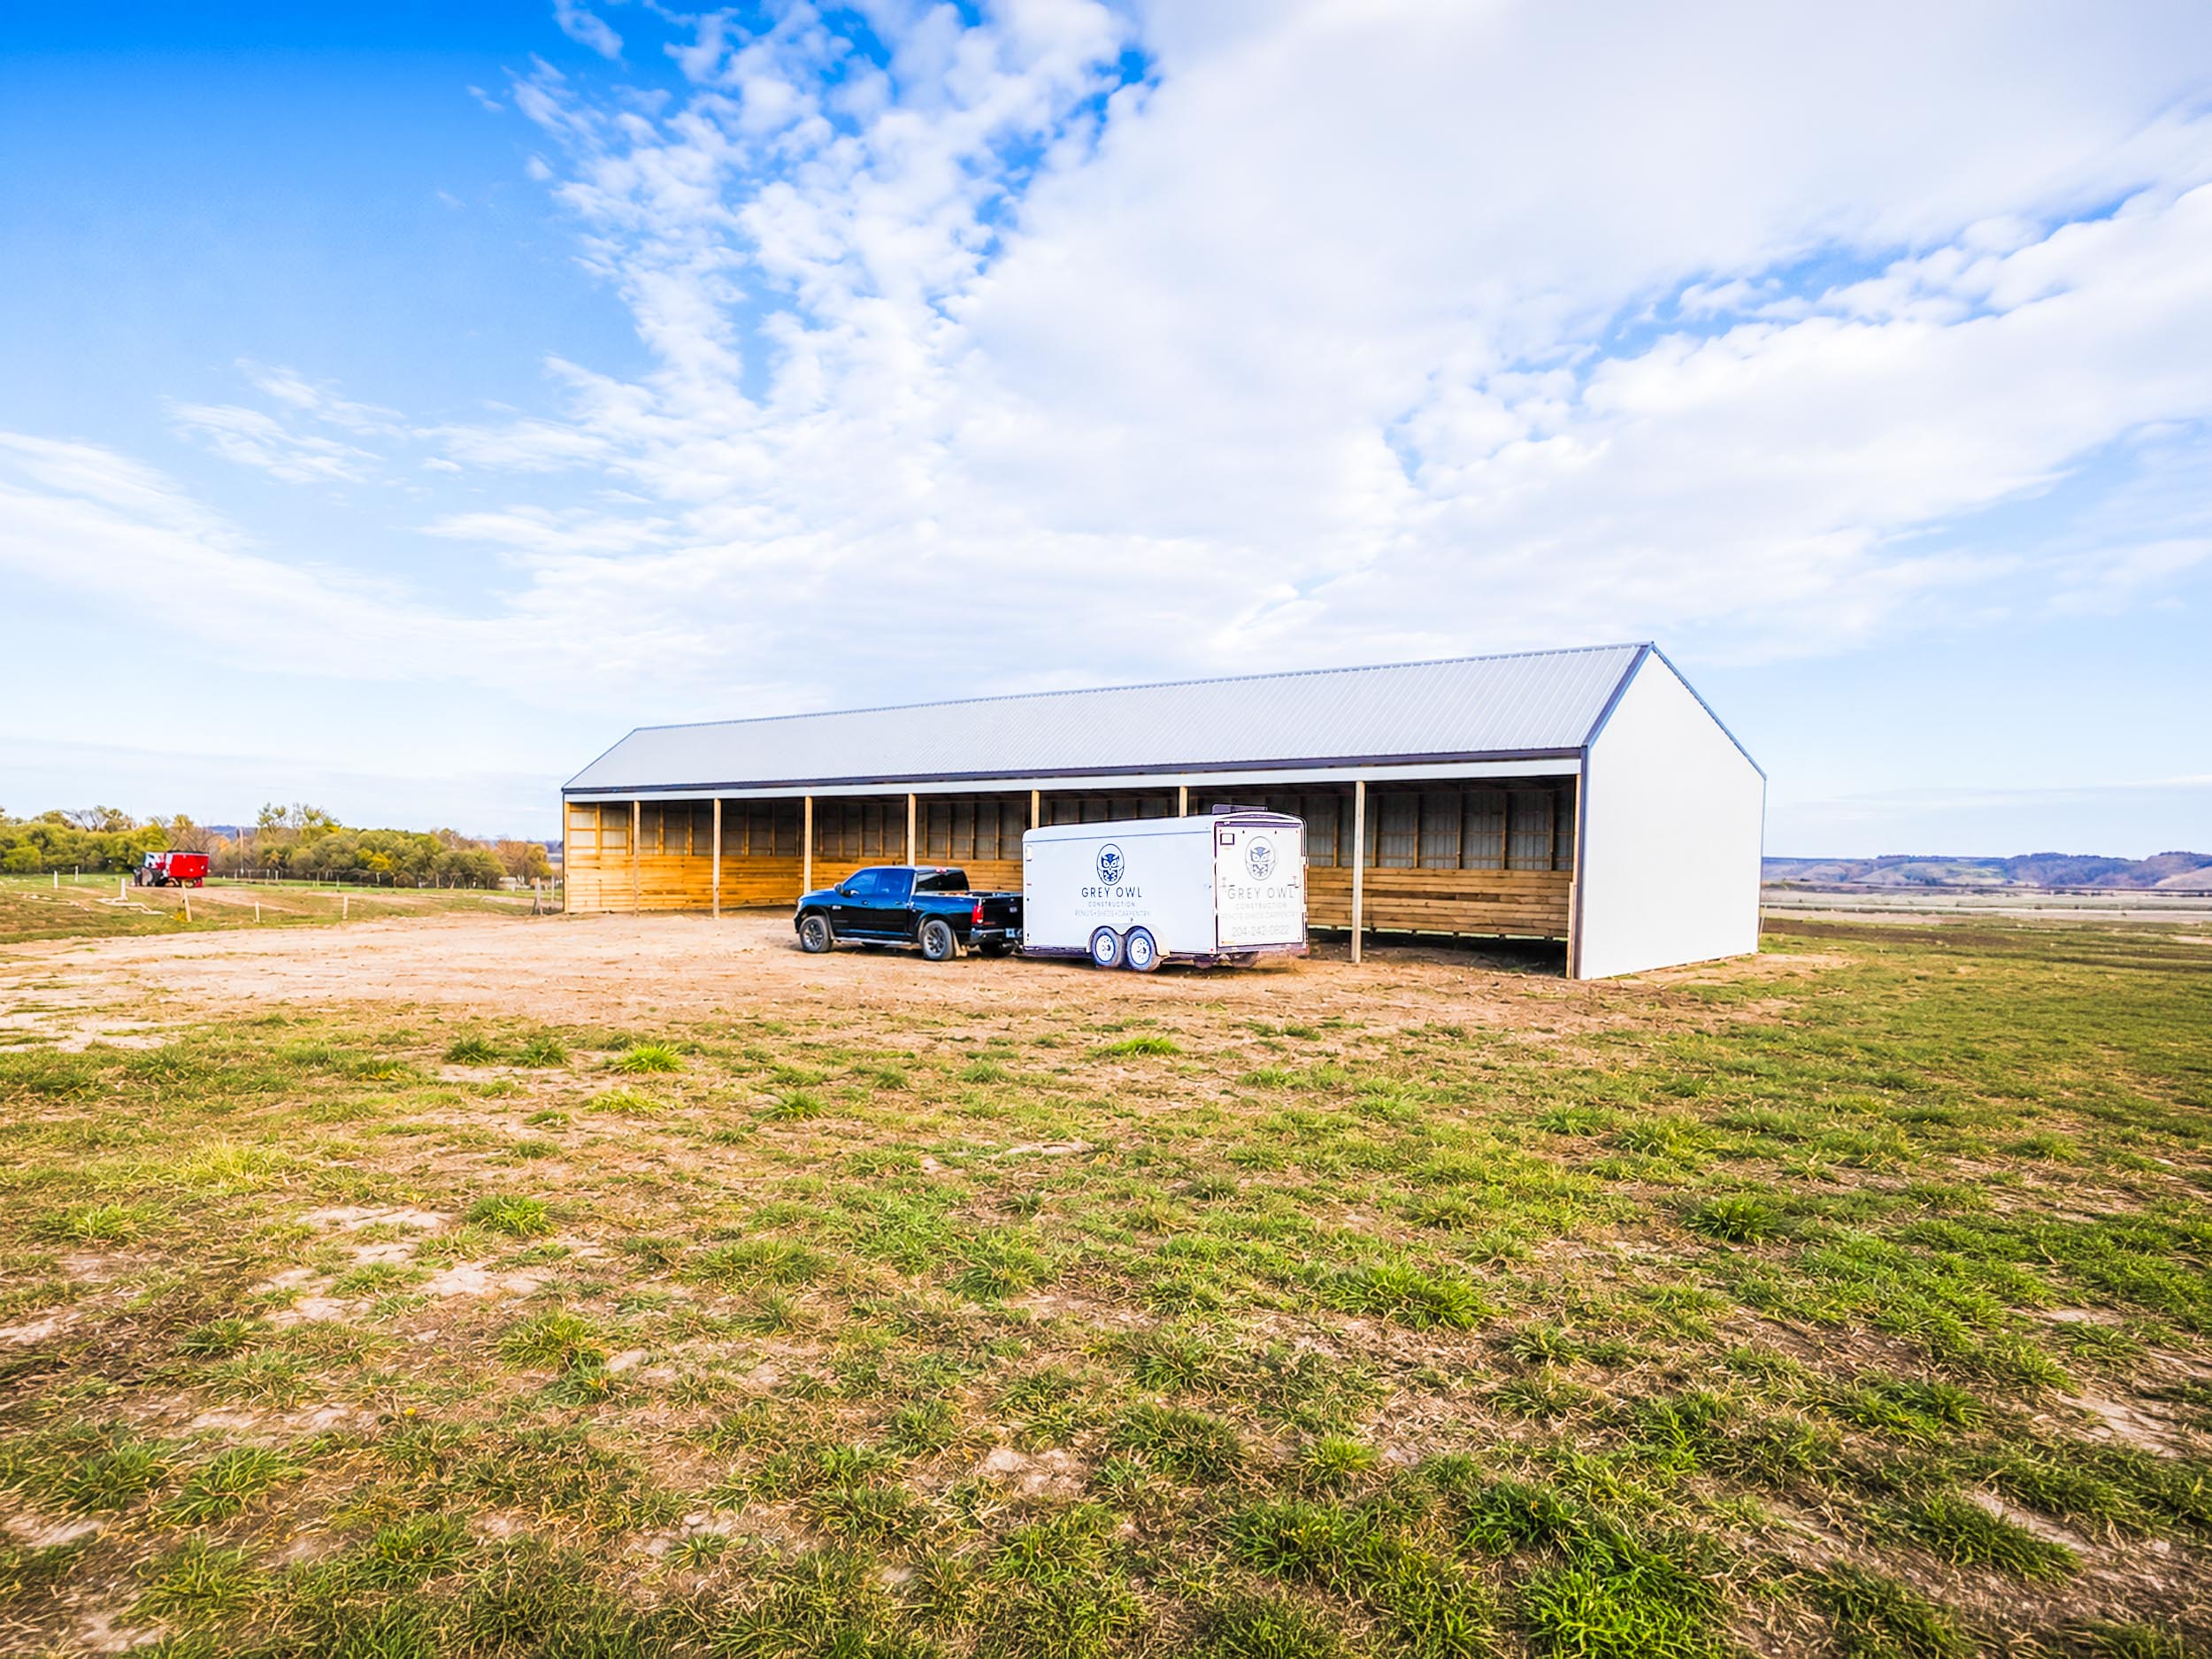
                        <img src="https://greyowlconstruction.ca/media/posts/6/2-Shop-Build-11.jpg" alt="Completed pole shed near St. Léon, Manitoba" />
                    Agricultural Construction A practical agricultural storage building constructed for dependable equipment access and long-term use. Project Overview Grey Owl Construction was hired to build a pole shed for a rural property near St. Léon. The owner needed a practical structure that would provide additional covered&hellip;
                ]]>
            </summary>
        <content type="html">
            <![CDATA[
                    <p><img src="https://greyowlconstruction.ca/media/posts/6/2-Shop-Build-11.jpg" class="type:primaryImage" alt="Completed pole shed near St. Léon, Manitoba" /></p>
                <div><!-- ======================================================
     PROJECT BLOCK 1: HERO
     ====================================================== -->

<section class="go-project-hero">

  <div class="go-project-hero__image">
    <img loading="lazy"       src="./media/posts/6/gallery/2-Shop-Build-11.jpg"
      alt="Completed pole shed near St. Léon, Manitoba"
      width="1800"
      height="1100"
    >
  </div>

  <div class="go-project-hero__content">

    <p class="go-eyebrow">
      Agricultural Construction
    </p>

    <h1>
      Pole Shed Near St. Léon
    </h1>

    <p>
      A practical agricultural storage building constructed for
      dependable equipment access and long-term use.
    </p>

  </div>

</section></div>
<div><!-- ======================================================
     PROJECT BLOCK 2: OVERVIEW AND DETAILS
     ====================================================== -->

<section class="go-full-bleed go-section">
  <div class="go-container--wide">

    <div class="go-project-overview">

      <div class="go-project-overview__content">

        <p class="go-eyebrow">
          Project Overview
        </p>

        <h2>
          A Durable Pole Shed Built for Agricultural Storage
        </h2>

        <p>
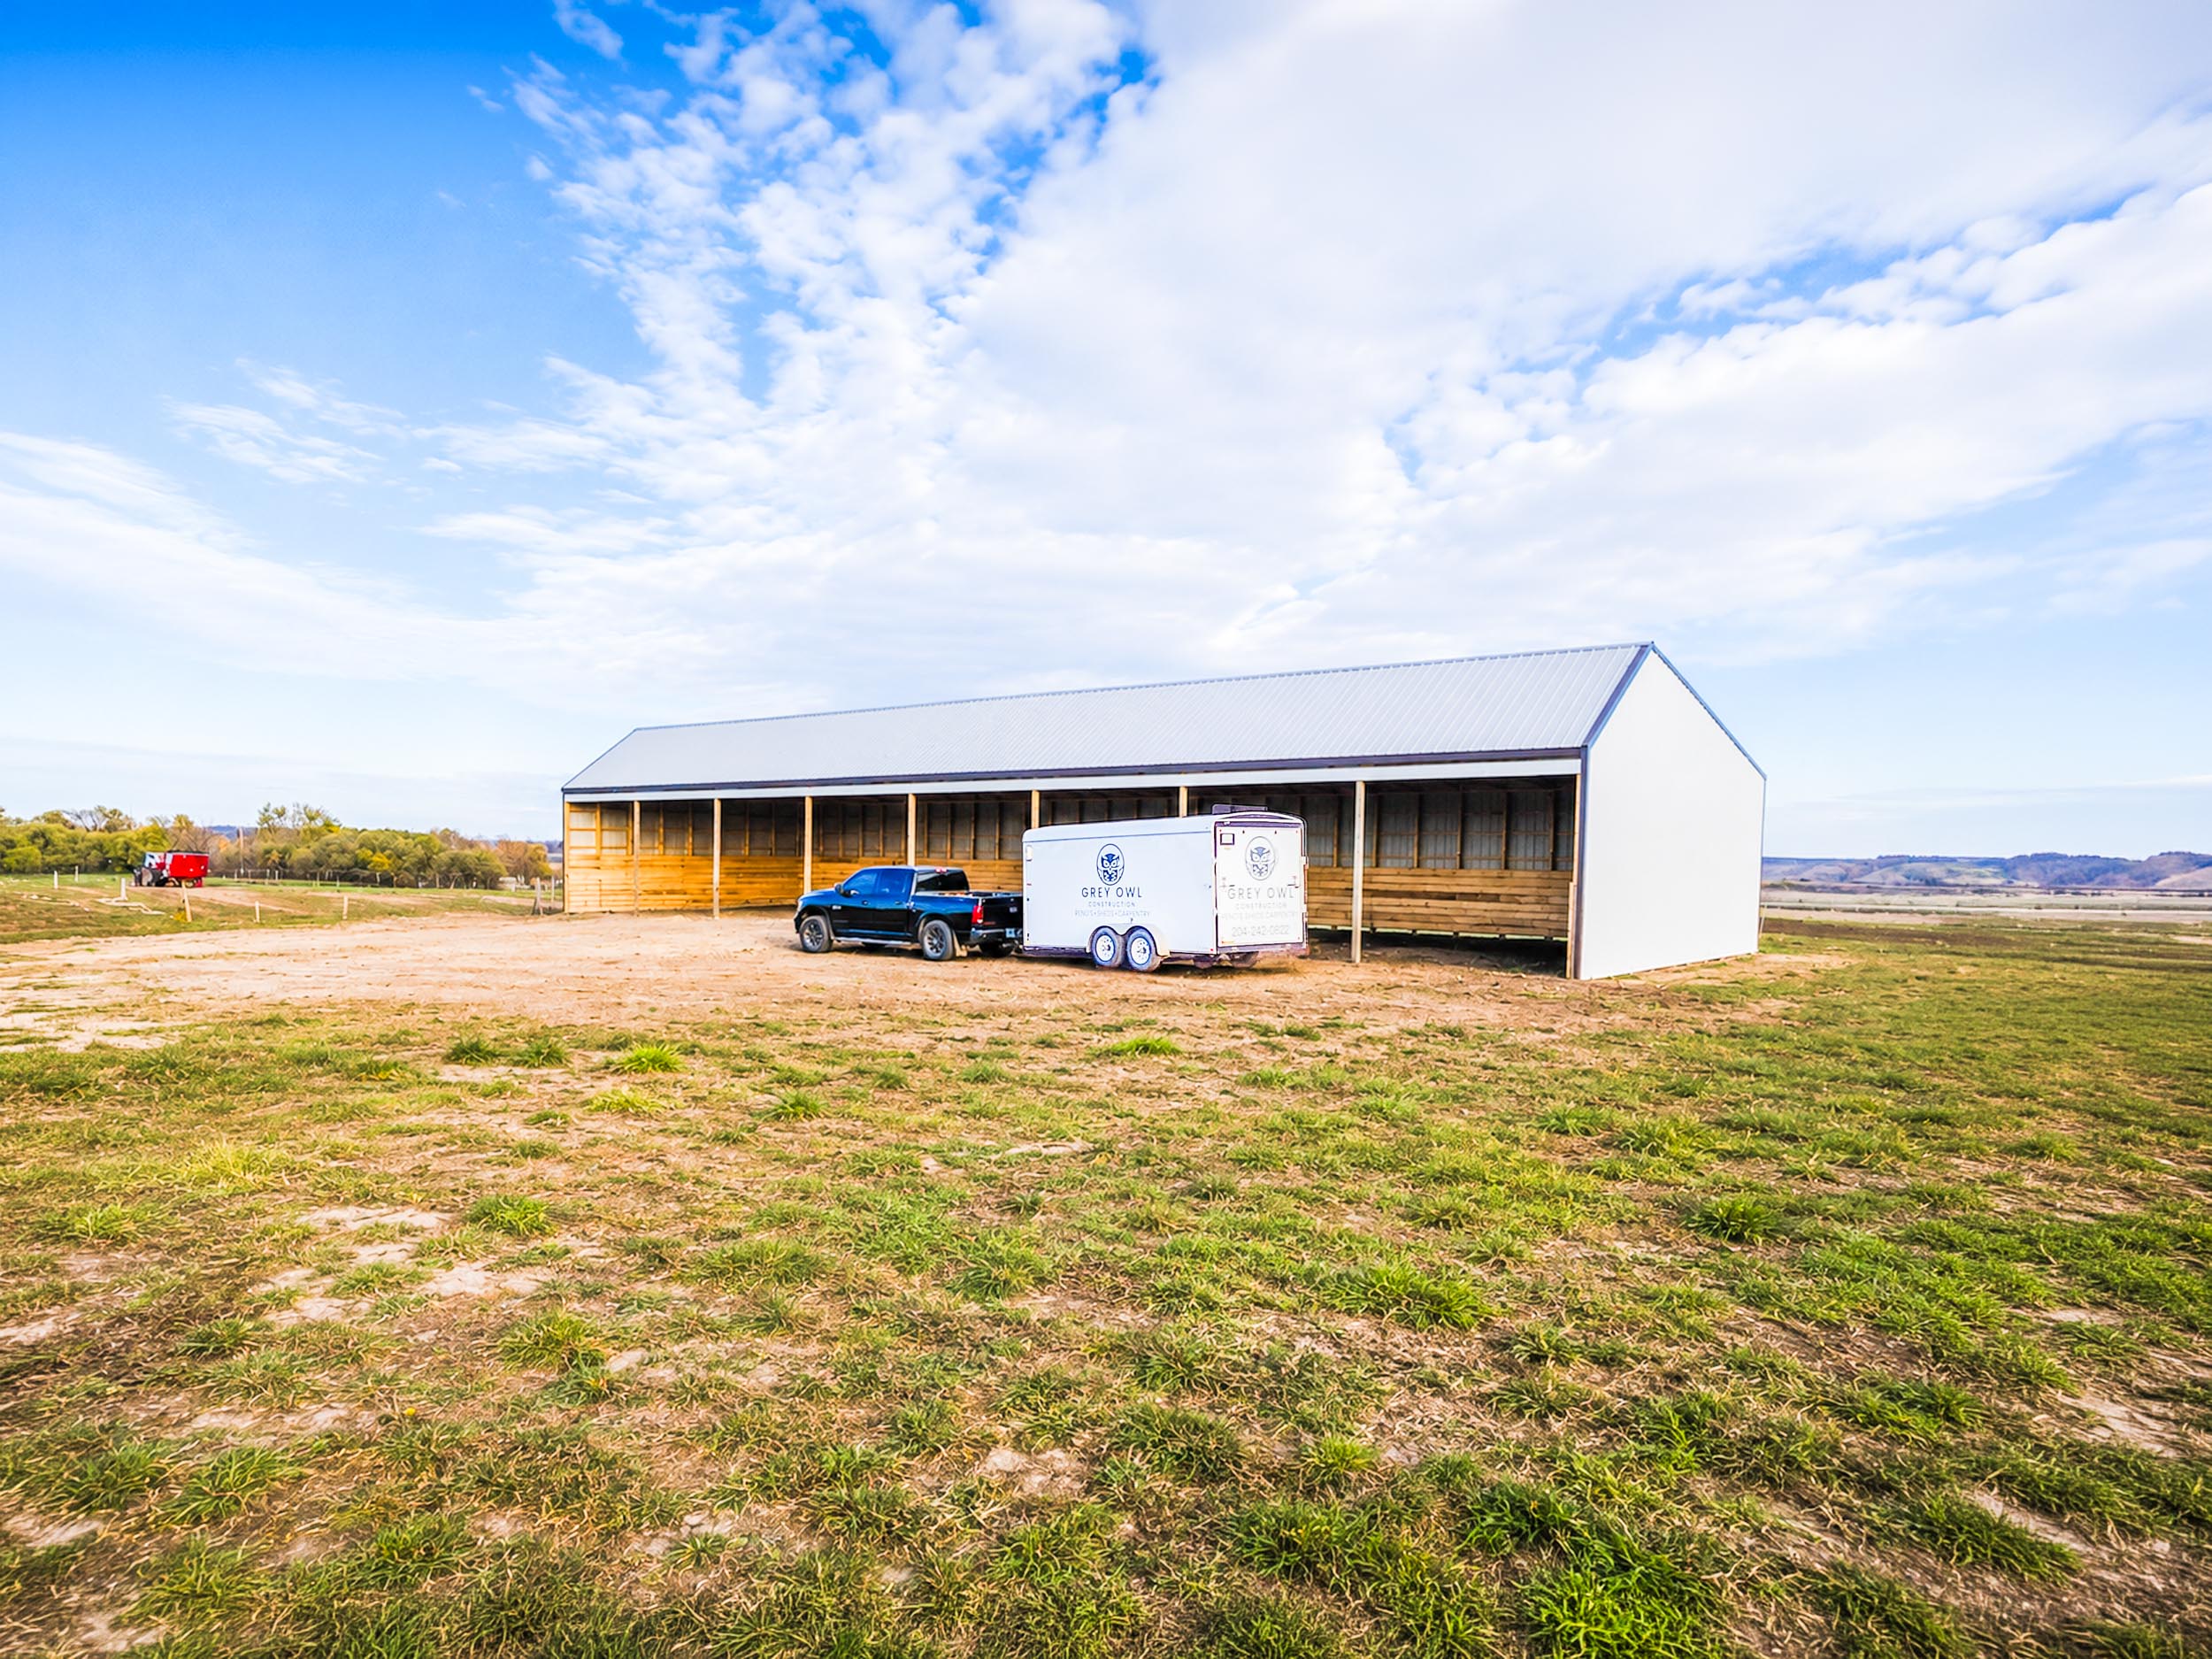
          Grey Owl Construction was hired to build a pole shed for a
          rural property near St. Léon. The owner needed a practical
          structure that would provide additional covered storage while
          keeping equipment easy to access.
        </p>

        <p>
          The building was planned around the property’s current needs
          while leaving flexibility for changing equipment and future
          use. From site preparation and structural framing through
          exterior cladding, the project was completed as a durable
          agricultural building suited to Southern Manitoba conditions.
        </p>

      </div>

      <aside class="go-project-details">

        <p class="go-eyebrow">
          Project Details
        </p>

        <dl>

          <div>
            <dt>Location</dt>
            <dd>Near St. Léon, Manitoba</dd>
          </div>

          <div>
            <dt>Project Type</dt>
            <dd>Agricultural Construction</dd>
          </div>

          <div>
            <dt>Scope</dt>
            <dd>Pole Shed Construction</dd>
          </div>

          <div>
            <dt>Completed</dt>
            <dd>2025</dd>
          </div>

        </dl>

      </aside>

    </div>

  </div>
</section></div>
<div><!-- ======================================================
     PROJECT BLOCK 3: WHAT WAS BUILT
     ====================================================== -->

<section class="go-full-bleed go-section go-section--alternate">
  <div class="go-container">

    <div class="go-reading-width">

      <p class="go-eyebrow">What Was Built</p>

      <h2>Project Scope and Construction</h2>

      <p>
        The pole shed was built as a practical agricultural storage
        structure with clear equipment access and an open interior
        layout.
      </p>

      <ul class="go-built-points">
        <li>
          Site preparation and building layout
        </li>

        <li>
          Structural post-frame construction
        </li>

        <li>
          Large equipment access openings
        </li>

        <li>
          Open interior storage area
        </li>

        <li>
          Metal roofing and exterior cladding
        </li>

        <li>
          Durable agricultural storage space designed for long-term use
        </li>
      </ul>

    </div>

  </div>
</section></div>
<div><!-- ======================================================
     PROJECT BLOCK 4: GALLERY
     Add or remove figures to match the photos available.
     ====================================================== -->

<section class="go-full-bleed go-section">
  <div class="go-container--wide">

    <header class="go-section-heading">

      <p class="go-eyebrow">
        Project Gallery
      </p>

      <h2>
        Pole Shed Construction From Start to Finish
      </h2>

    </header>

    <div class="go-project-gallery">

      <figure class="go-project-gallery__item">

        <img loading="lazy"           src="./media/posts/6/gallery/2-Shop-Build-2.jpg"
          alt="Site preparation for a pole shed near St. Léon"
          loading="lazy"
          width="1200"
          height="900"
        >

        <figcaption>
          Building location prepared and laid out before structural
          construction began.
        </figcaption>

      </figure>

      <figure class="go-project-gallery__item">

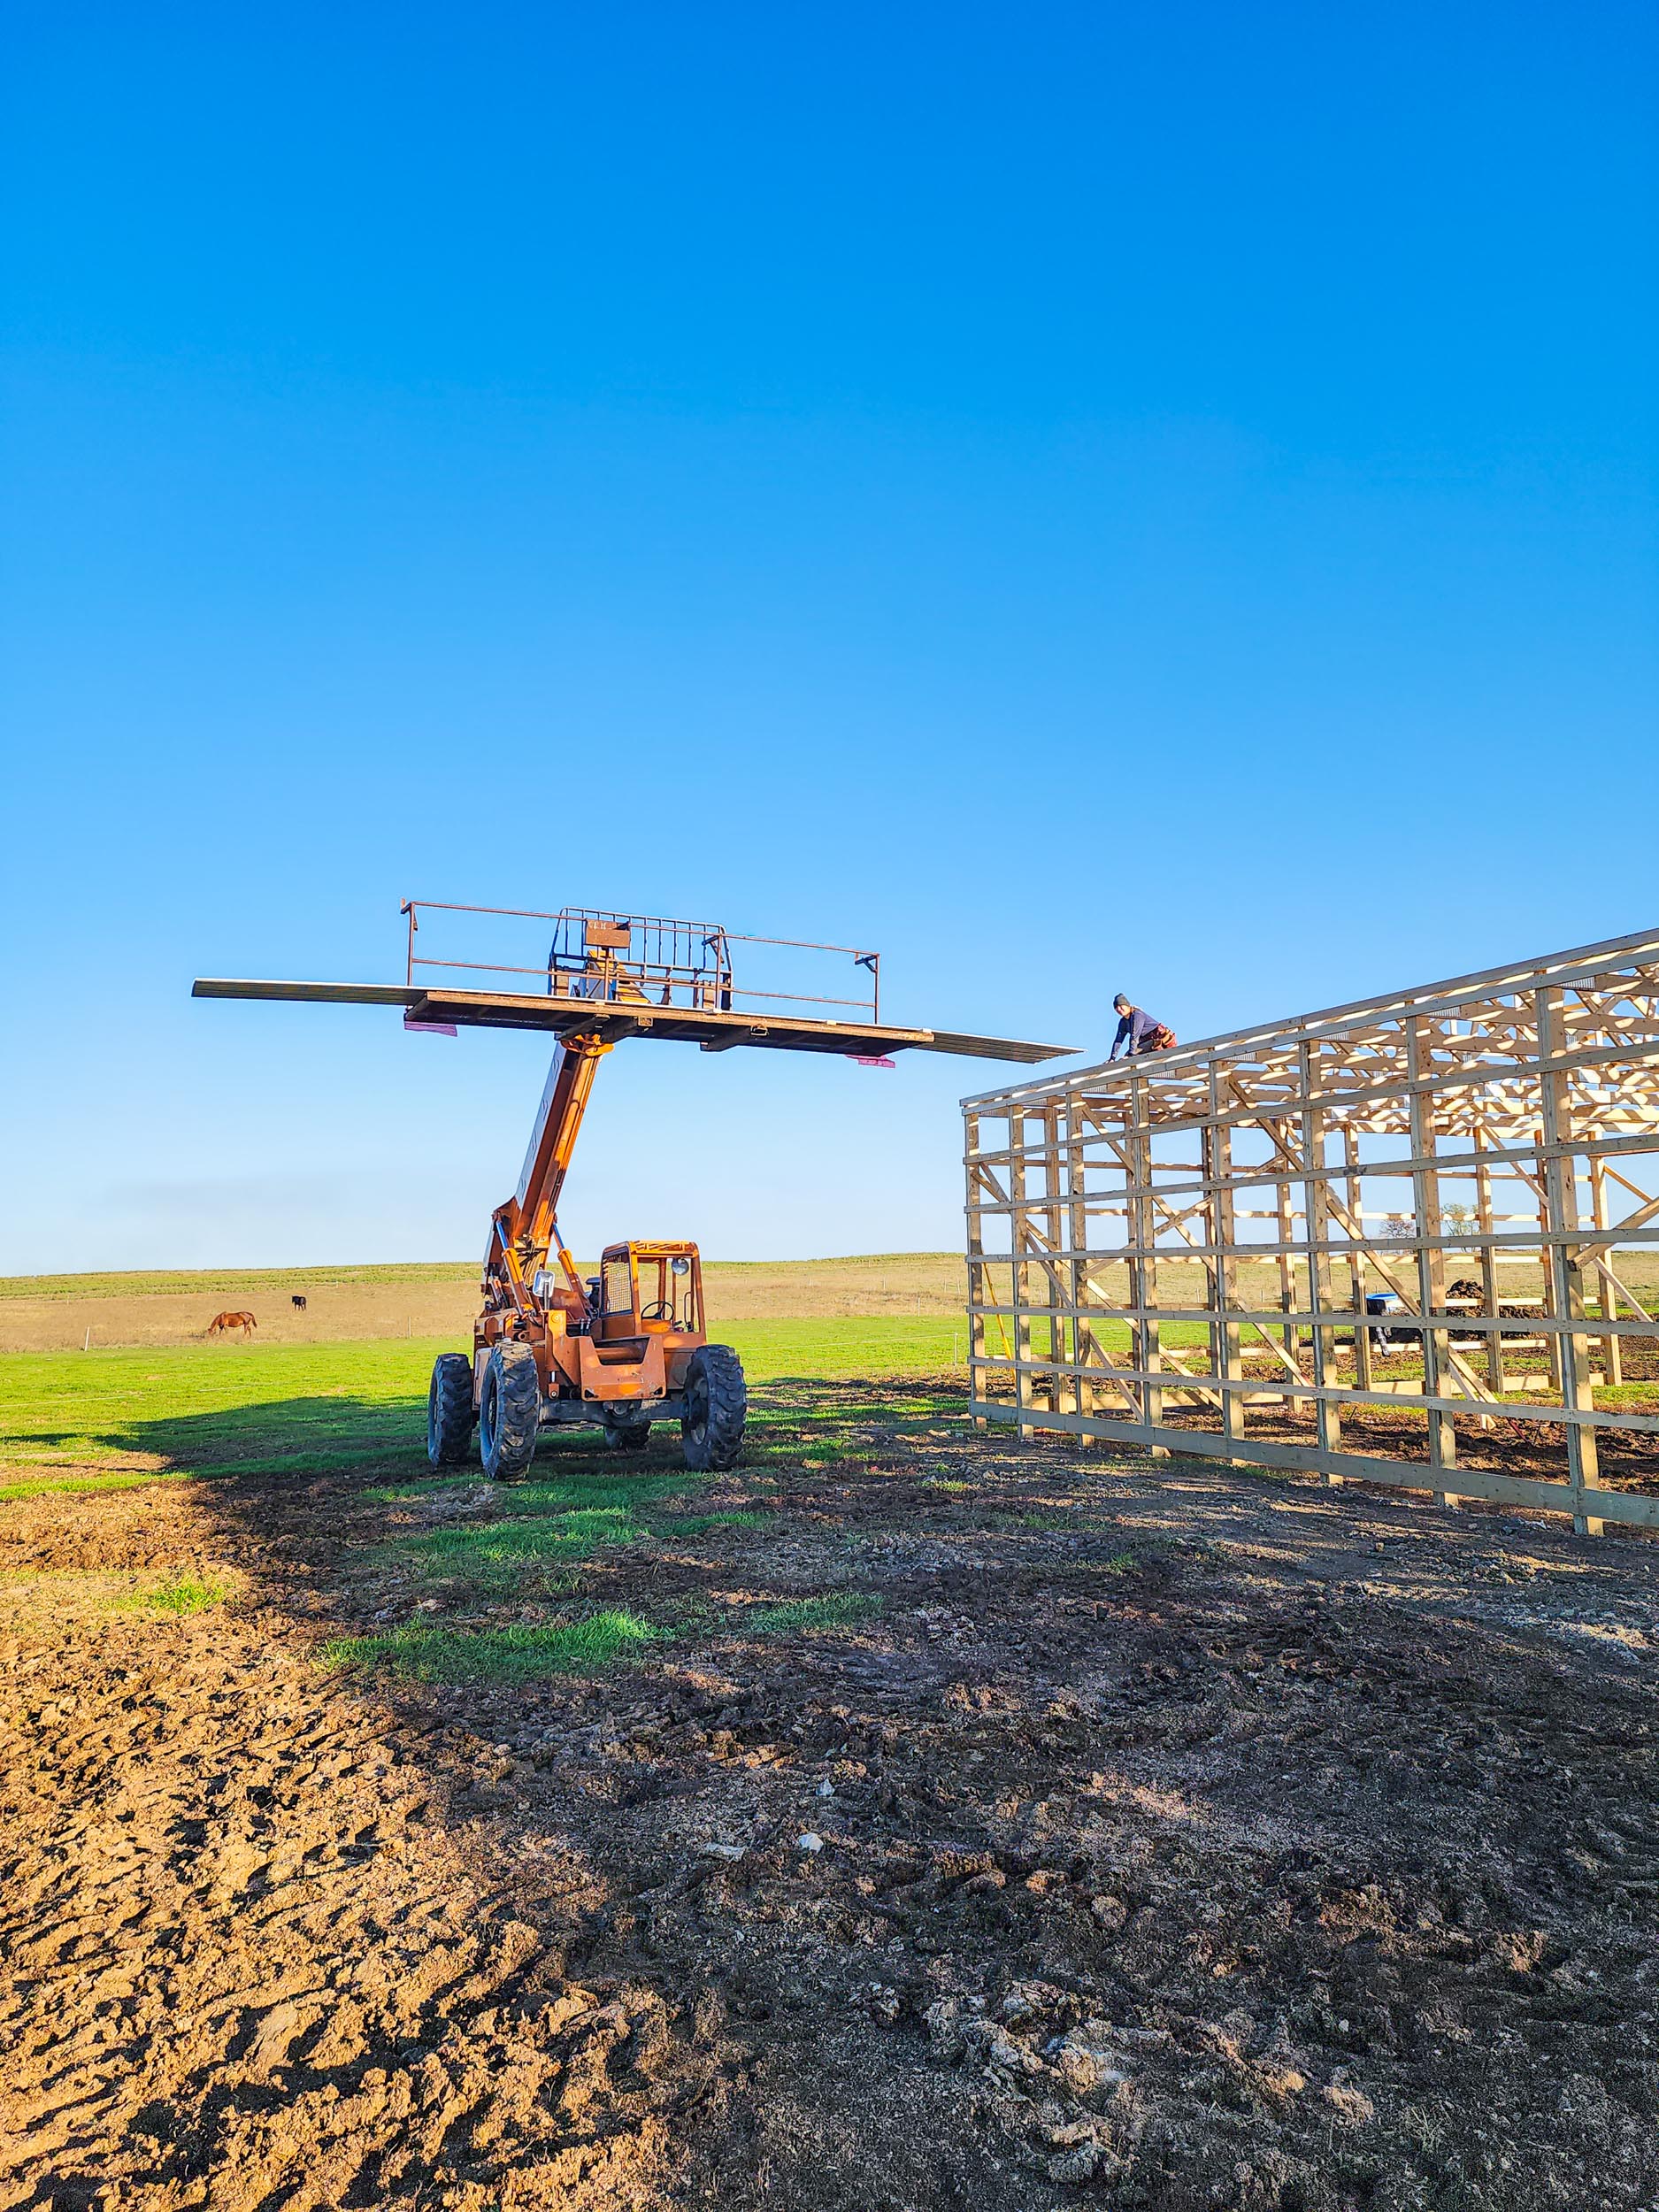
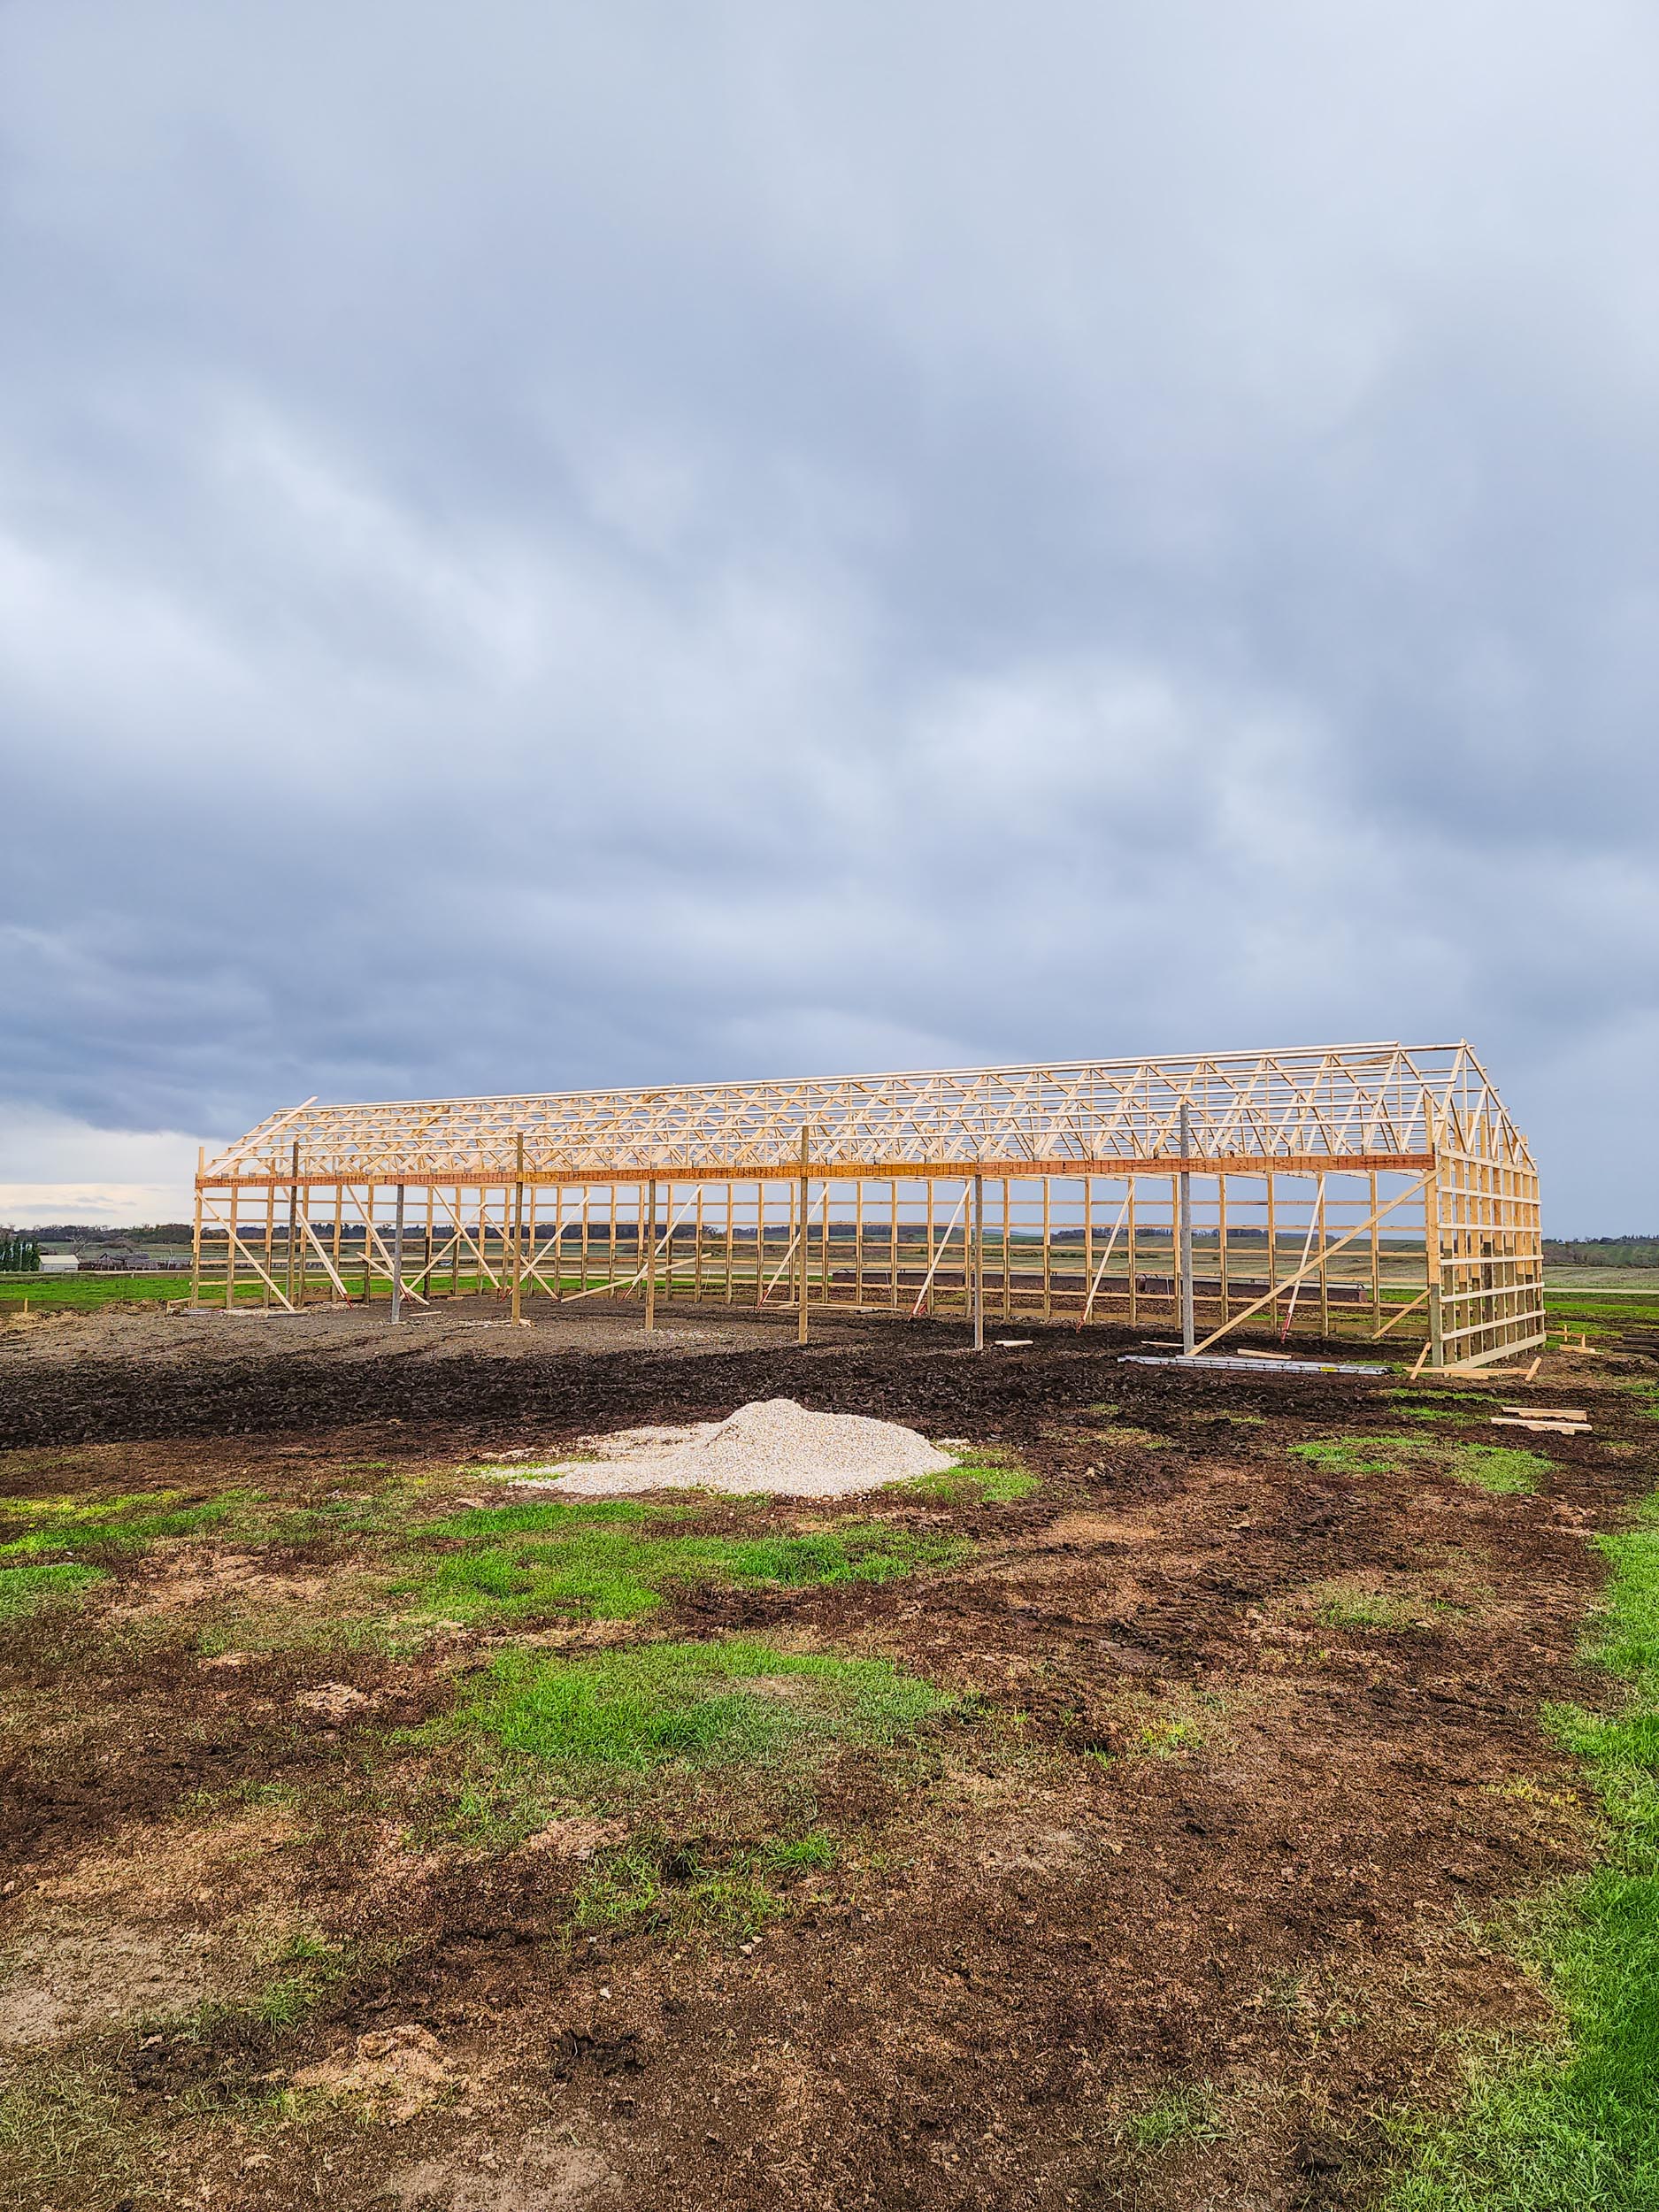
        <img loading="lazy"           src="./media/posts/6/gallery/2-Shop-Build-6.jpg"
          alt="Post-frame construction underway on an agricultural pole shed"
          loading="lazy"
          width="1200"
          height="900"
        >

        <figcaption>
          Structural posts and framing installed to establish the
          building’s open layout.
        </figcaption>

      </figure>

      <figure class="go-project-gallery__item">

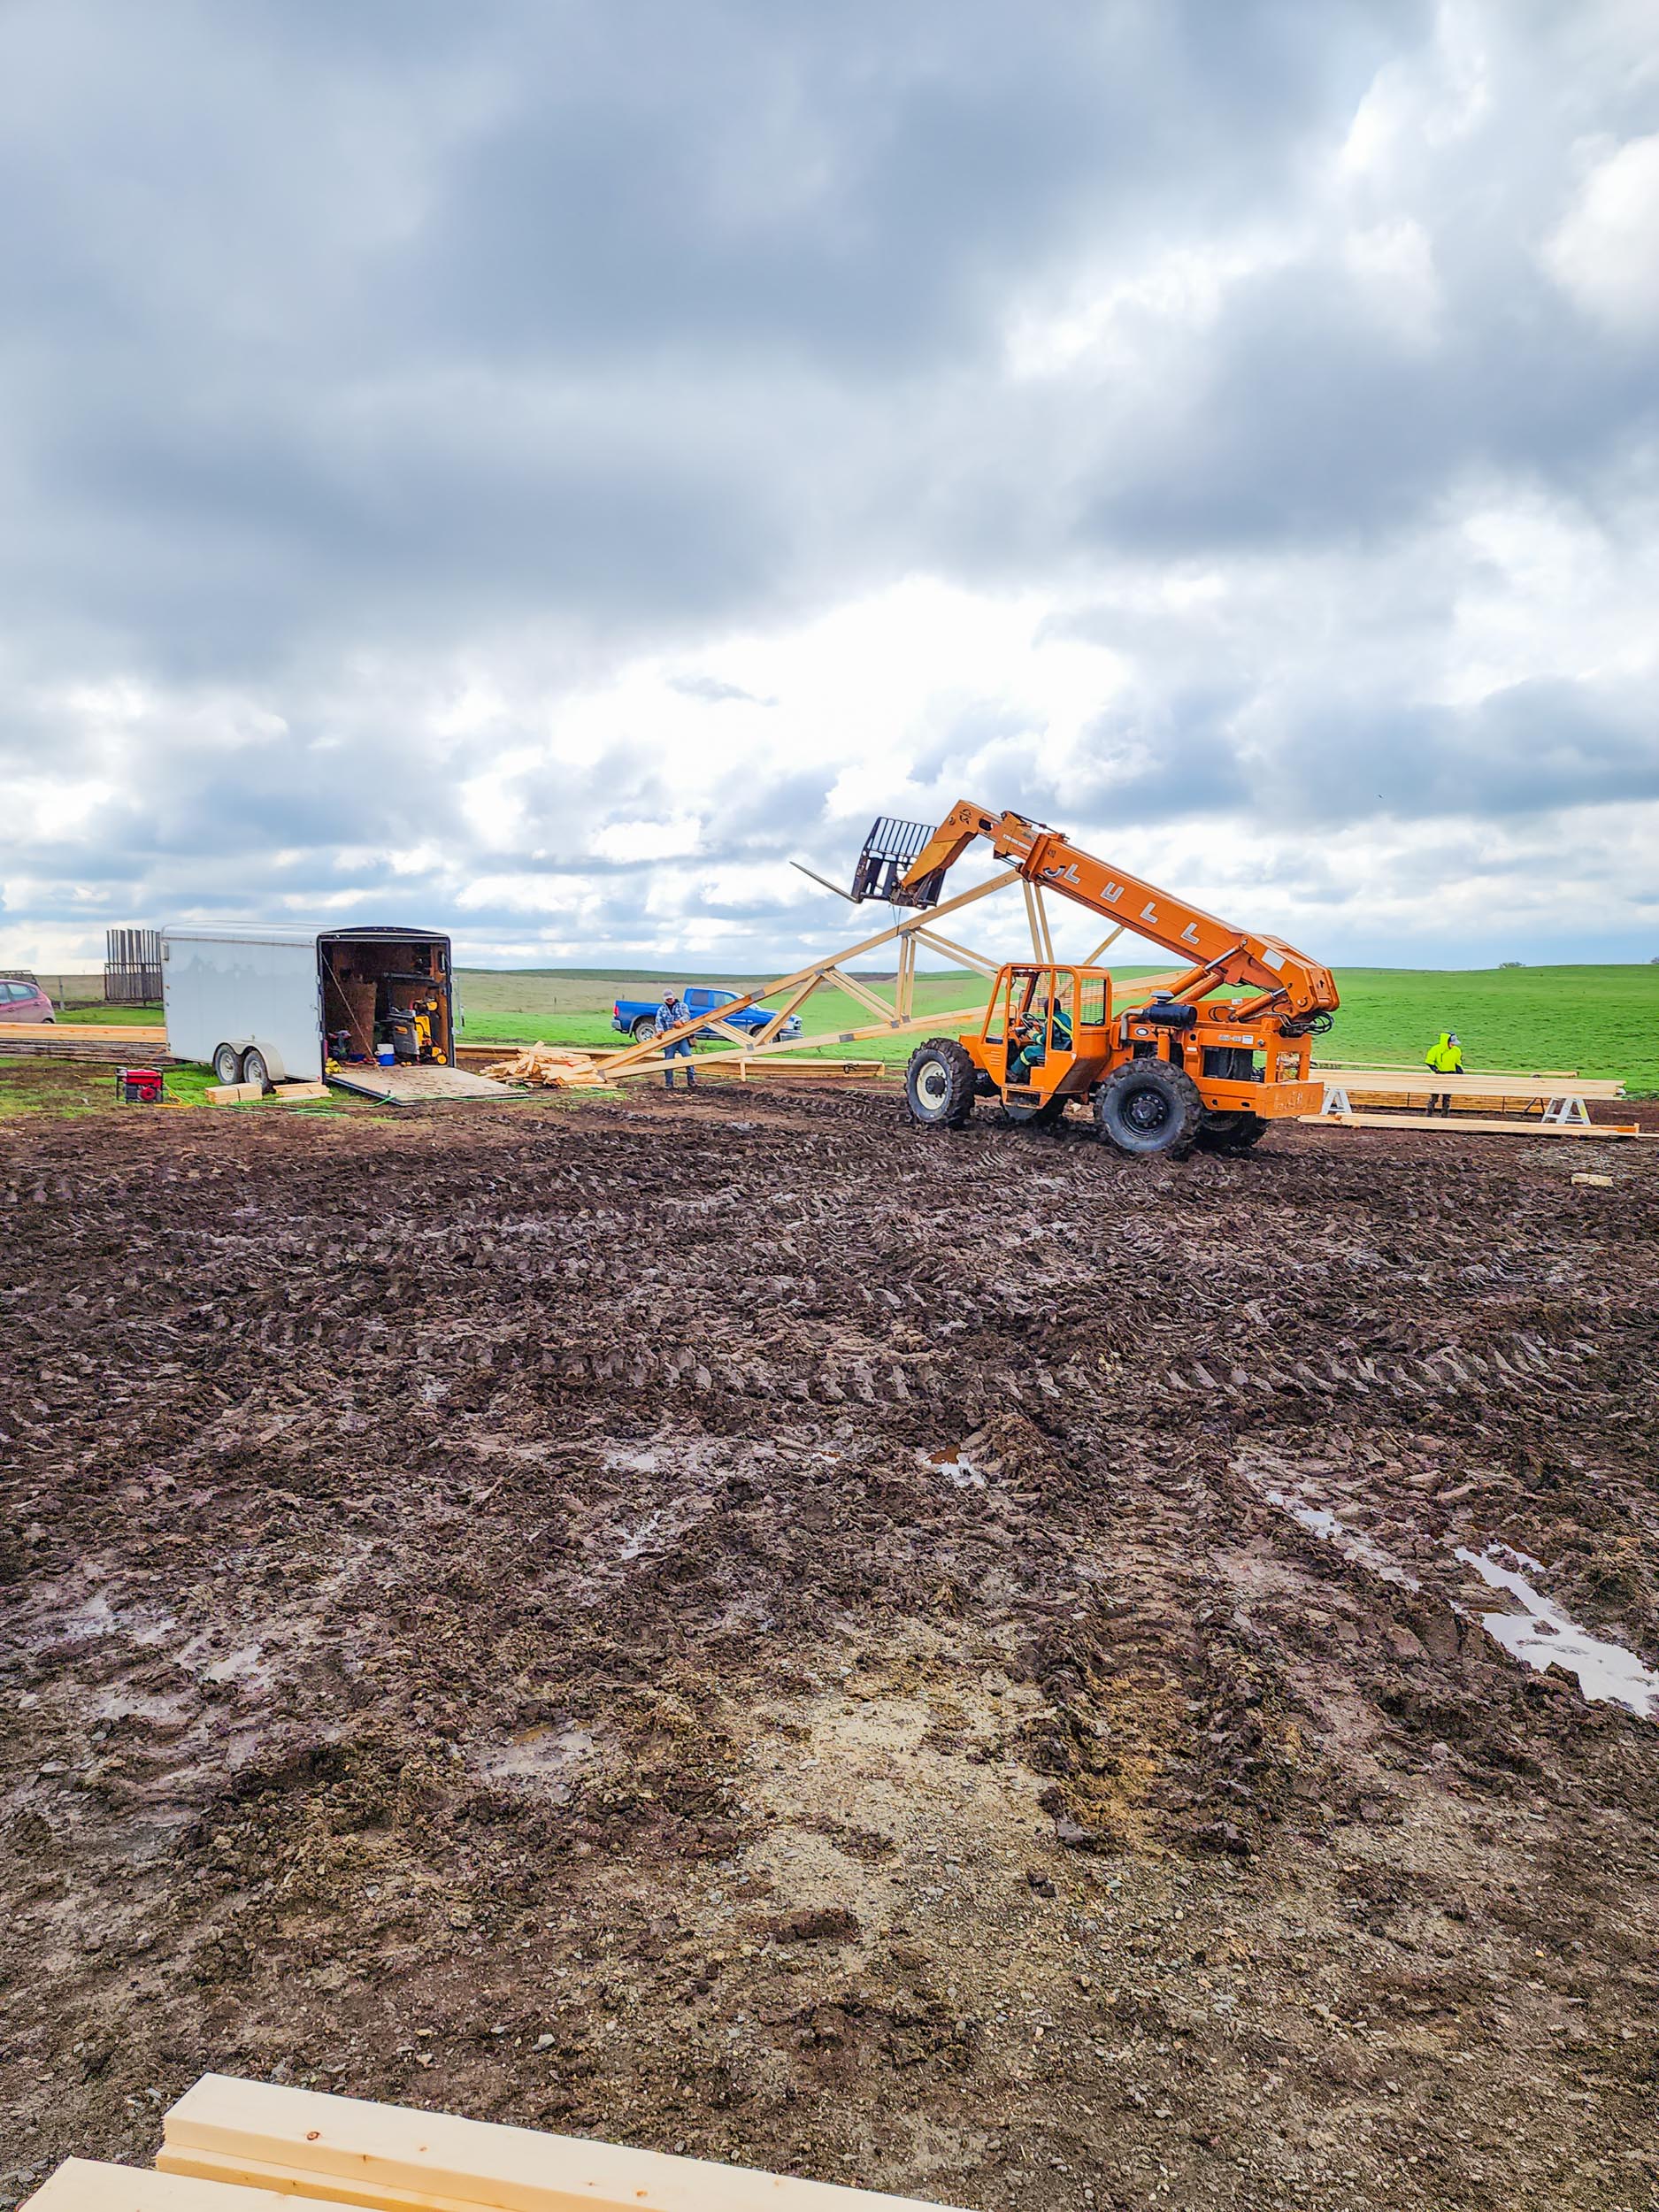
        <img loading="lazy"           src="./media/posts/6/gallery/2-Shop-Build-3.jpg"
          alt="Roof framing being installed on a pole shed"
          loading="lazy"
          width="1200"
          height="900"
        >

        <figcaption>
          Roof framing underway with clear access maintained through
          the front of the building.
        </figcaption>

      </figure>


      <figure class="go-project-gallery__item">

        <img loading="lazy"           src="./media/posts/6/gallery/2-Shop-Build-11.jpg"
          alt="Completed agricultural pole shed near St. Léon Manitoba"
          loading="lazy"
          width="1200"
          height="900"
        >

        <figcaption>
          Completed pole shed ready to provide covered agricultural
          storage.
        </figcaption>

      </figure>

    </div>

  </div>
</section></div>
<div><!-- ======================================================
     PROJECT BLOCK 5: PLANNING ADVICE
     ====================================================== -->

<section class="go-full-bleed go-section go-section--dark">
  <div class="go-container">

    <div class="go-reading-width">

      <p class="go-eyebrow">
        Planning Advice
      </p>

      <h2>
        Planning a Similar Pole Shed?
      </h2>

      <p>
        Before deciding on the size of a pole shed, think about more
        than the equipment or materials you need to store today. These
        buildings often remain in use for decades, while machinery,
        vehicles and farm operations can change much sooner.
      </p>

      <p>
        Door width, building height and the amount of clear interior
        space all affect how useful the shed will be. It is also worth
        considering where equipment will turn, how snow will be managed
        around the building and whether power, lighting or a concrete
        floor may be added later.
      </p>

      <p>
        We prefer to work through those practical details before the
        layout is finalized. A little extra planning at the beginning
        can prevent an access problem or expensive alteration after the
        building is complete.
      </p>

    </div>
    <div class="go-actions">

        <a
          class="go-button go-button--light go-button--large"
          href="/request-a-quote/"
        >
          Let us know about your project
        </a>


      </div>

  </div>
</section></div>
<div><!-- ======================================================
     PROJECT BLOCK 6: FINAL CALL TO ACTION
     ====================================================== -->

<section class="go-full-bleed go-section">
  <div class="go-container">

    <div class="go-project-cta">

      <div class="go-project-cta__content">

        <p class="go-eyebrow">
          Start a Project
        </p>

        <h2>
          Ready to Build Something Similar?
        </h2>

        <p>
          Tell us what you need to store, where the building will be
          located and how you plan to use it. Grey Owl Construction can
          help you work through the size, access and construction
          details before the project begins.
        </p>

      </div>

      <div class="go-actions">

        <a
          class="go-button go-button--primary go-button--large"
          href="/request-a-quote/"
        >
          Book a Quote
        </a>

        <a
          class="go-button go-button--secondary go-button--large"
          href="tel:+12042420822"
        >
          Call Grey Owl
        </a>

      </div>

    </div>

  </div>
</section></div>

  <p>
    
  </p>
            ]]>
        </content>
    </entry>
</feed>